[to go directly to photos of this project, click here]
I am thrilled to announce that A Day in the Sun, my project for San Diego International Airport’s New Terminal 1, officially opens to the public on September 23, 2025. This project has taken nearly five years, which is typical for large scale public art projects. As you might imagine, I have hundreds of sketches, notes, images, architectural plans, and specs in dozens of folders that I have compiled over the last several years while working on this commission. Here, I will share a timeline of images that shows the development of my design concept and the process of working with the San Diego Airport team and my brilliant mosaic and terrazzo fabricators to realize this installation.
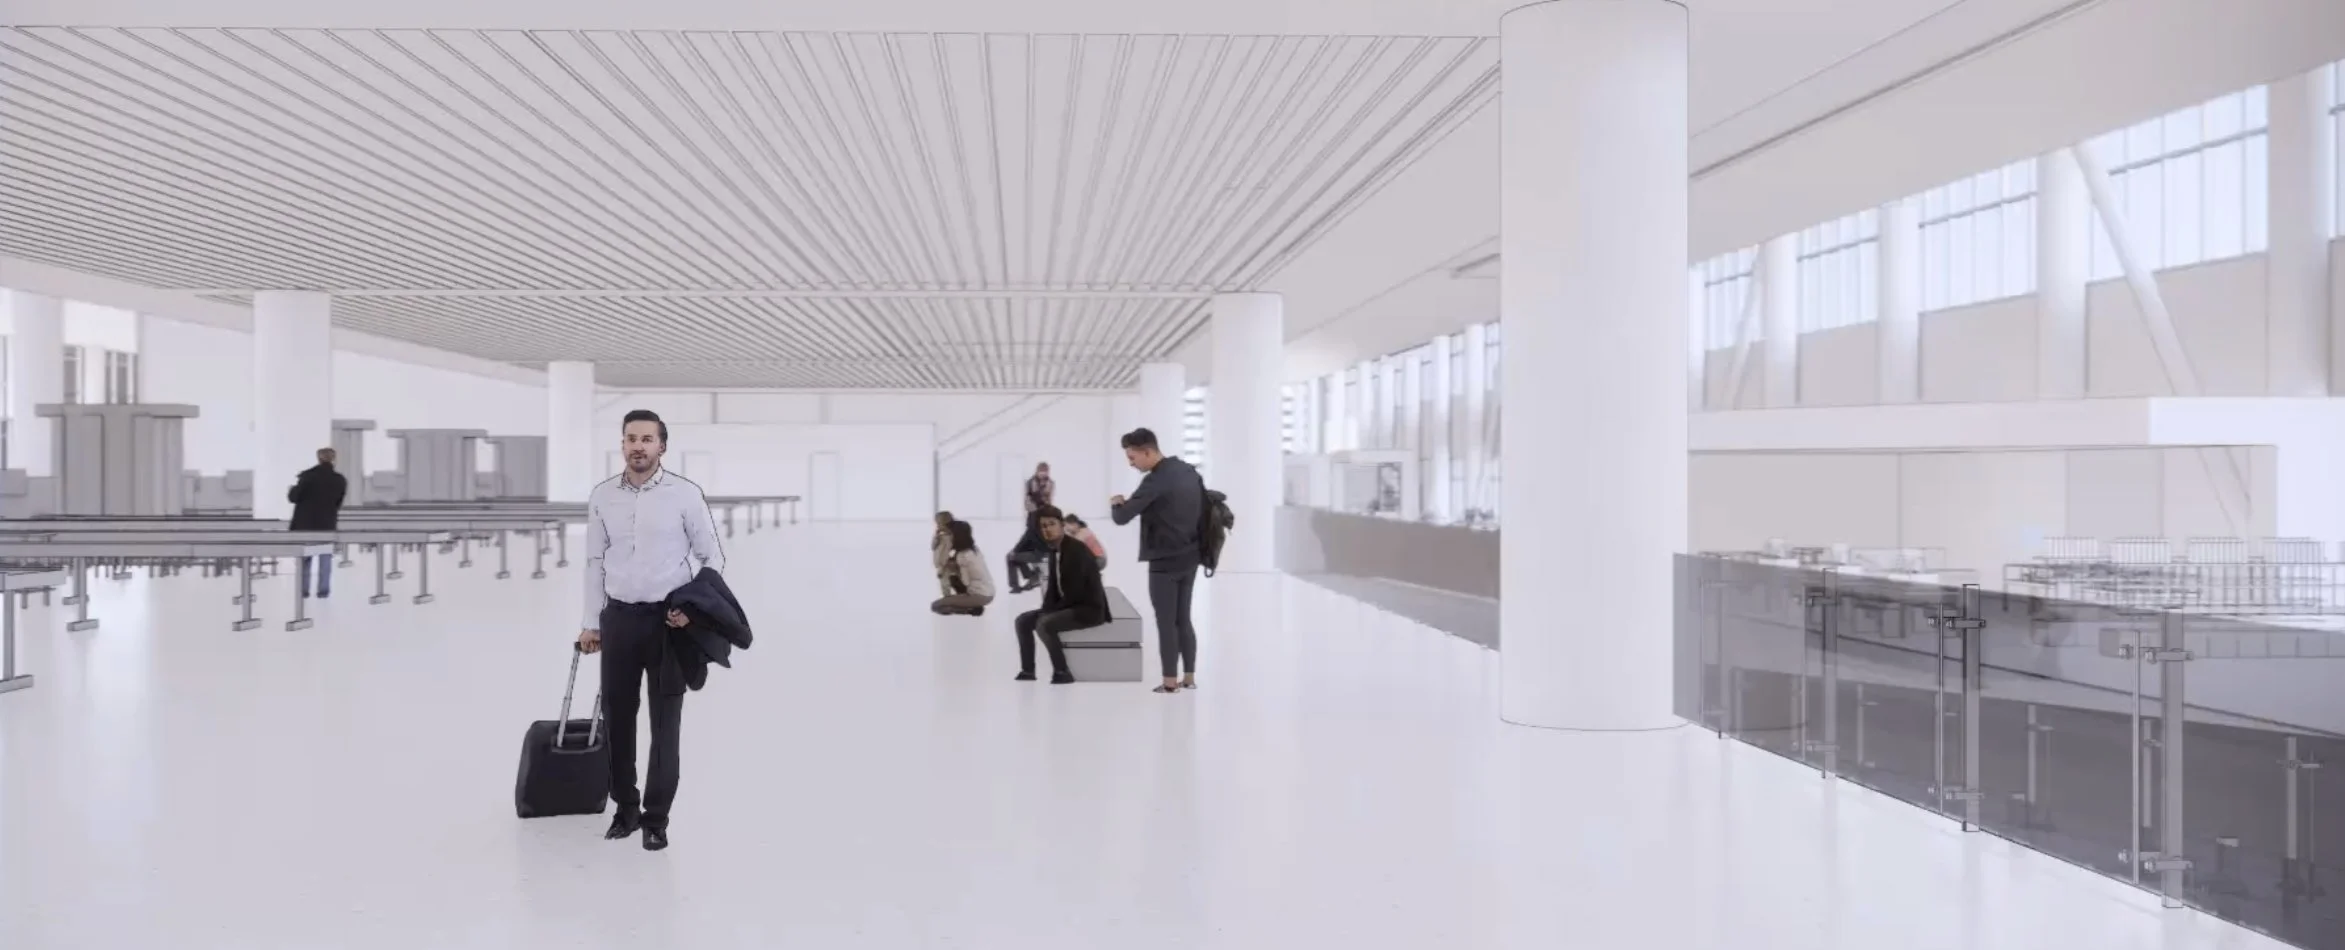
I applied for this opportunity in December 2020. At the time, the building design was less than 25% complete. There were several art opportunities within as well as outside the building, and applicants were asked to rank their interest in the available sites. My top choice was the “Recomposure Area,” which is the post-TSA security area. It’s a transitional space, in which travelers move through a “point of pain” (TSA) to the concessions and airline gates area. Designed by Gensler, the new Terminal 1 replaces the crowded, outdated 1967 Brutalist-style old Terminal 1. Gensler is extremely art-forward, and it is a joy to work with them. They have designed an airy, spacious, generous space that is exceptionally responsive to the needs and experience of staff and travelers. The building and the new public art commissions are designed to convey the sprit of San Diego.
When I learned that I was selected for the commission and that I had been assigned my preferred site within T1, I began with an image search.
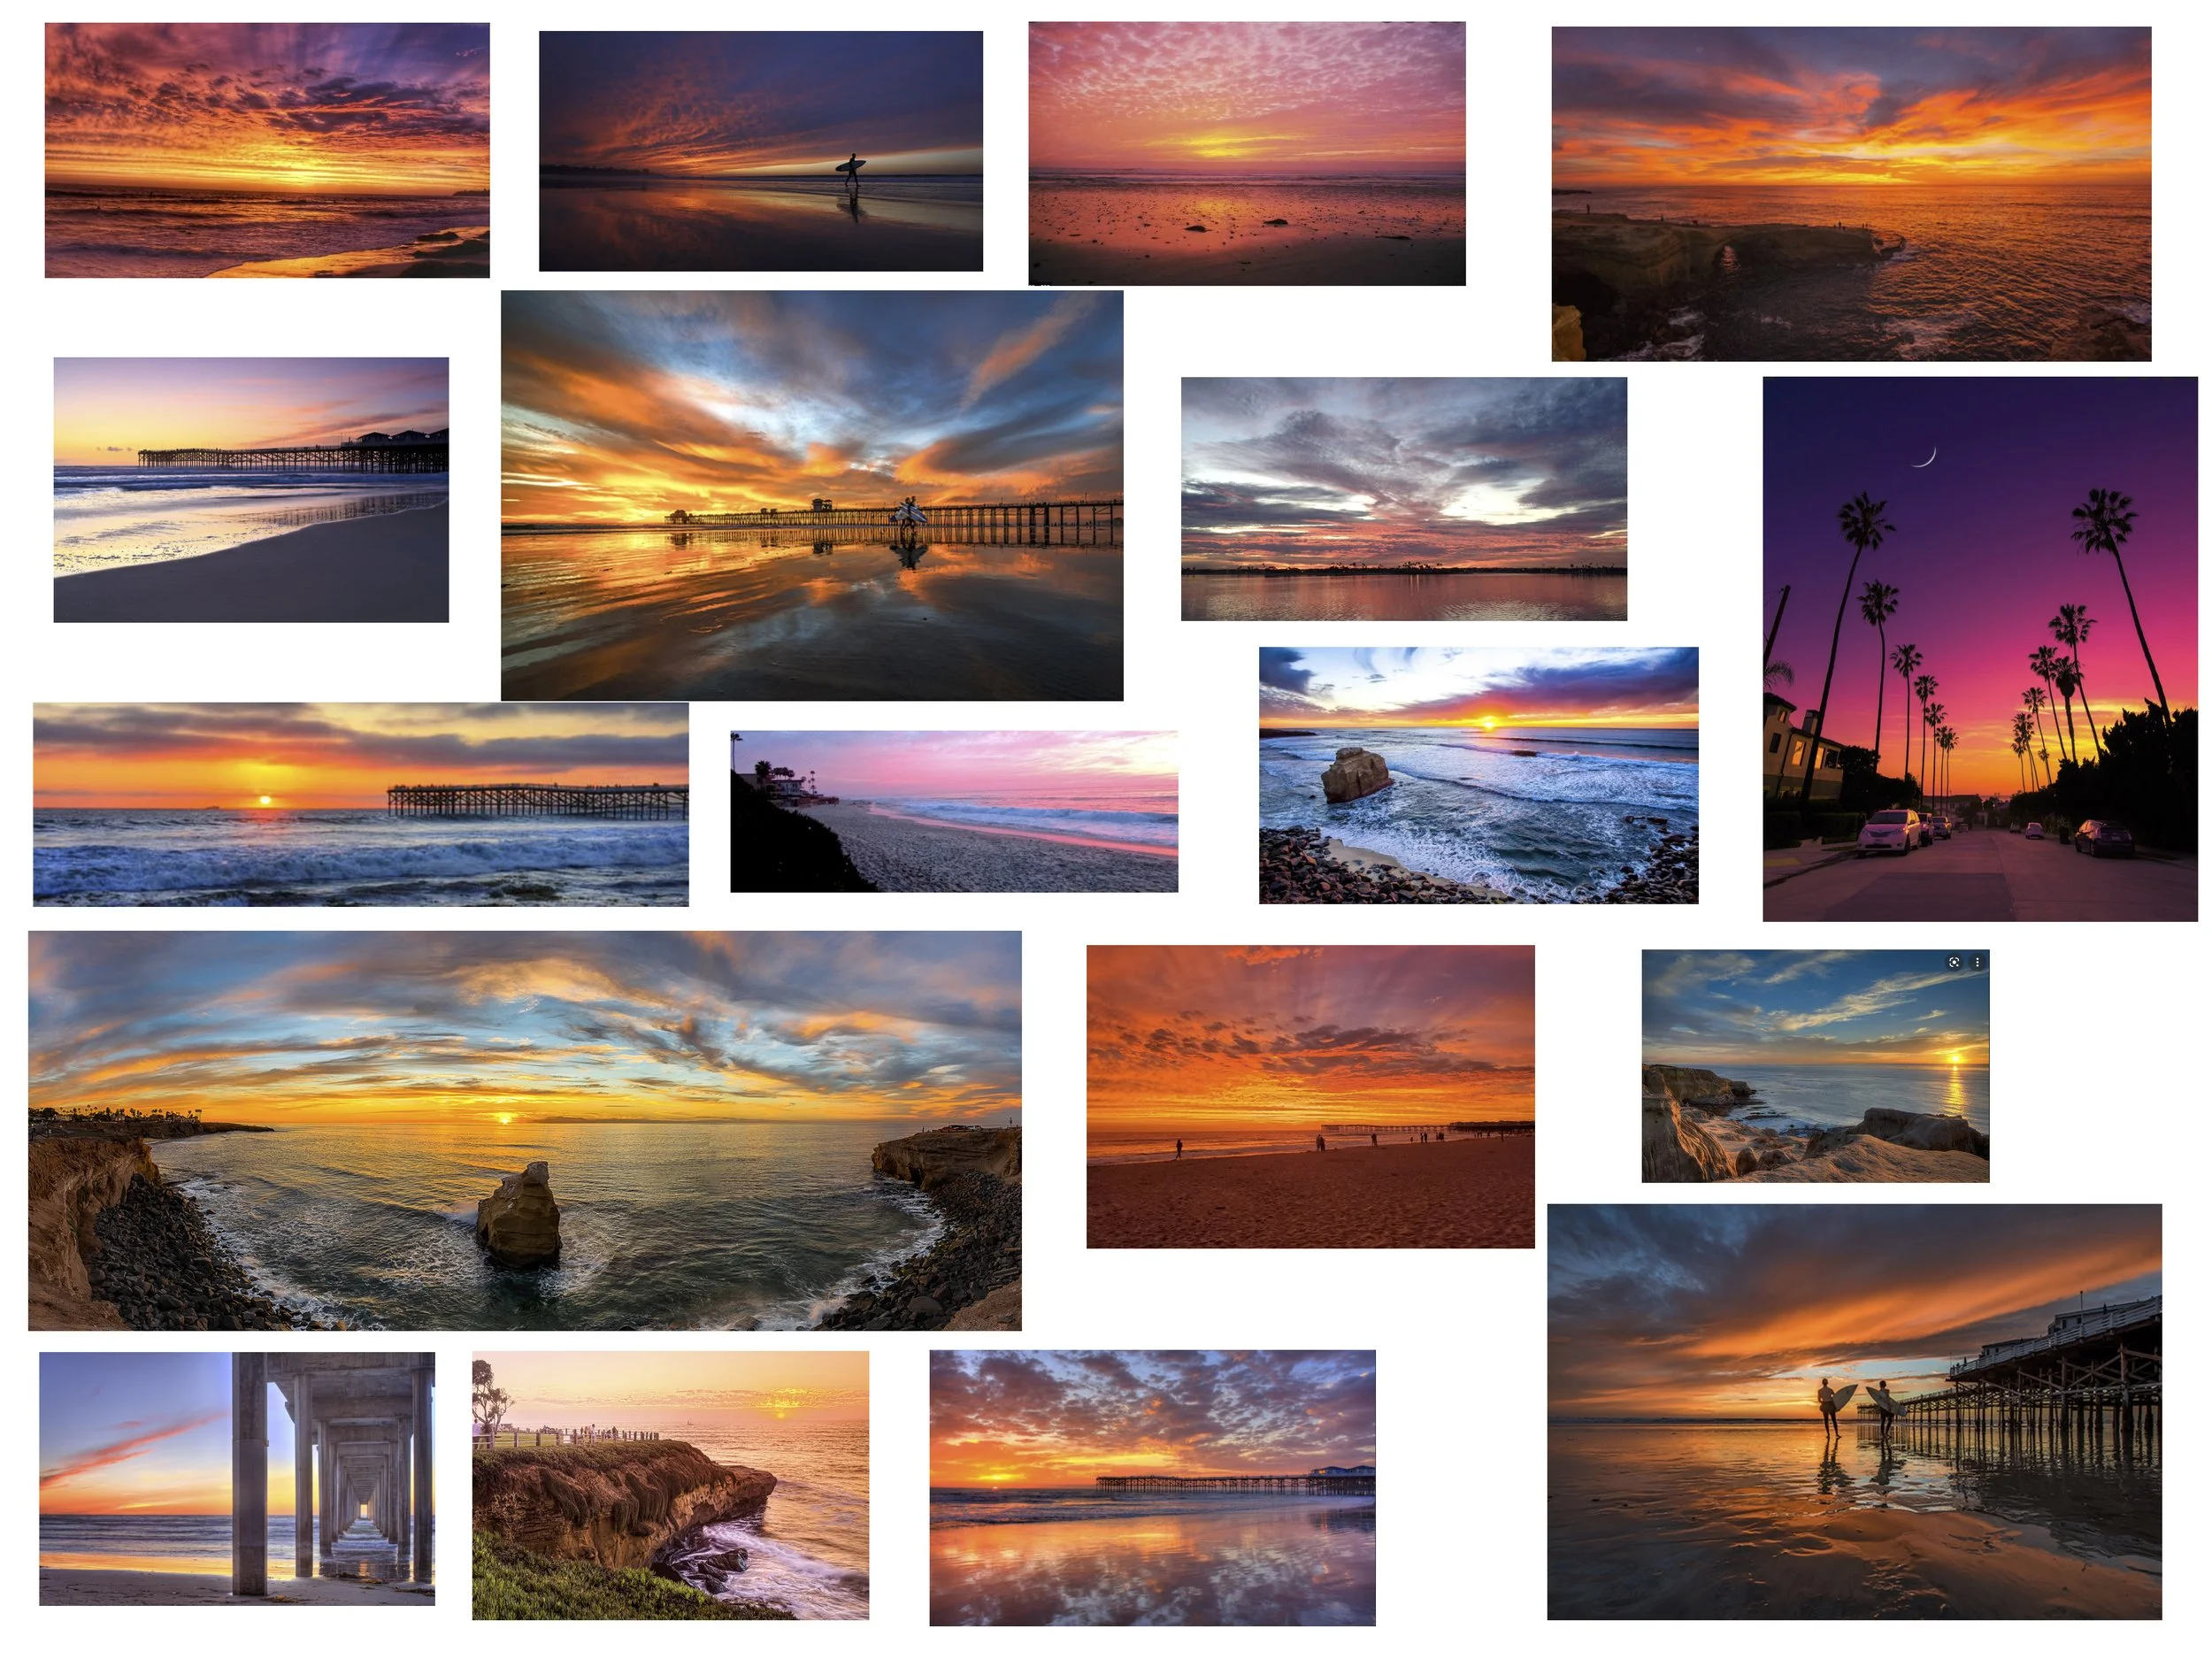
I looked at many images of San Diego’s gorgeous sunsets.
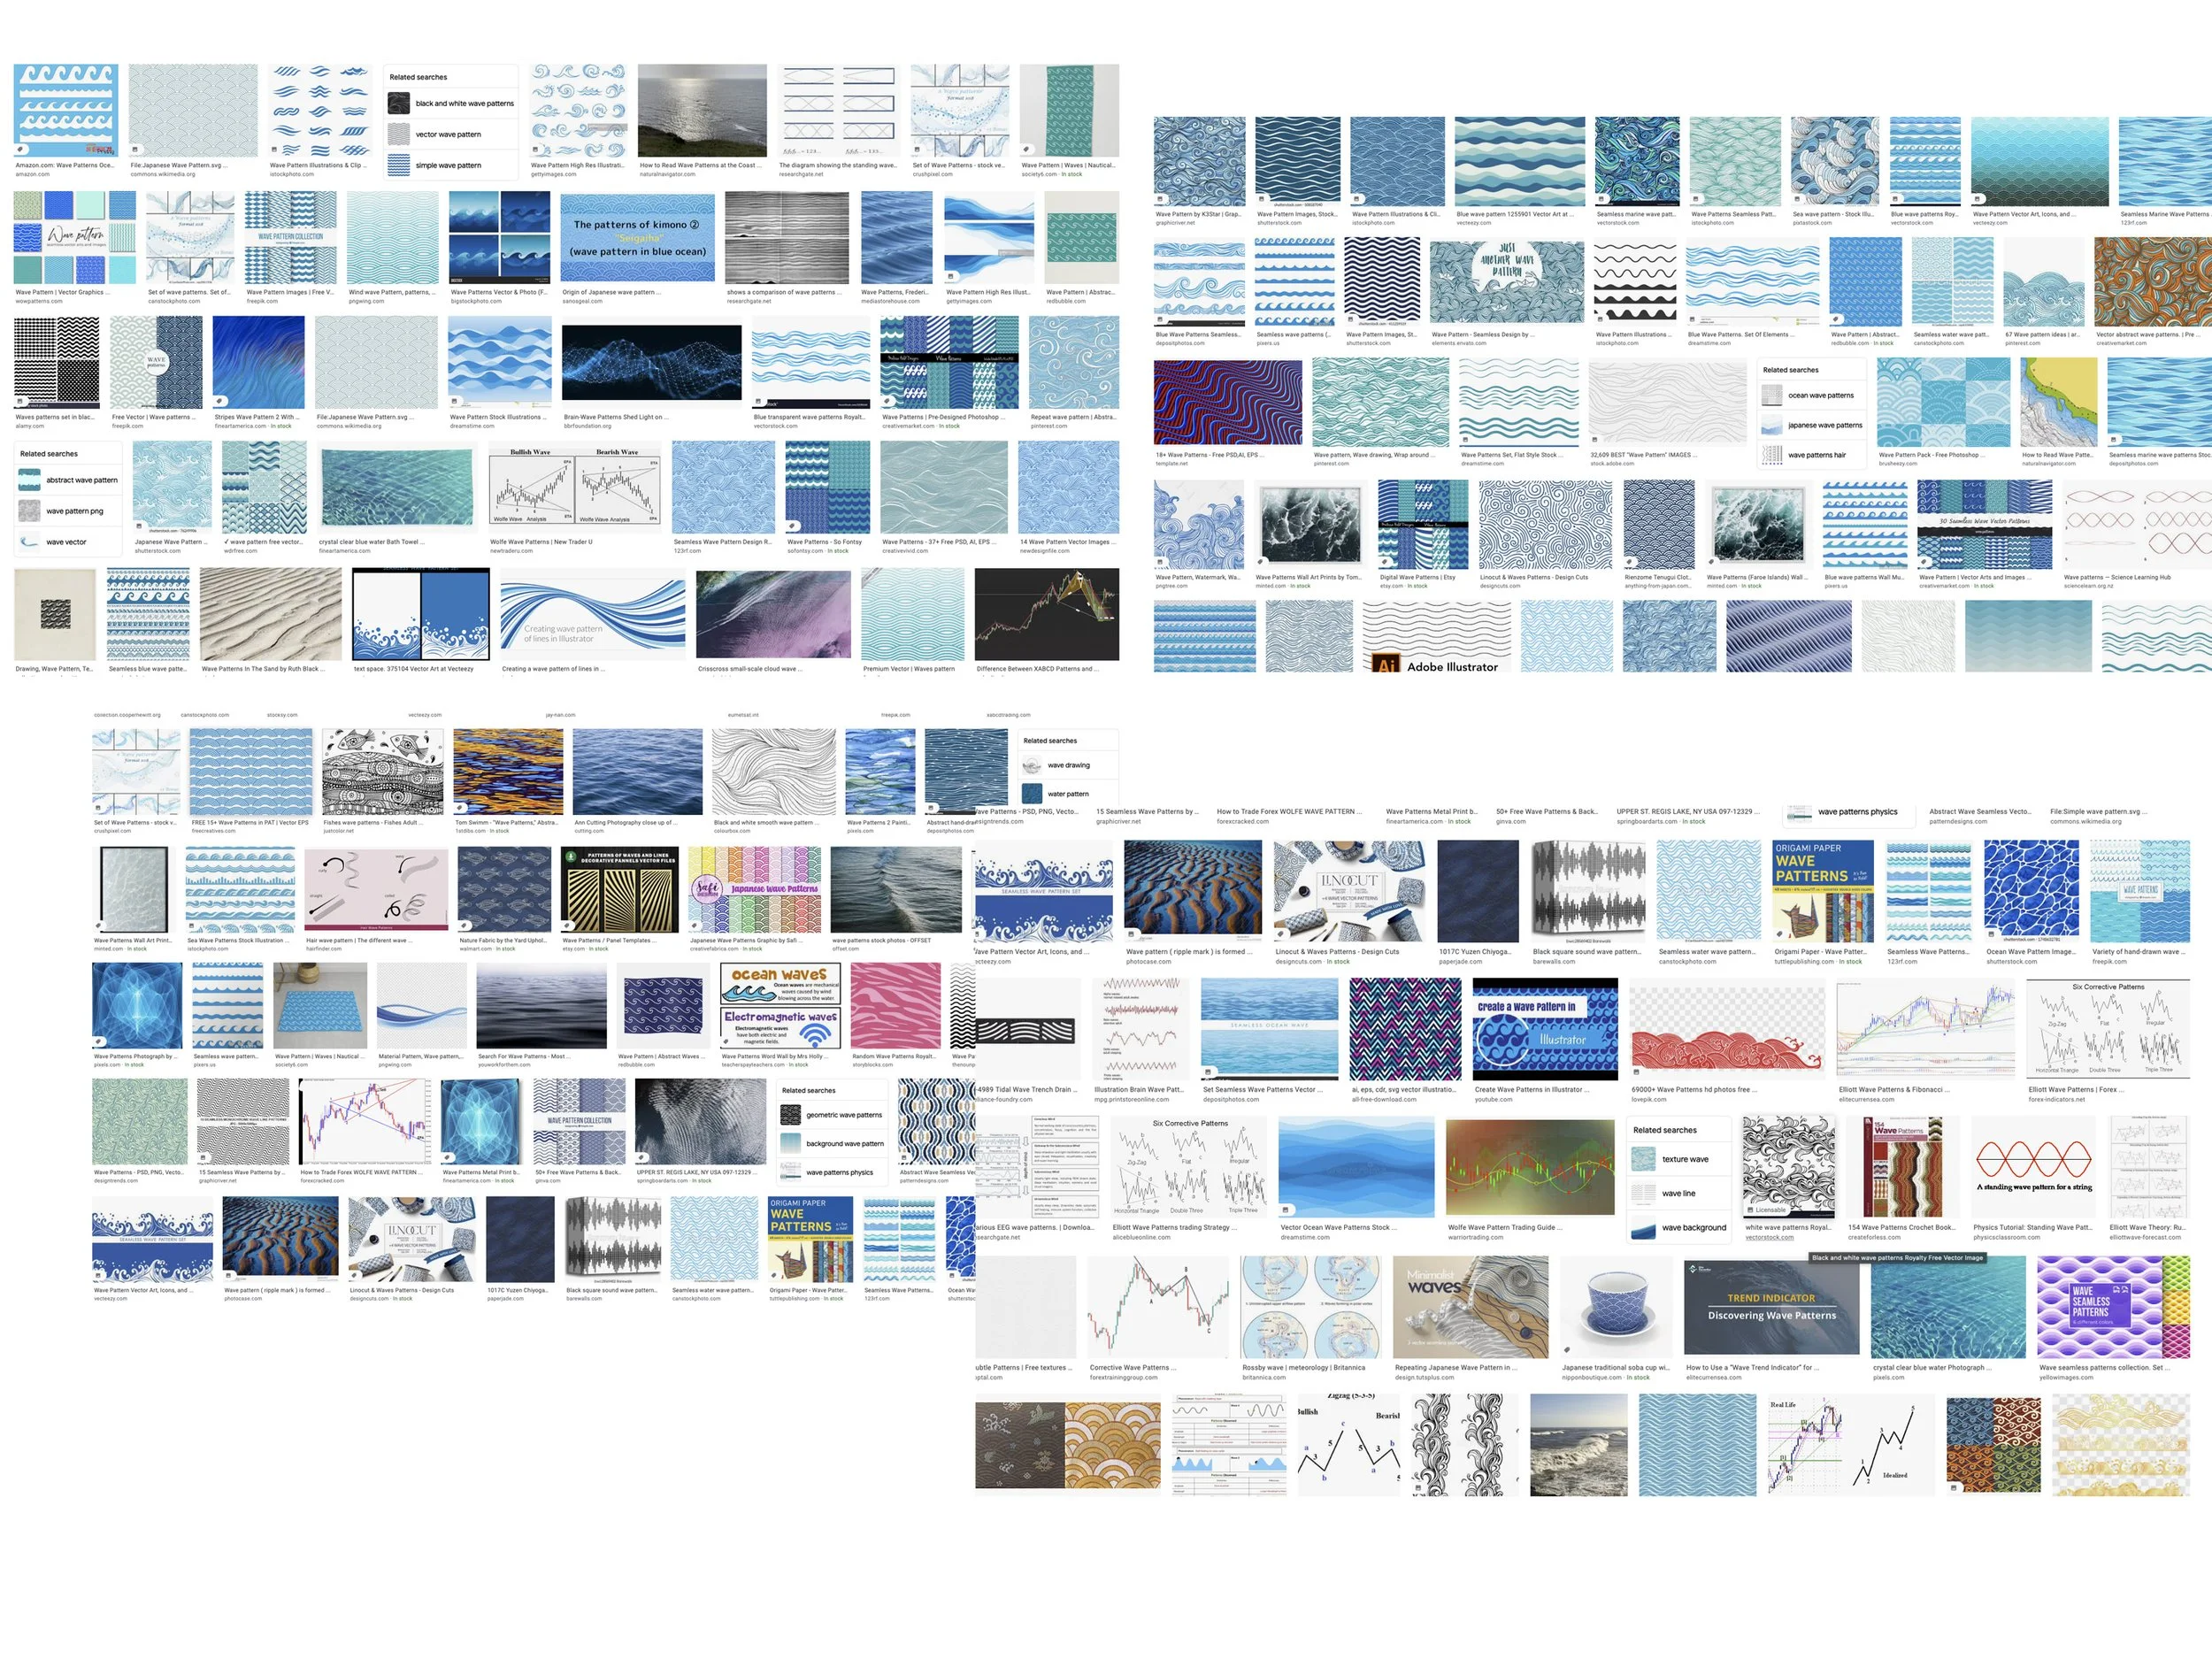
And images of wave patterns

And lots of photos of Ocean Beach Pier
I was REALLY struck by images of Ocean Beach Pier. I found many photos like this, with the dramatic silhouette of the pier piles interspersed with visible “columns” of striated color. As an artist who works within the tradition of abstraction, I often have to figure out a way to contextualize my work for site-specific applications. The strata of color and light between the architecture of the pier piles inspired my design concept.
Early image of the Recomposure Area, designated by red outline
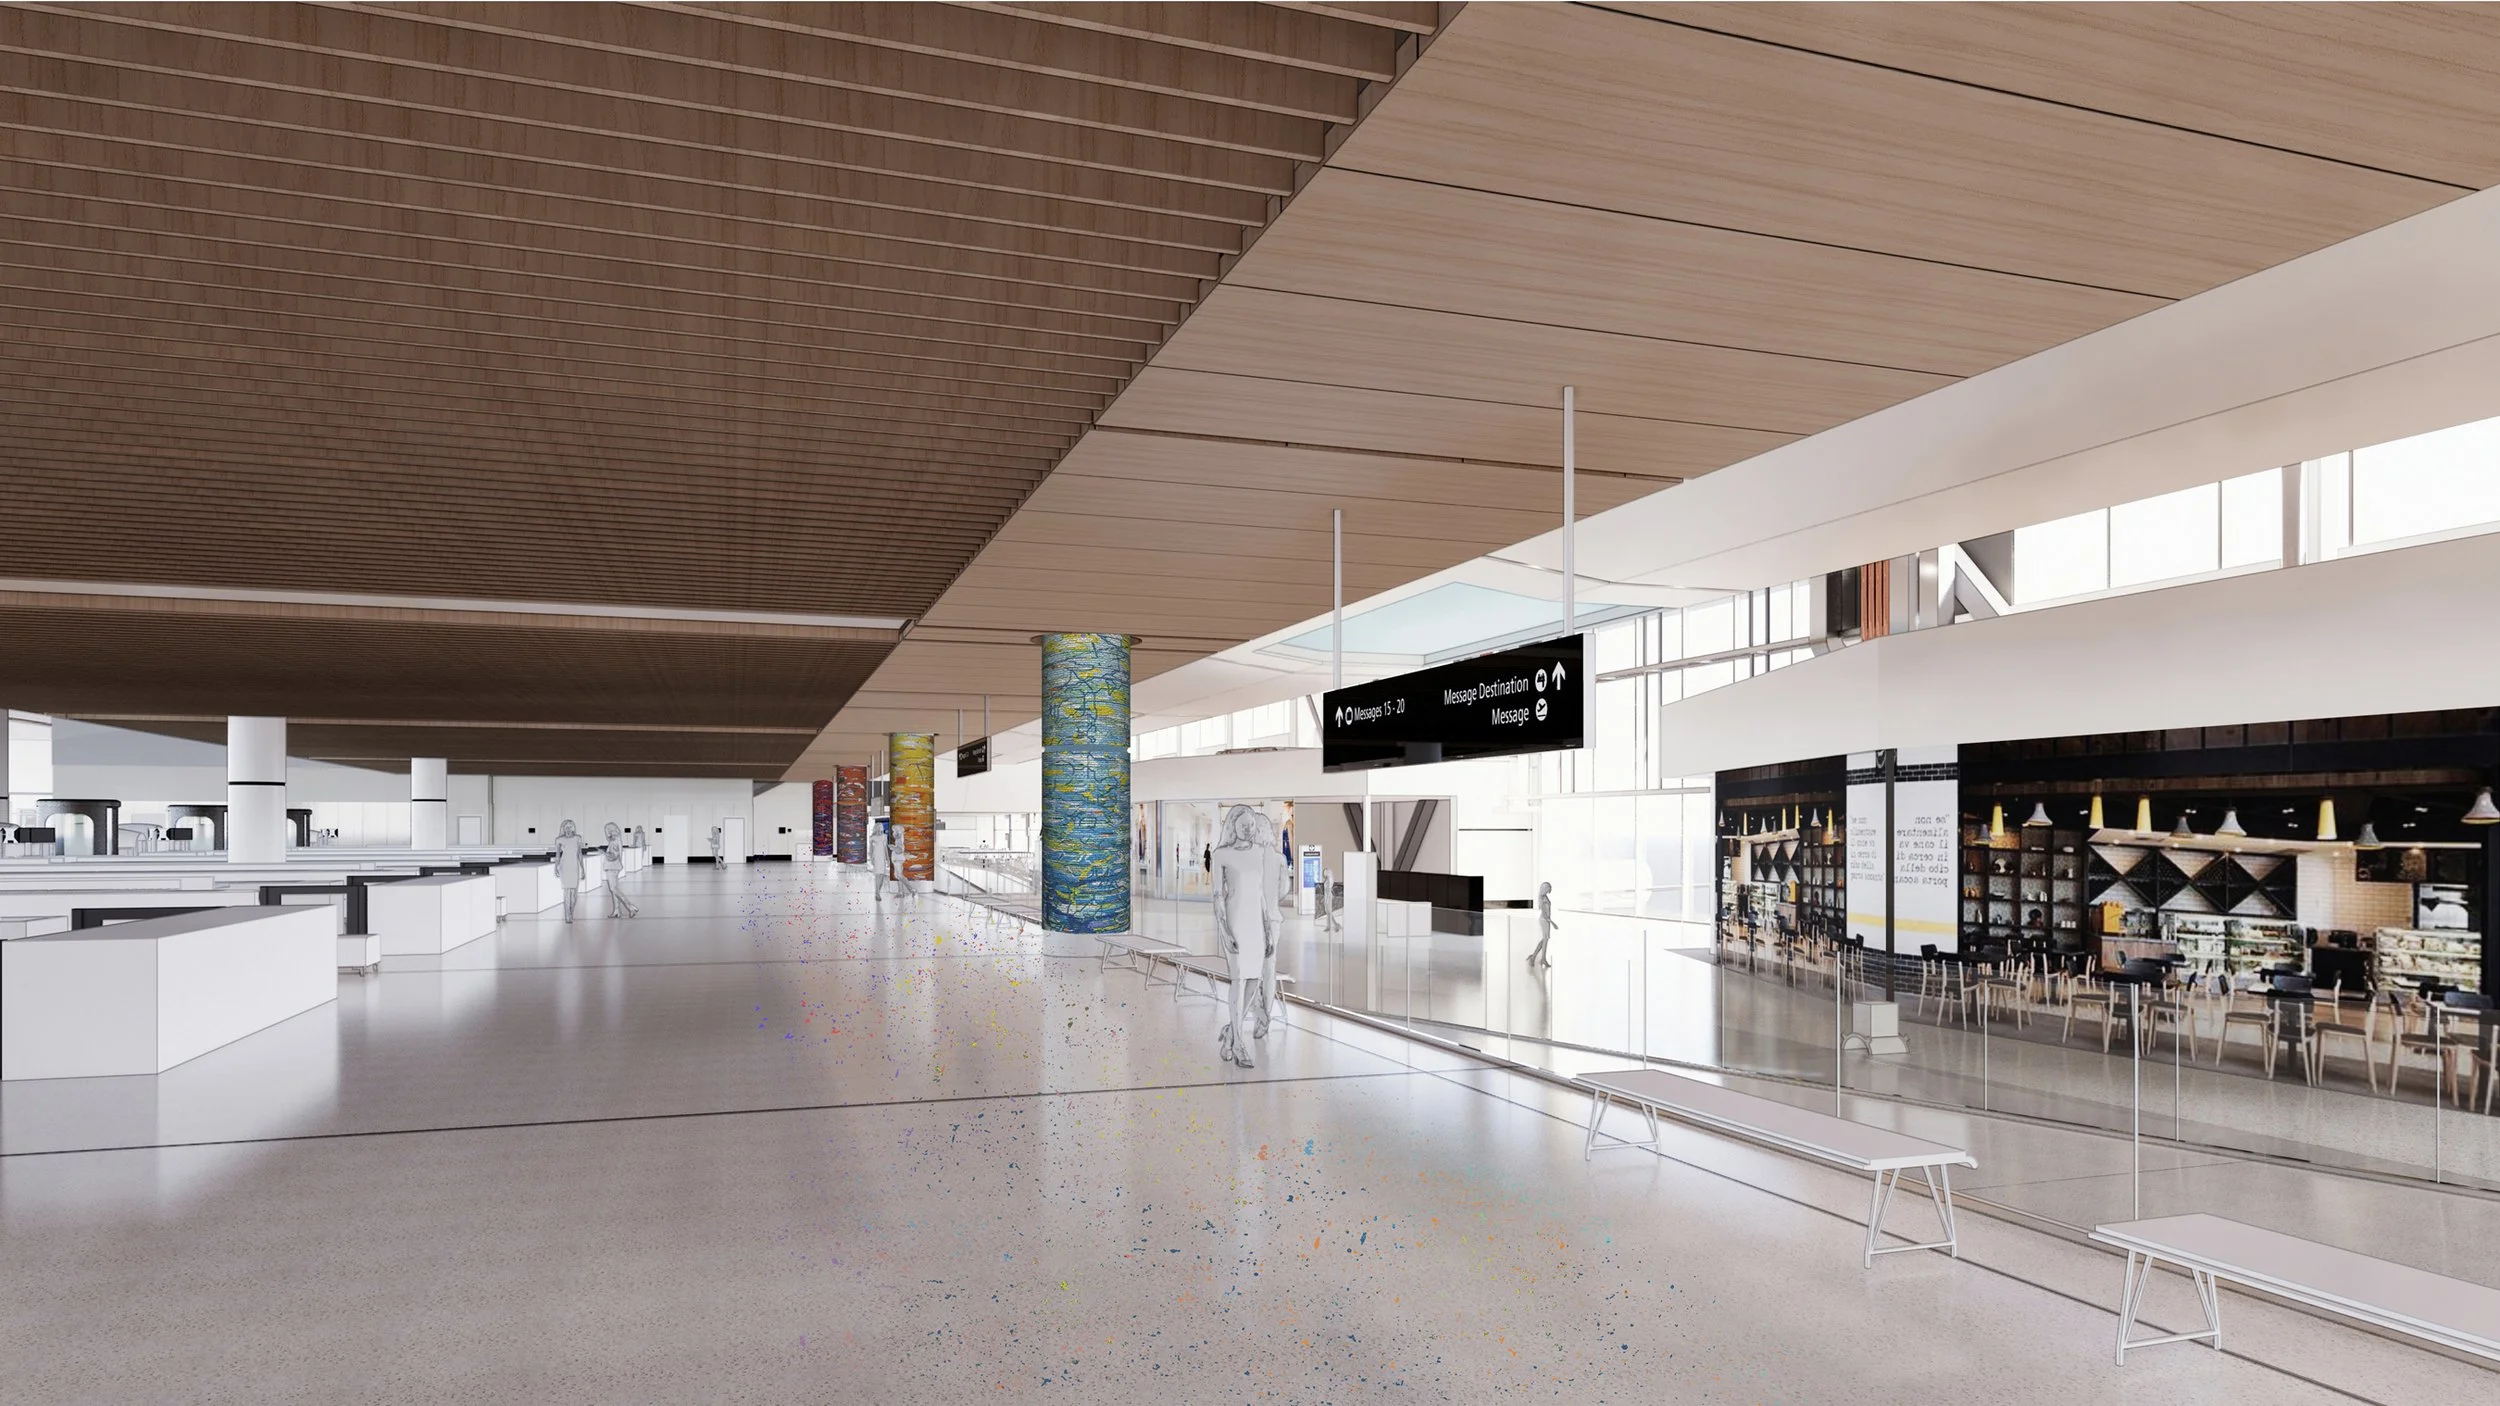
My first sketches were for two flat mosaic murals for the far ends of the space. One would signify “dawn” in cool colors, and the other would suggest “dusk” in a warmer palette. We even discussed the possibility of custom designed furniture to accompany the murals. We called these areas at the far ends of the space “lily pads”— areas in which people could rest, gather themselves, etc. However, it soon became clear that, post-TSA, travelers must proceed quickly down to the concourse gates and concessions. We talked a lot about how to keep people moving through the space.
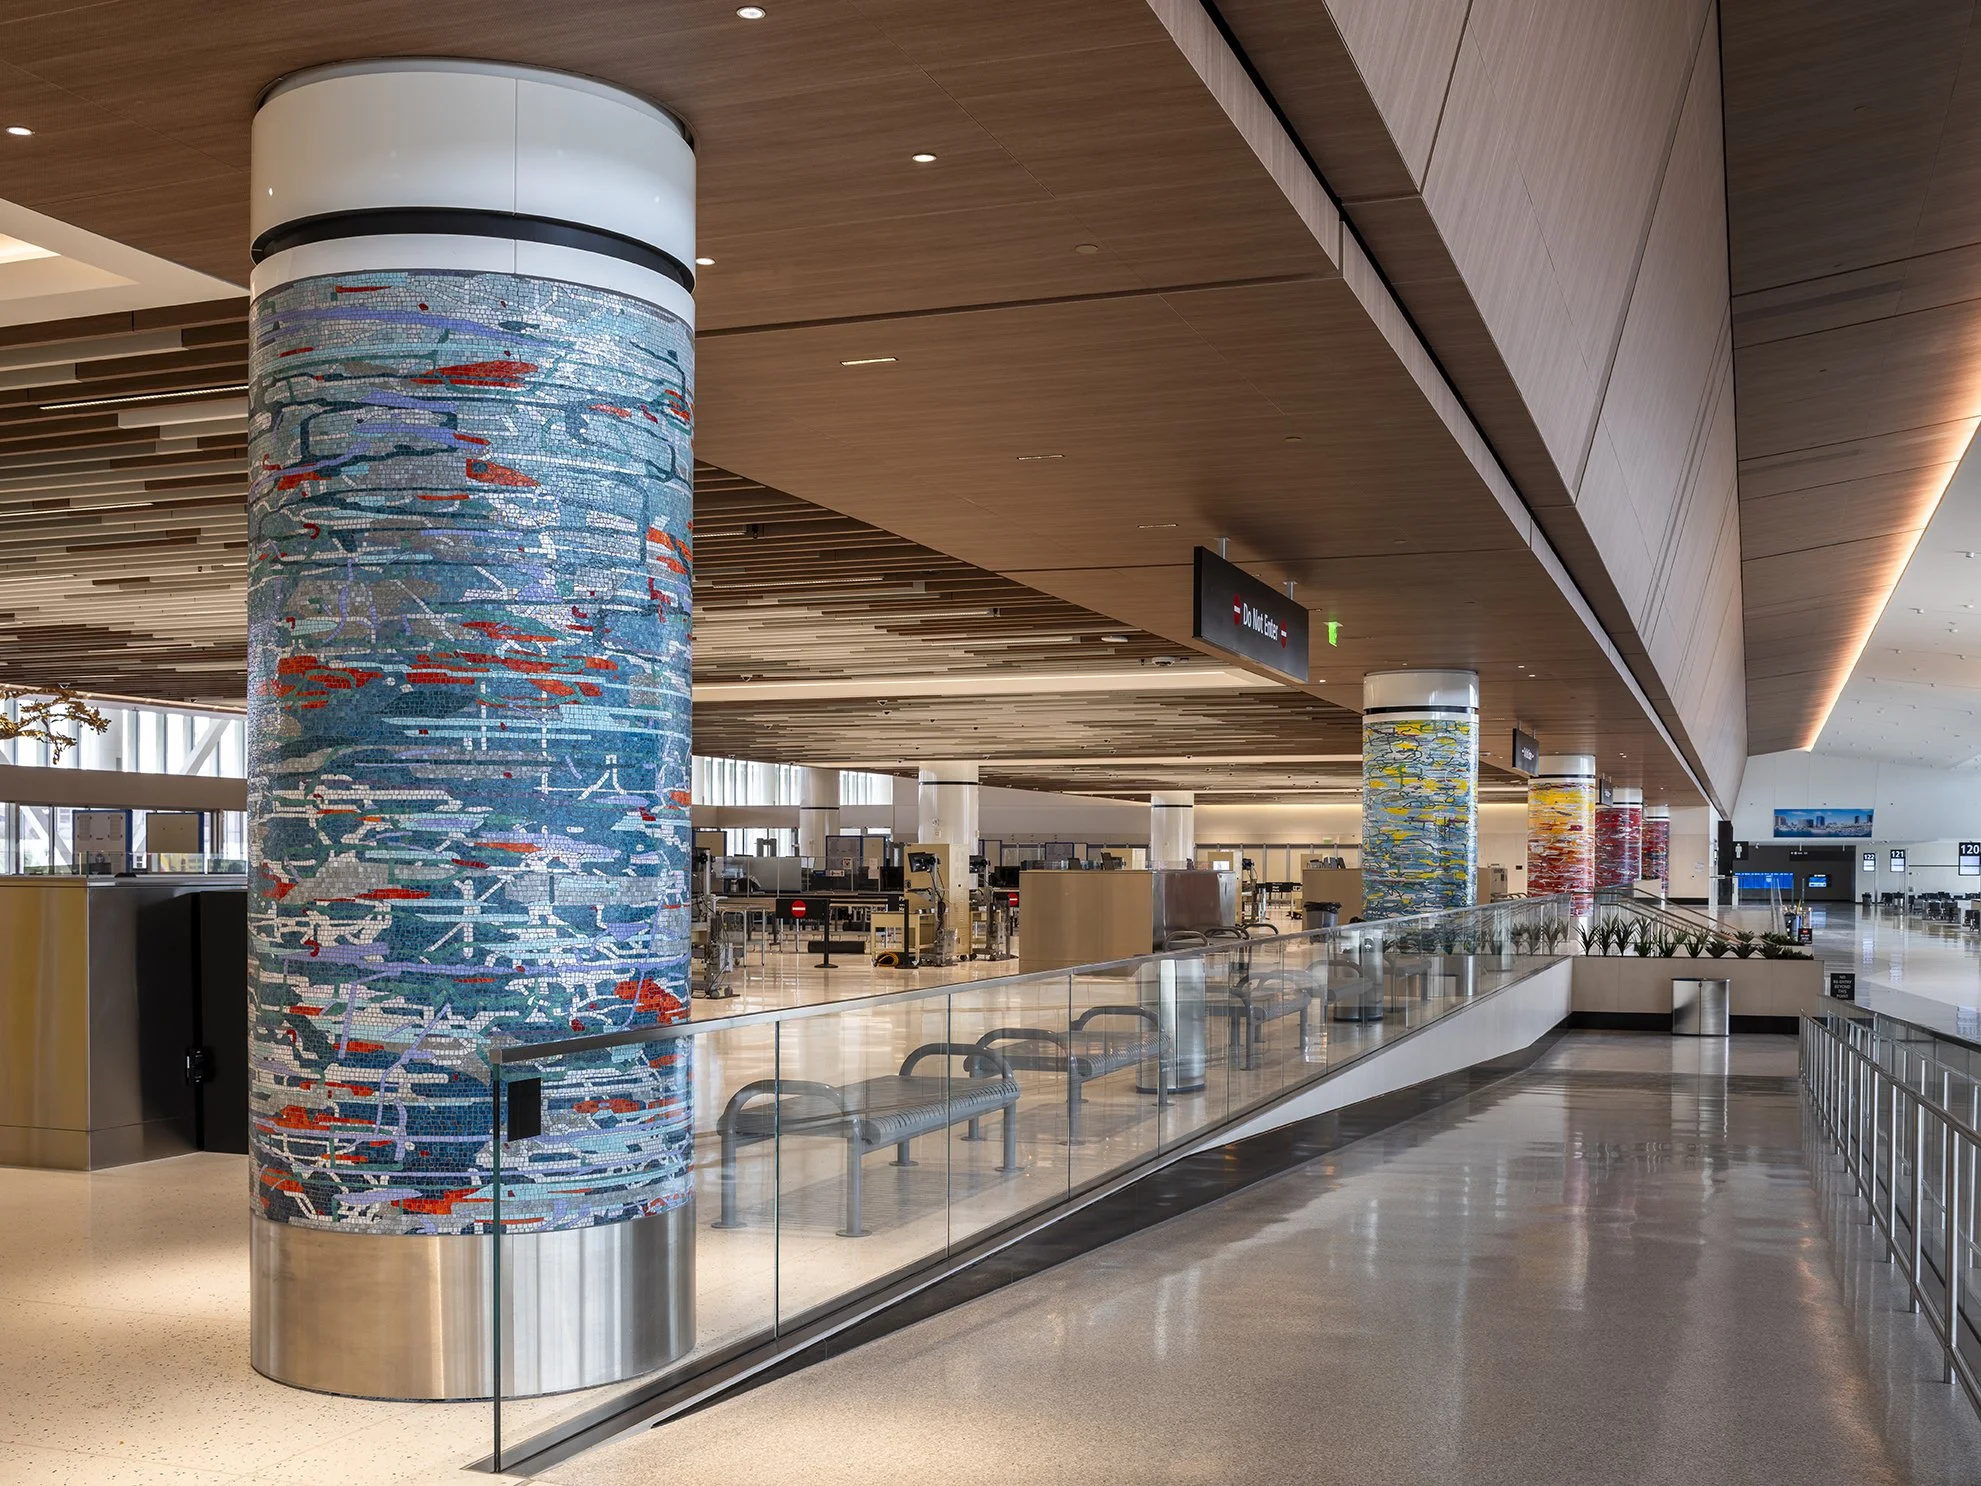
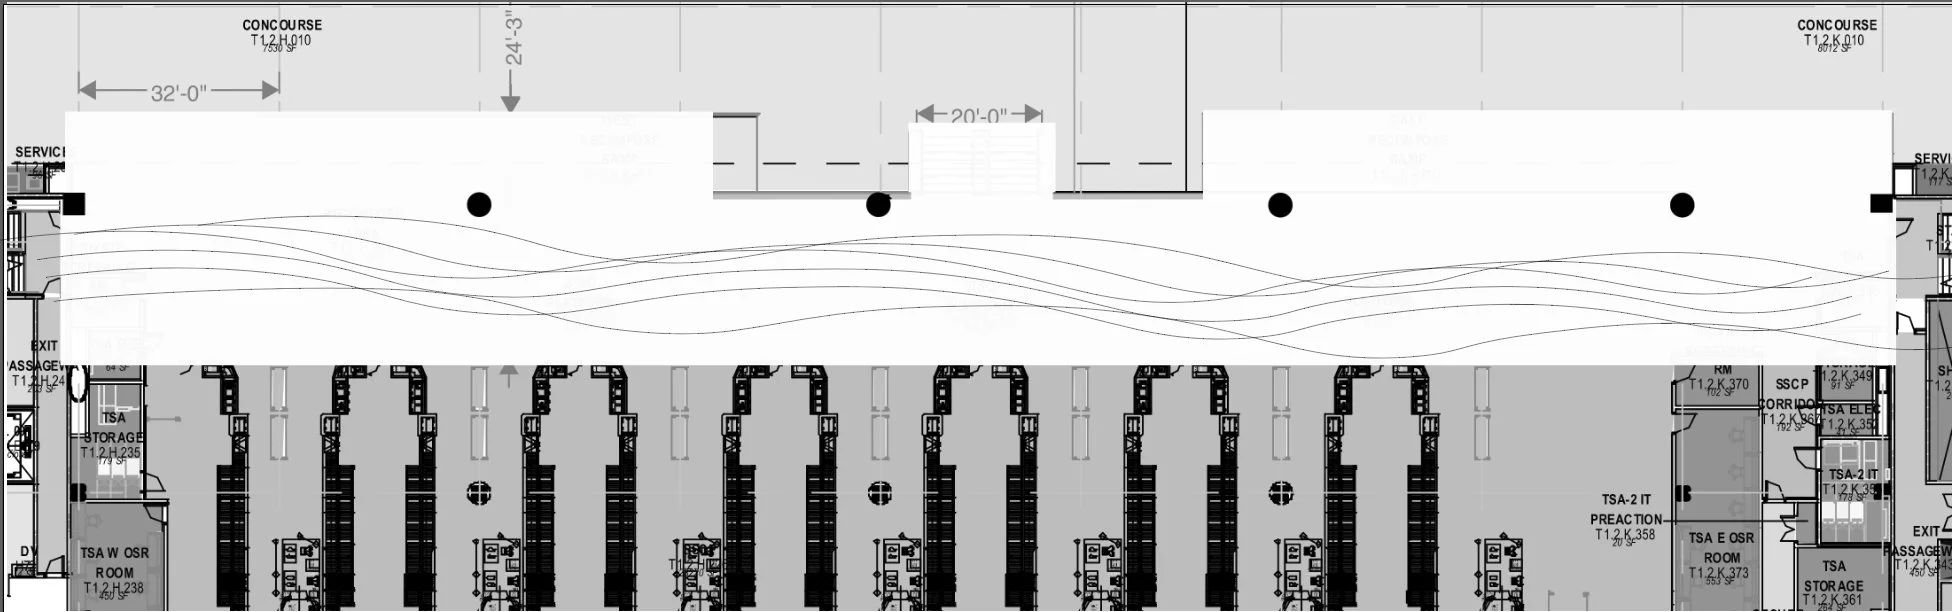
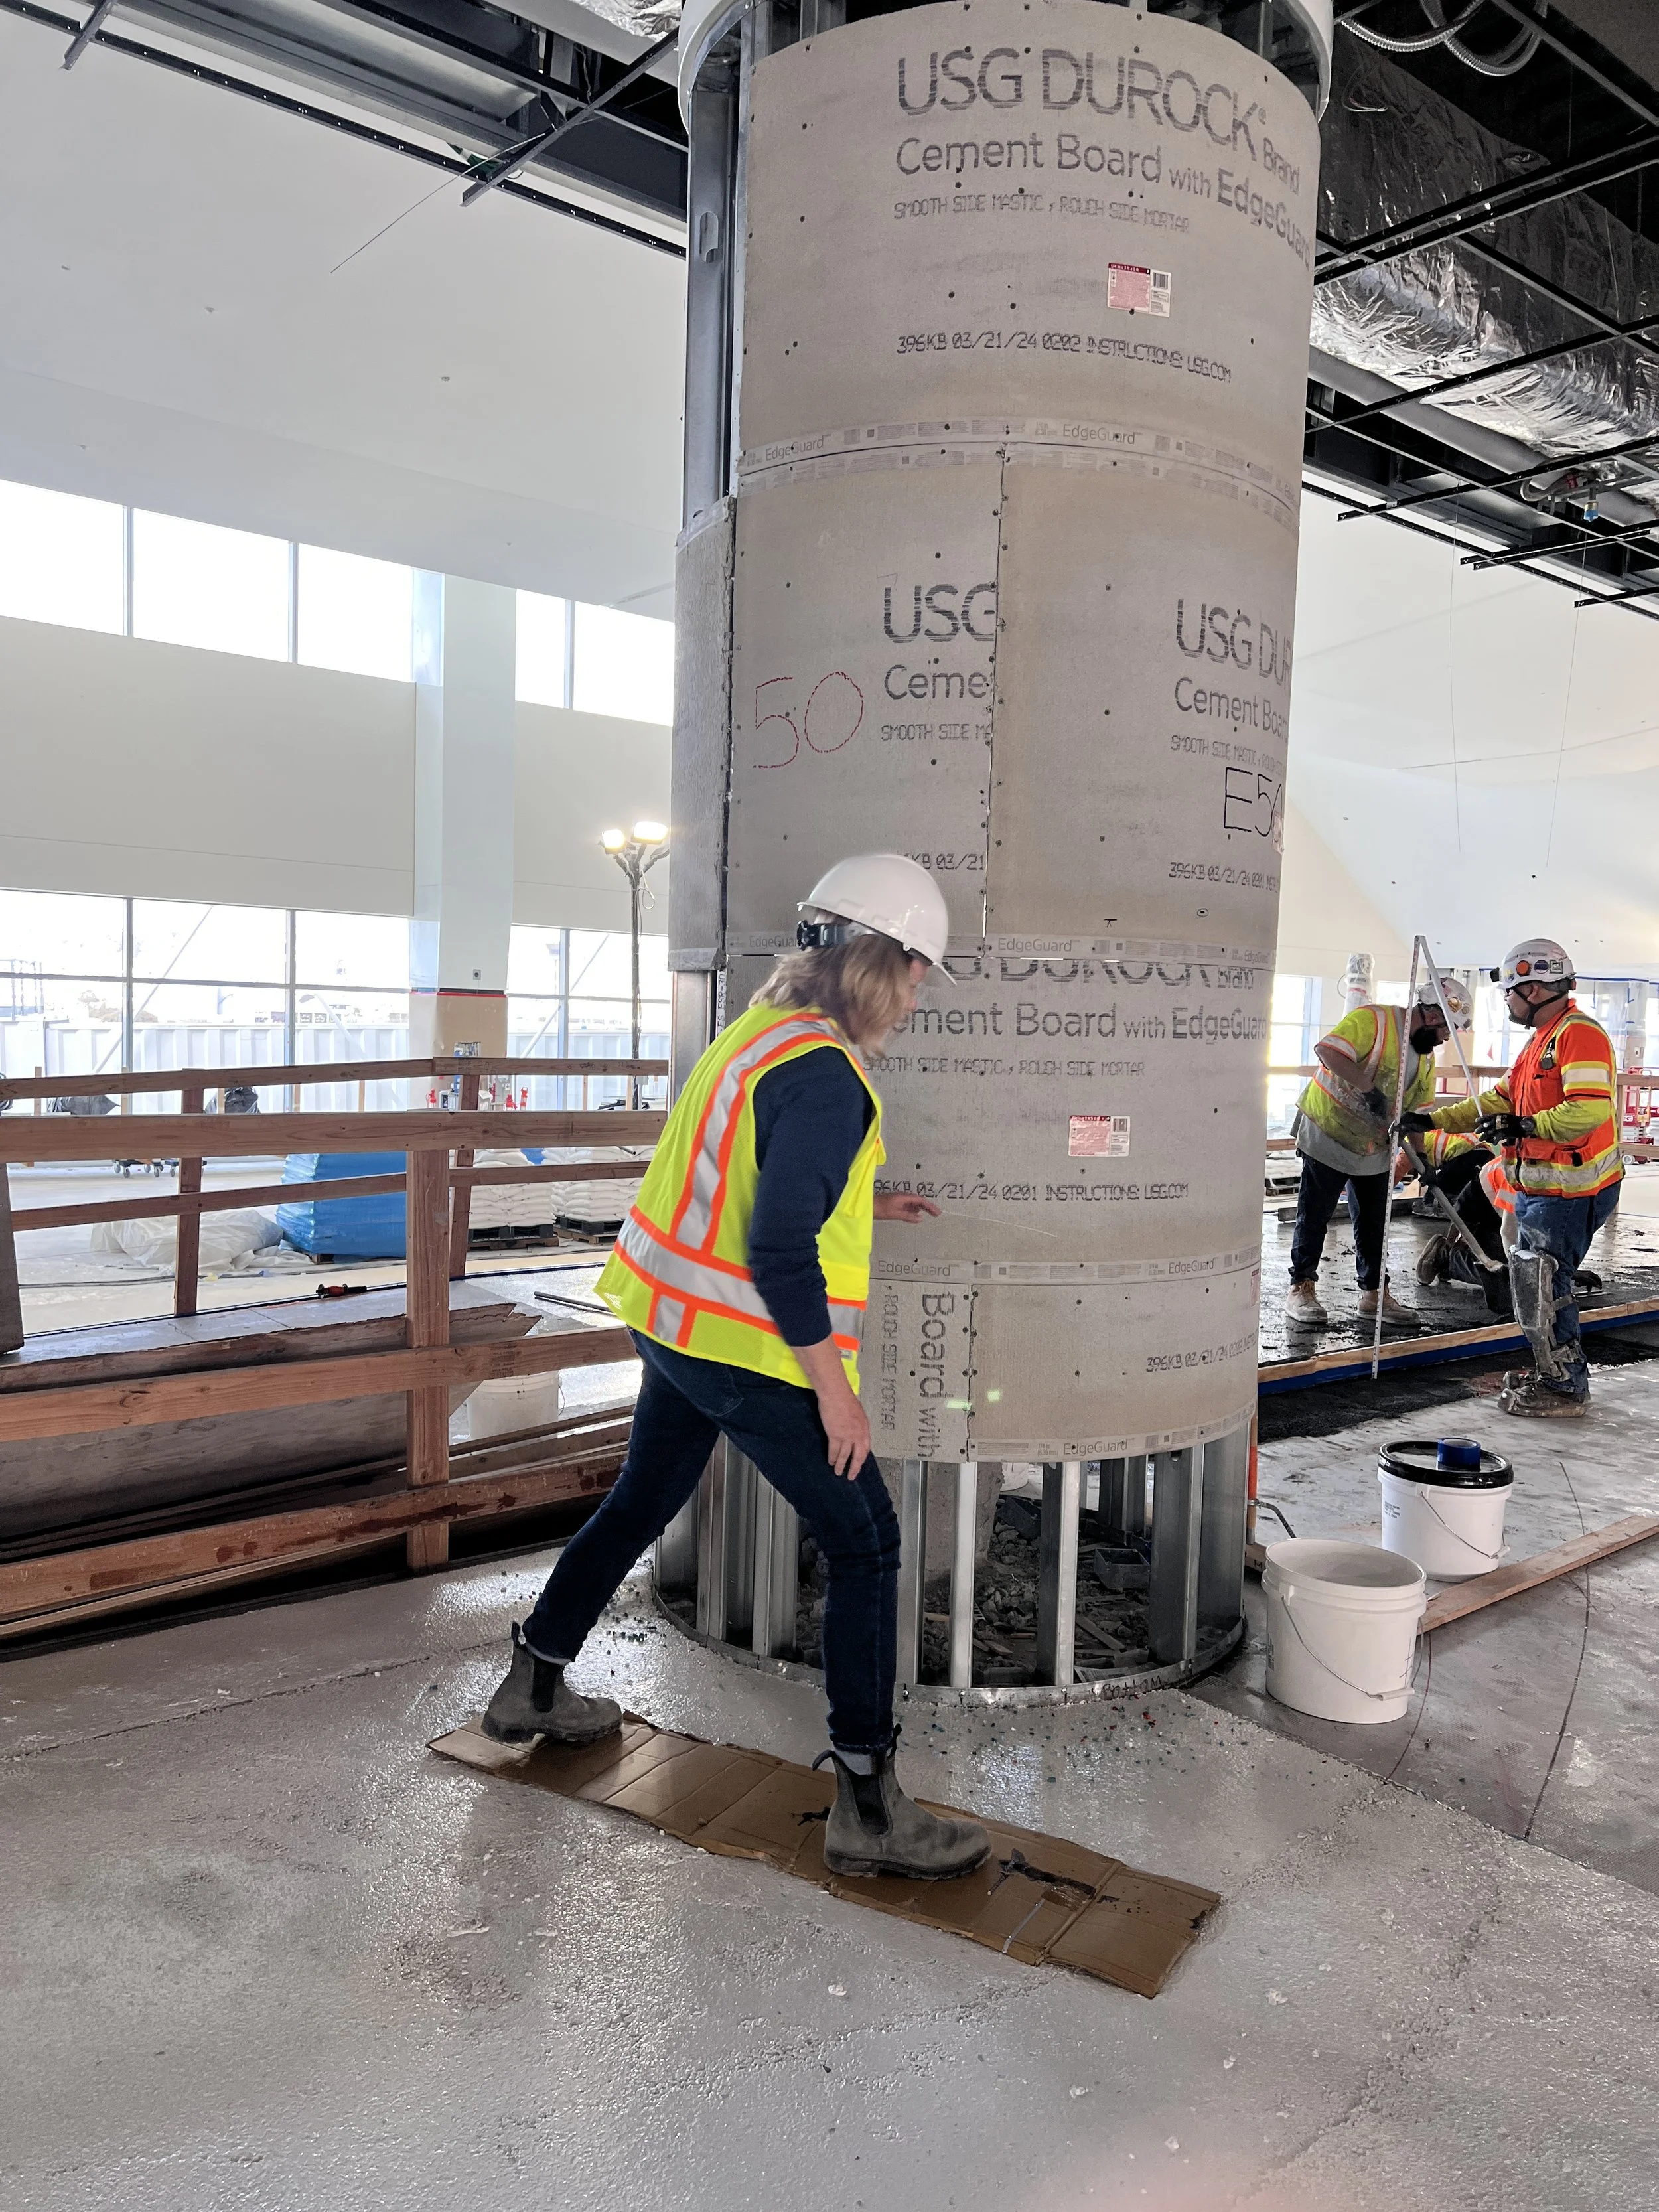
When designing in installation for such a large site, the scale and atmosphere of the space is extremely abstract. Once it became clear the “lily pad” areas would create unwanted clusters of people, we began to consider the six structural columns as the location for my installation. It seemed like a logical option. Because of their size (54 inches in diameter and approximately 10 feet tall) they are visible to passengers entering the TSA area, and they are also visible from the concessions and gate level.
I thought back to Ocean Beach Pier. What if I reversed the background/foreground, and created the striations of color and atmosphere on the columns? It seemed quite logical. In addition, the new T1 is on an east/west axis, so I could essentially create a “time lapse” by indicating “sunrise” in the east and “sunset” in the west. The color scheme of the columns could indicate both time and place, celebrating San Diego’s coastal environment.
Early rendering of Recomposure Area
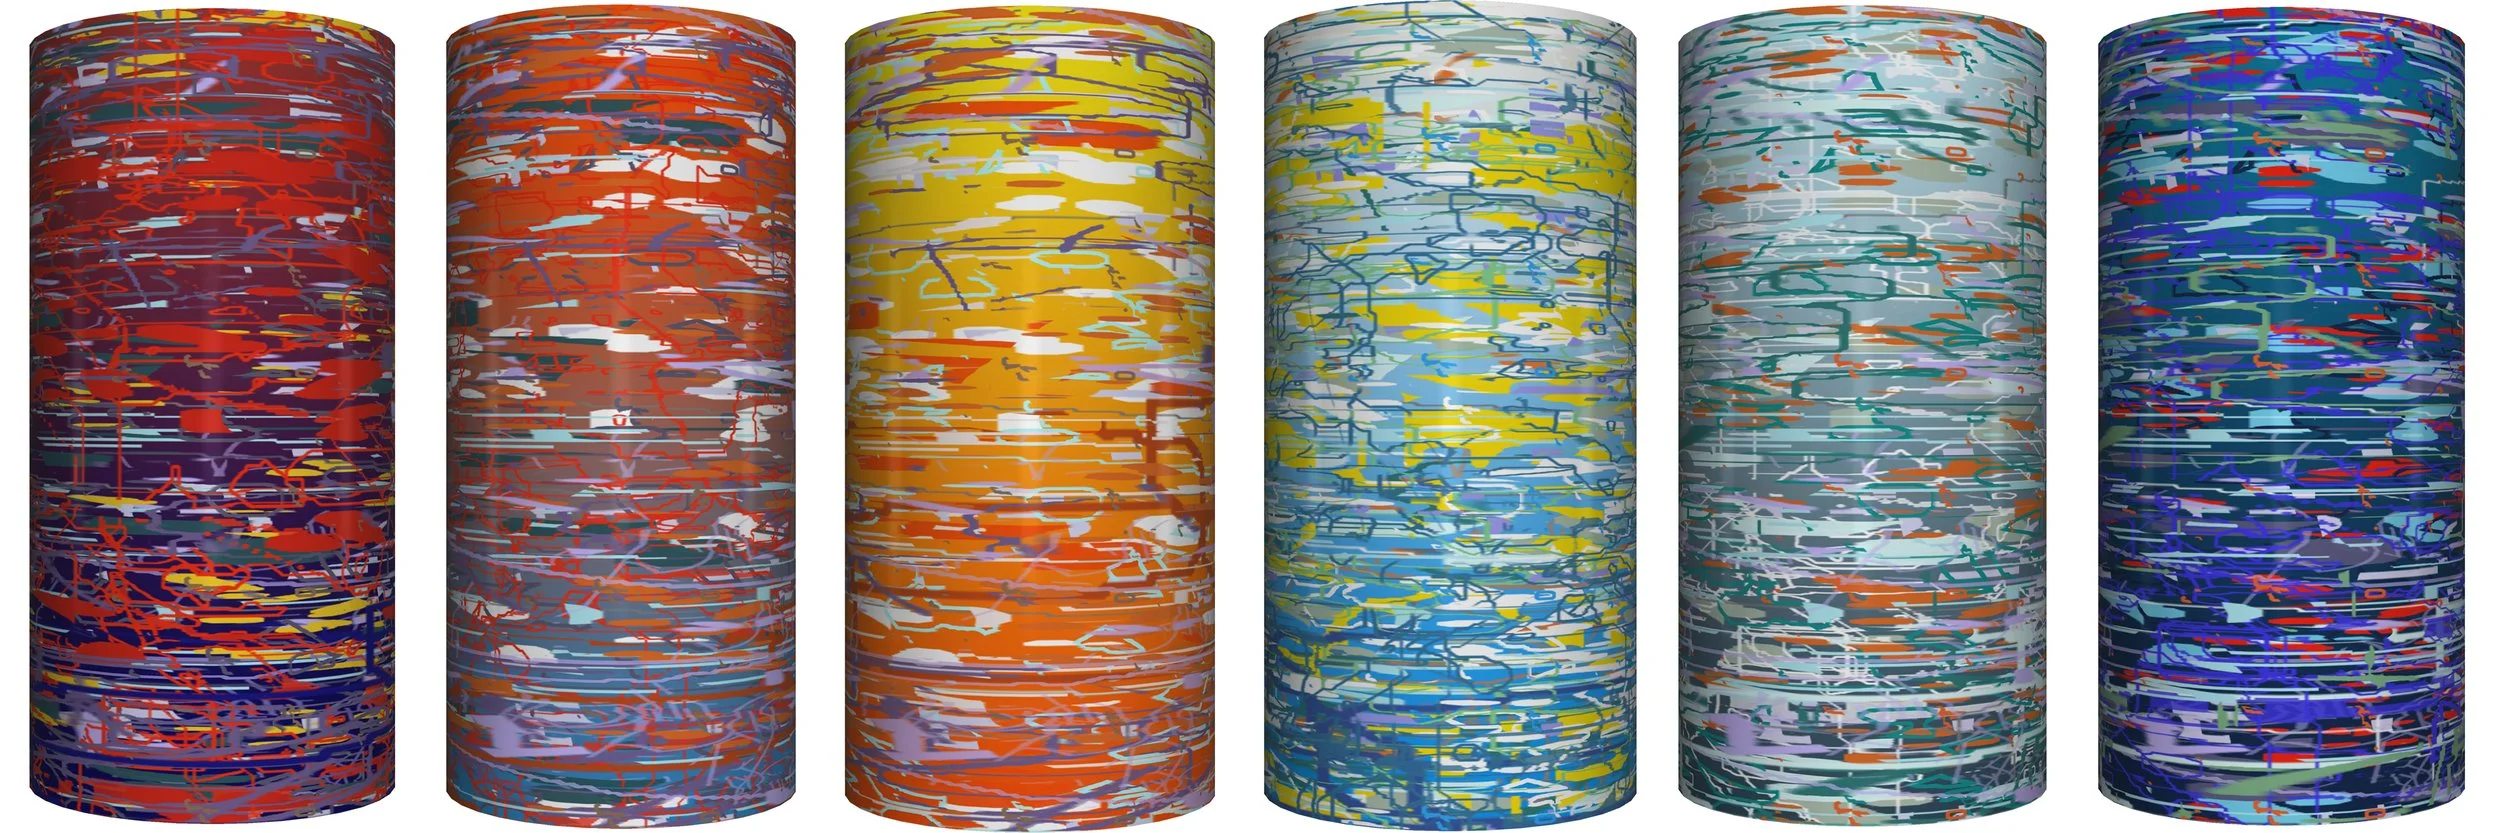
First refined version of six column designs
My team liked this direction, so I fleshed it out a bit more, consulting with Mosaika Art & Design. I have worked with Mosaika on two other projects, both ceramic mosaic murals. In this case, we decided very early on to use smalti glass mosaic, rather than ceramic. Smalti had a few advantages: the material is reflective, luminous, luxurious, and varied in its characteristics. Also, due to the arc of the circumference of the columns, we knew we’d need to work with very small pieces of material, to prevent awkward rough edges and large flat planes. Smalti is also suitable for applying in stacked rows, which would add to the sense of layering and striation that I was looking for.
It’s a long process to work through proposals for public art; first, working with the team to arrive at an idea that is viable in terms of esthetics for the space, the construction timeline, and the budget; second, bringing that idea to a much larger group of people, including various stakeholders, the Airport Authority, and the architecture and construction teams. Luckily, my initial concept was approved. Around the same time, I was asked to do a complimentary terrazzo floor design that would relate to the columns.
It’s tough to communicate the materiality of the final version of one’s concept in a proposal. Many artists who do public art have huge studios and big teams of people who do exceptionally beautiful renderings of their designs. I just have… myself. Although I am adept at many aspects of Adobe Photoshop, architectural rendering is not one of them. However, I found a cool filter to add to the designs, to suggest the idea of mosaic.
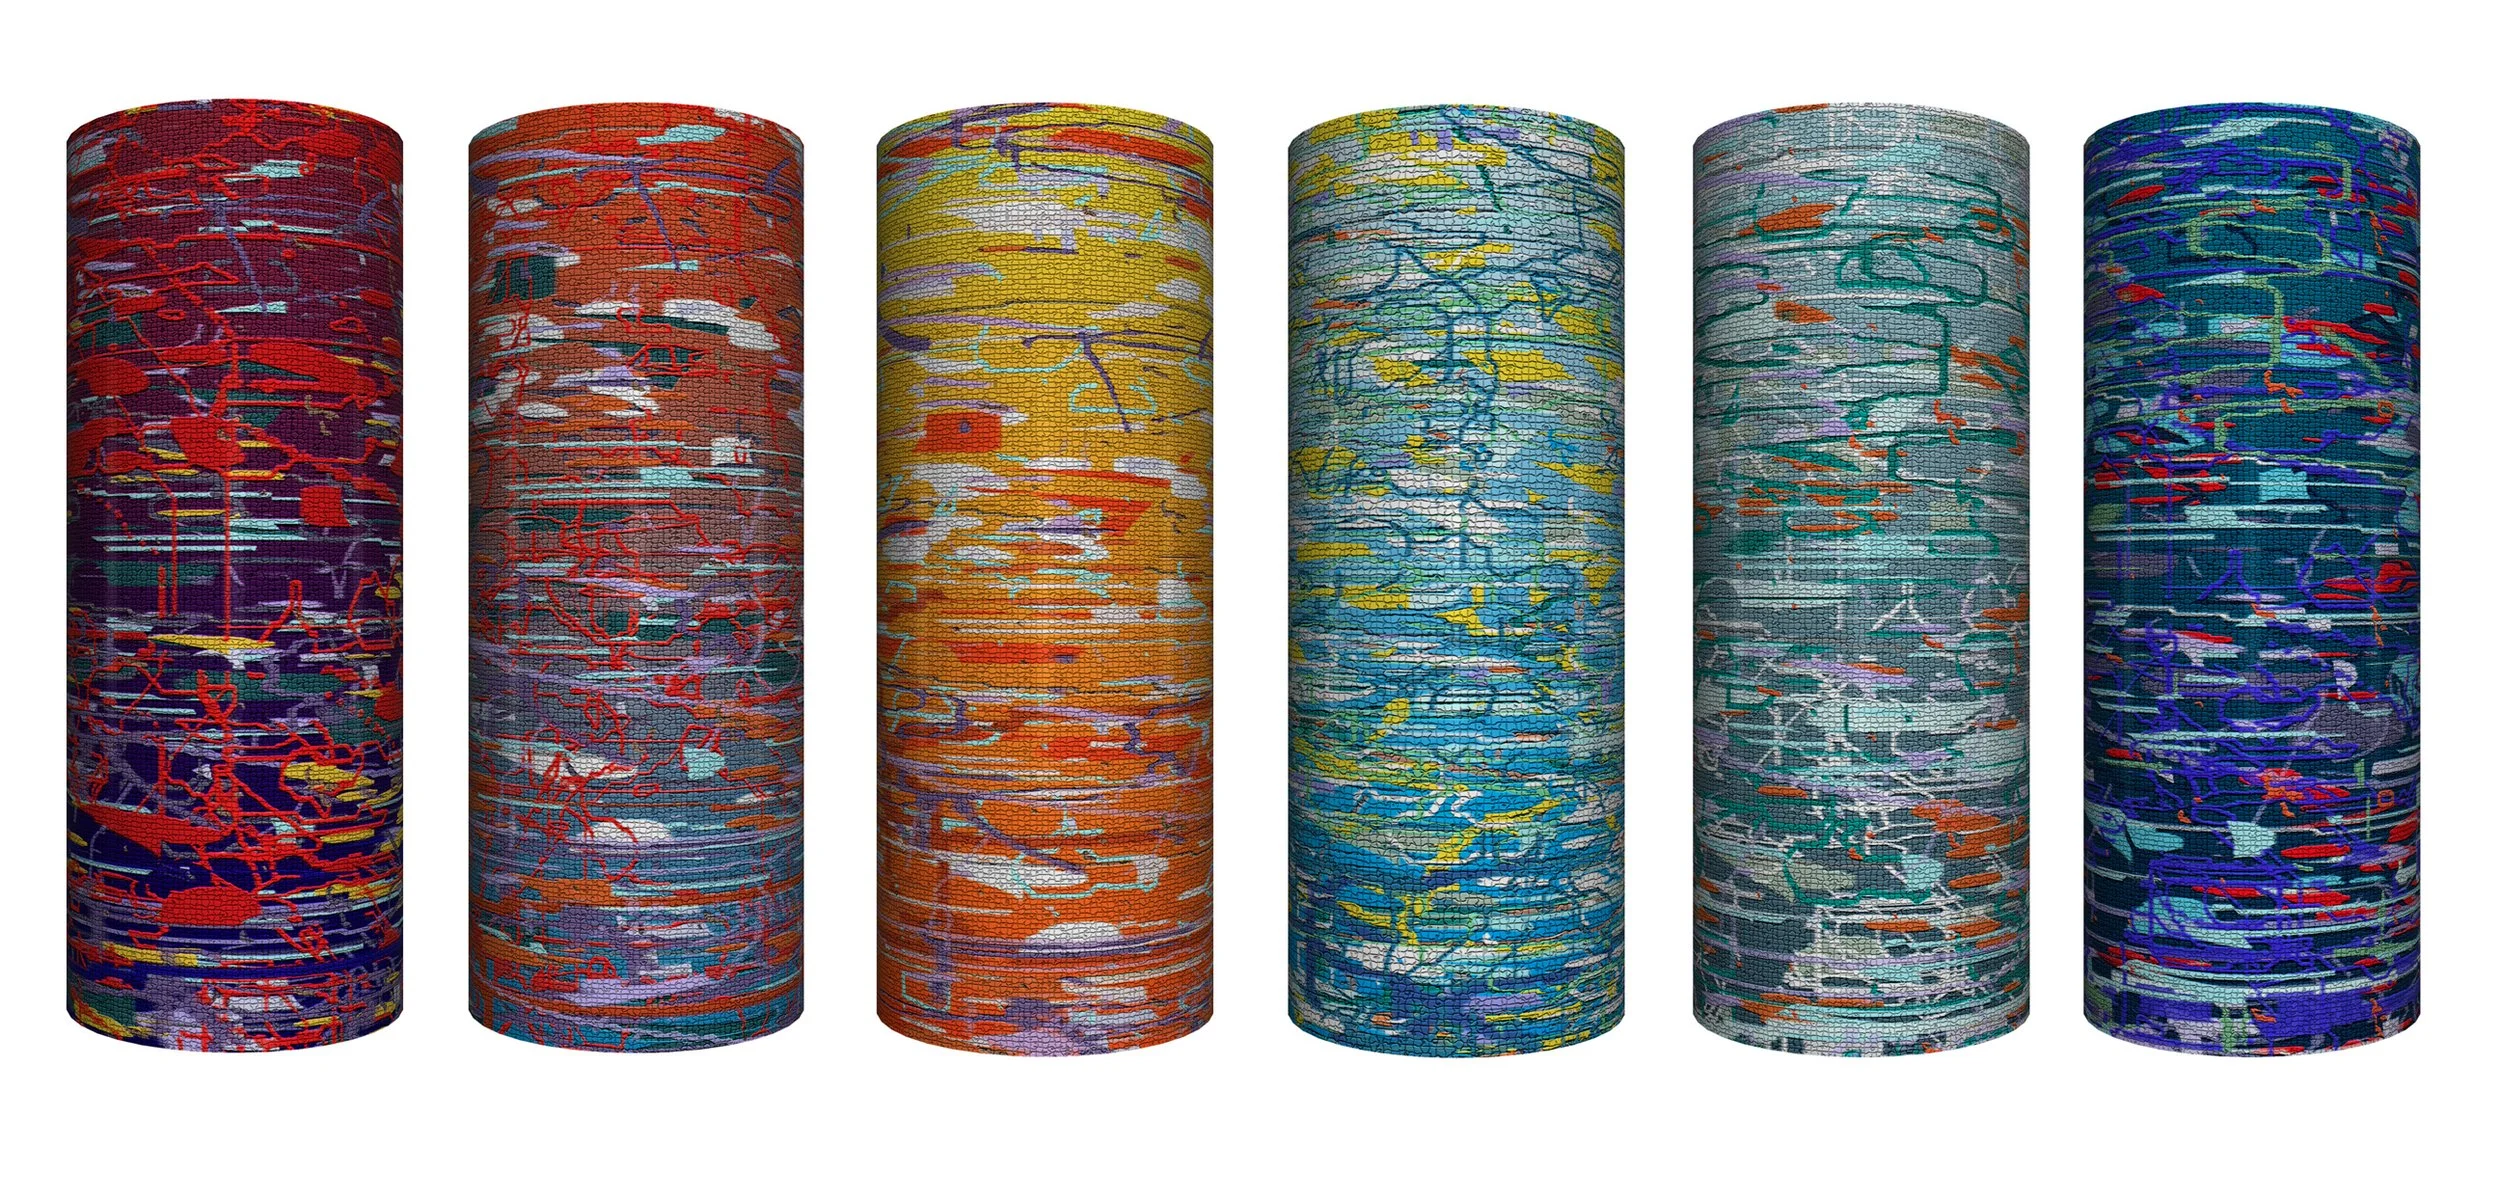
A little Photoshop magic lends some texture
Early rendering of columns and floor design
By the way, we are only about 2 years into the process at this point! Every aspect of this project was gone over many, many times. For the first three years or so, our team had a weekly meeting. Because the artists were brought in so early, it meant that there were many design and construction decisions in flux. Dimensions kept changing, designs for the metal caps at the tops and bottoms of the columns changed numerous times and, for a year or two, there was talk of including some kind of vent or air diffuser into the column design. All of it meant that we could not begin fabrication. However, we were finally at the point at which we could proceed with a mosaic sample.
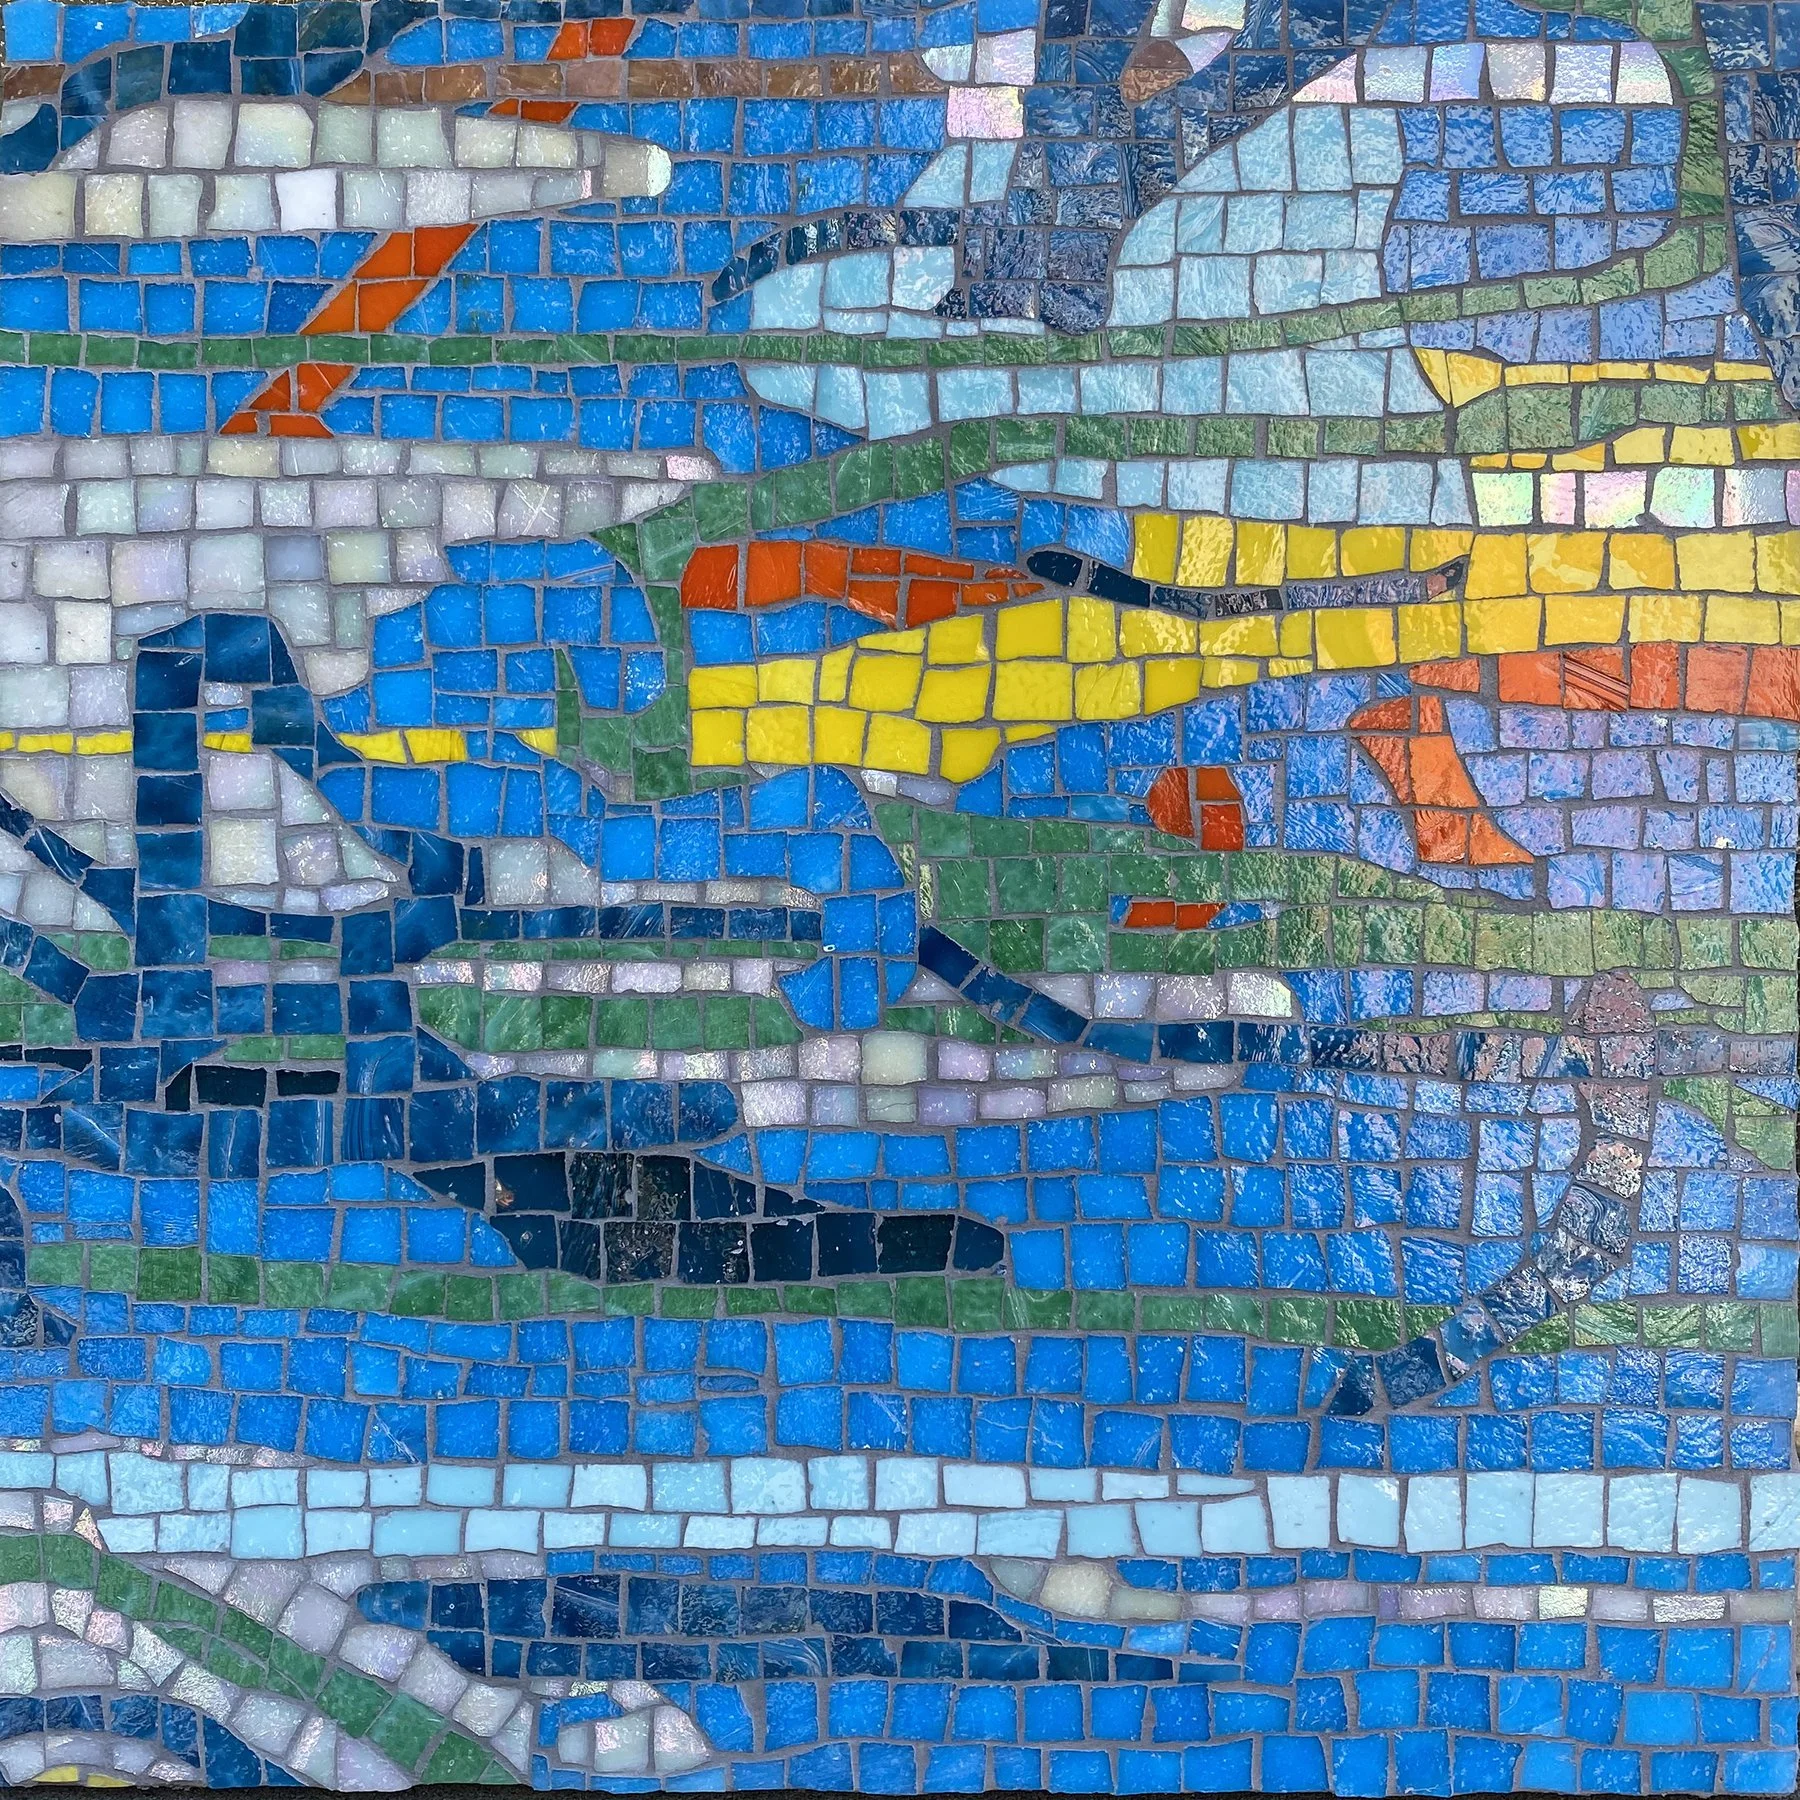
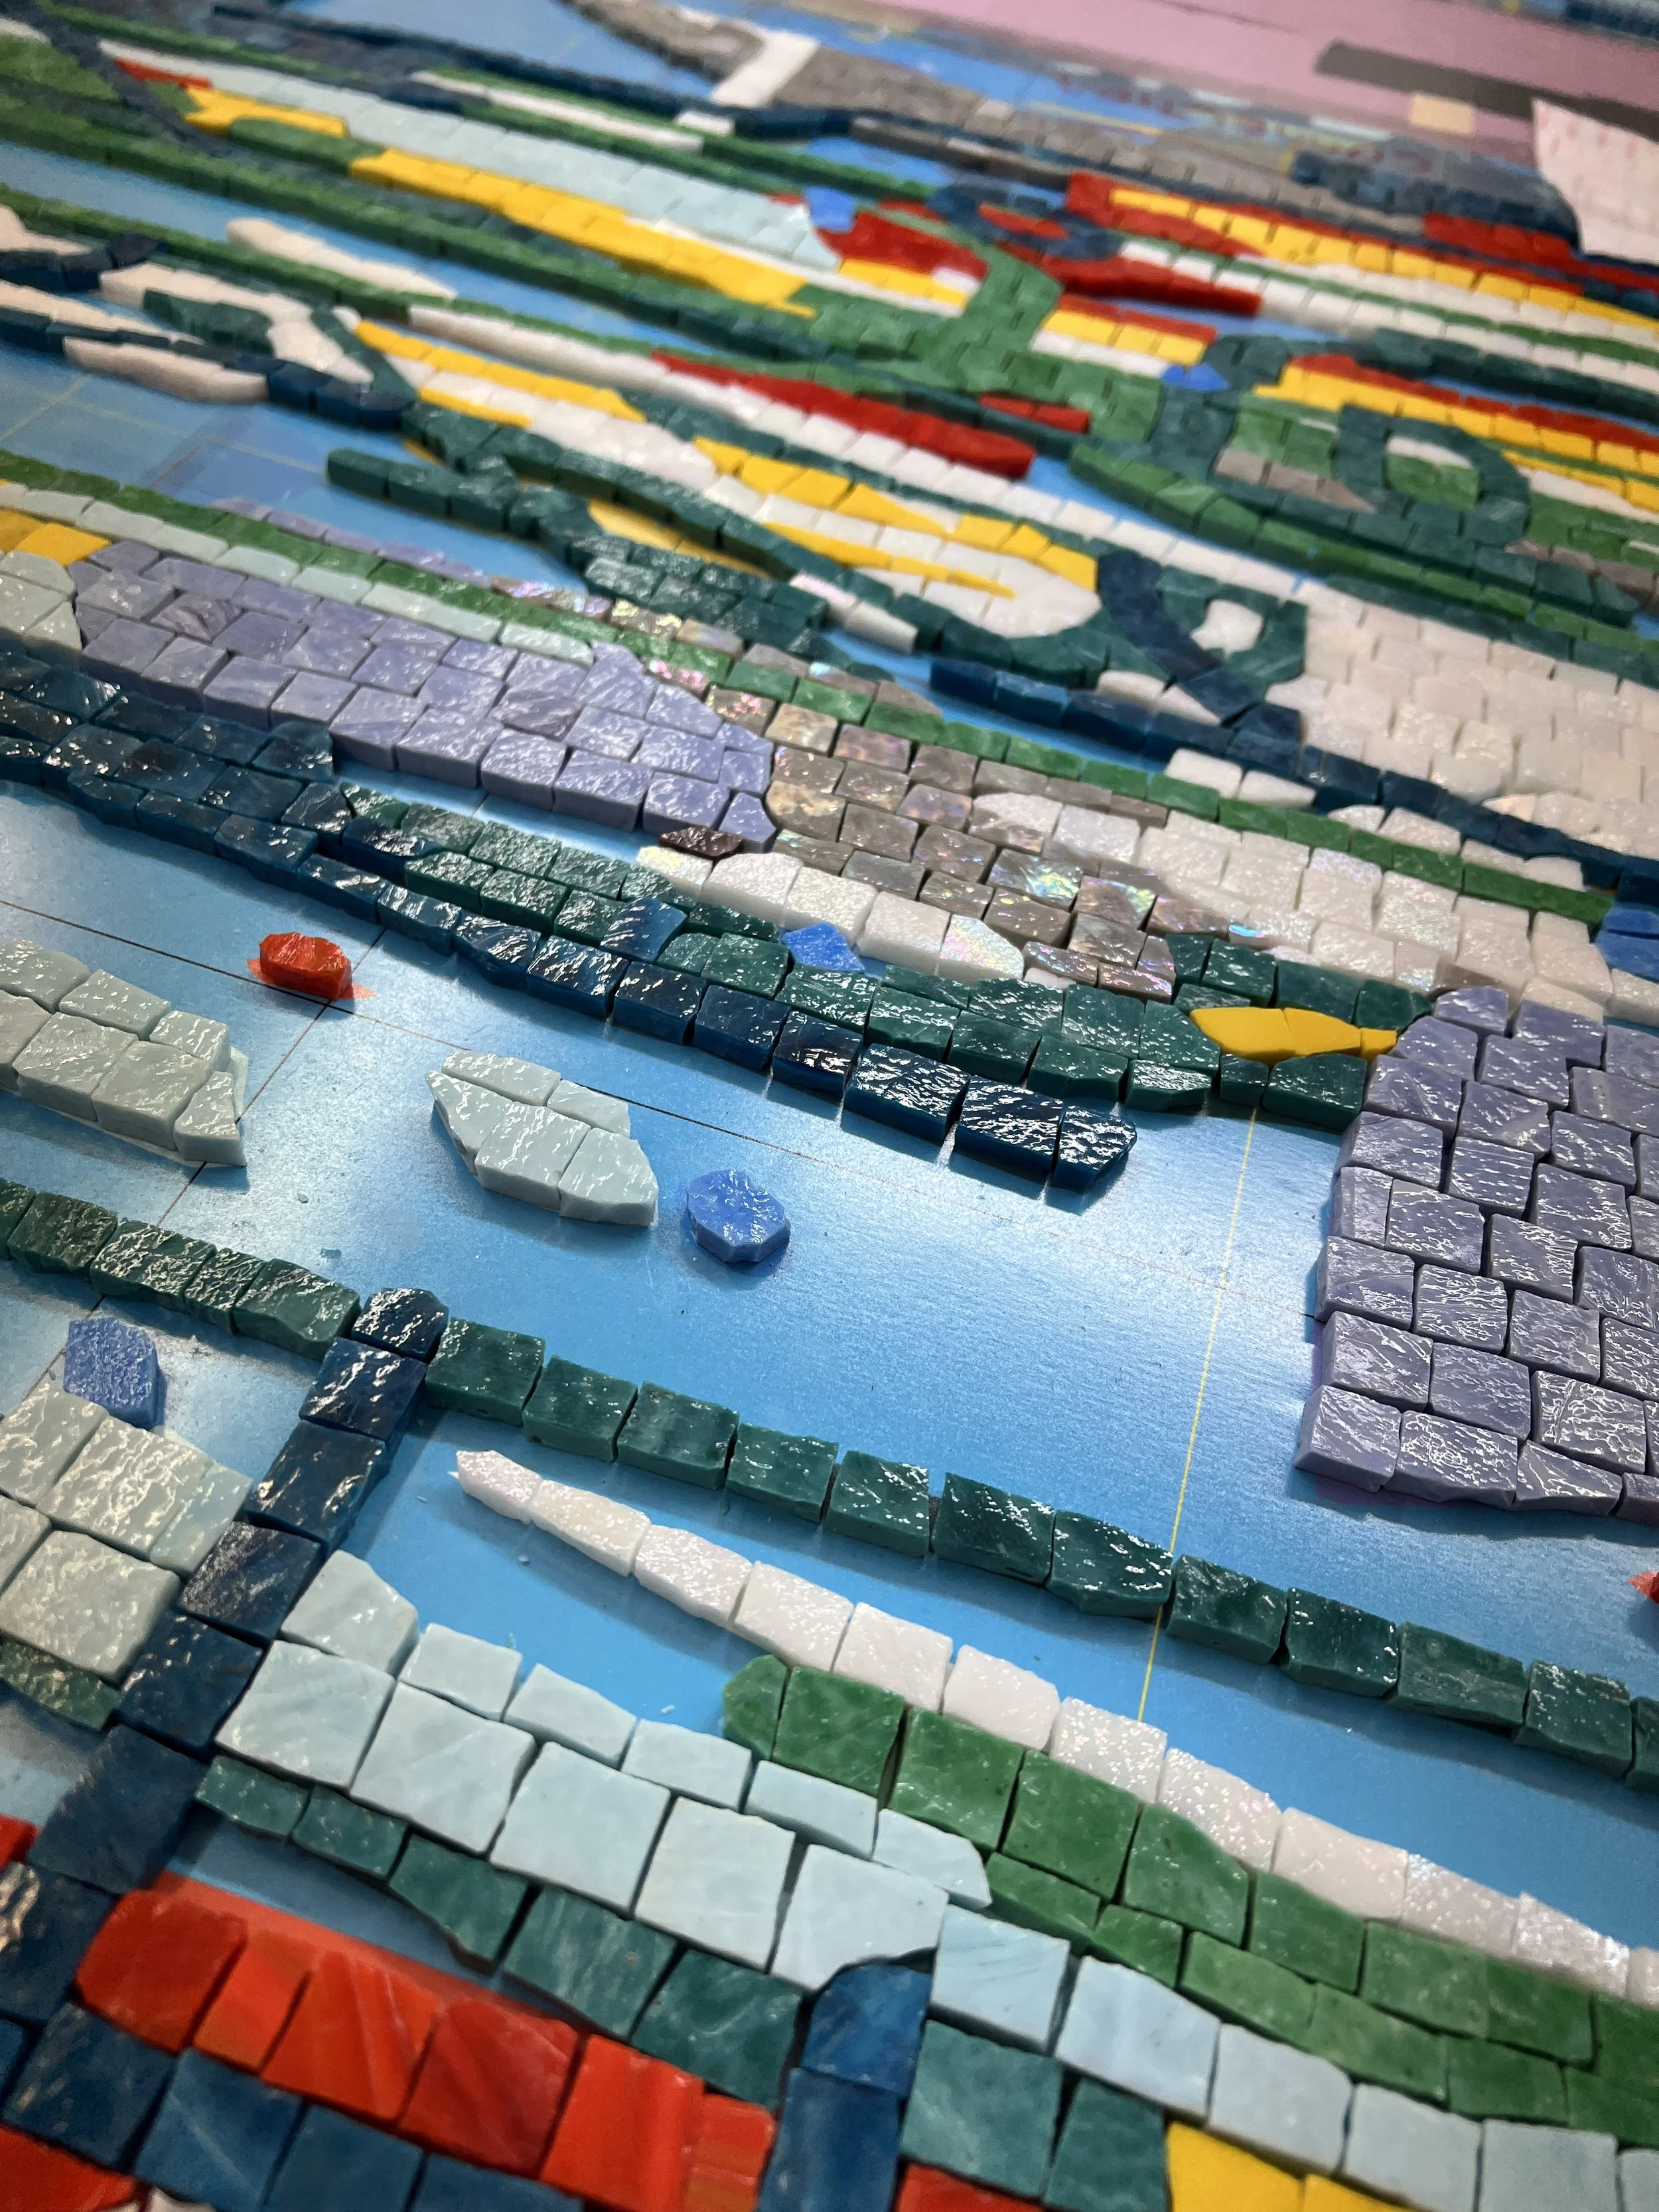
24 x 24 inch sample of proposed smalti mosaic technique
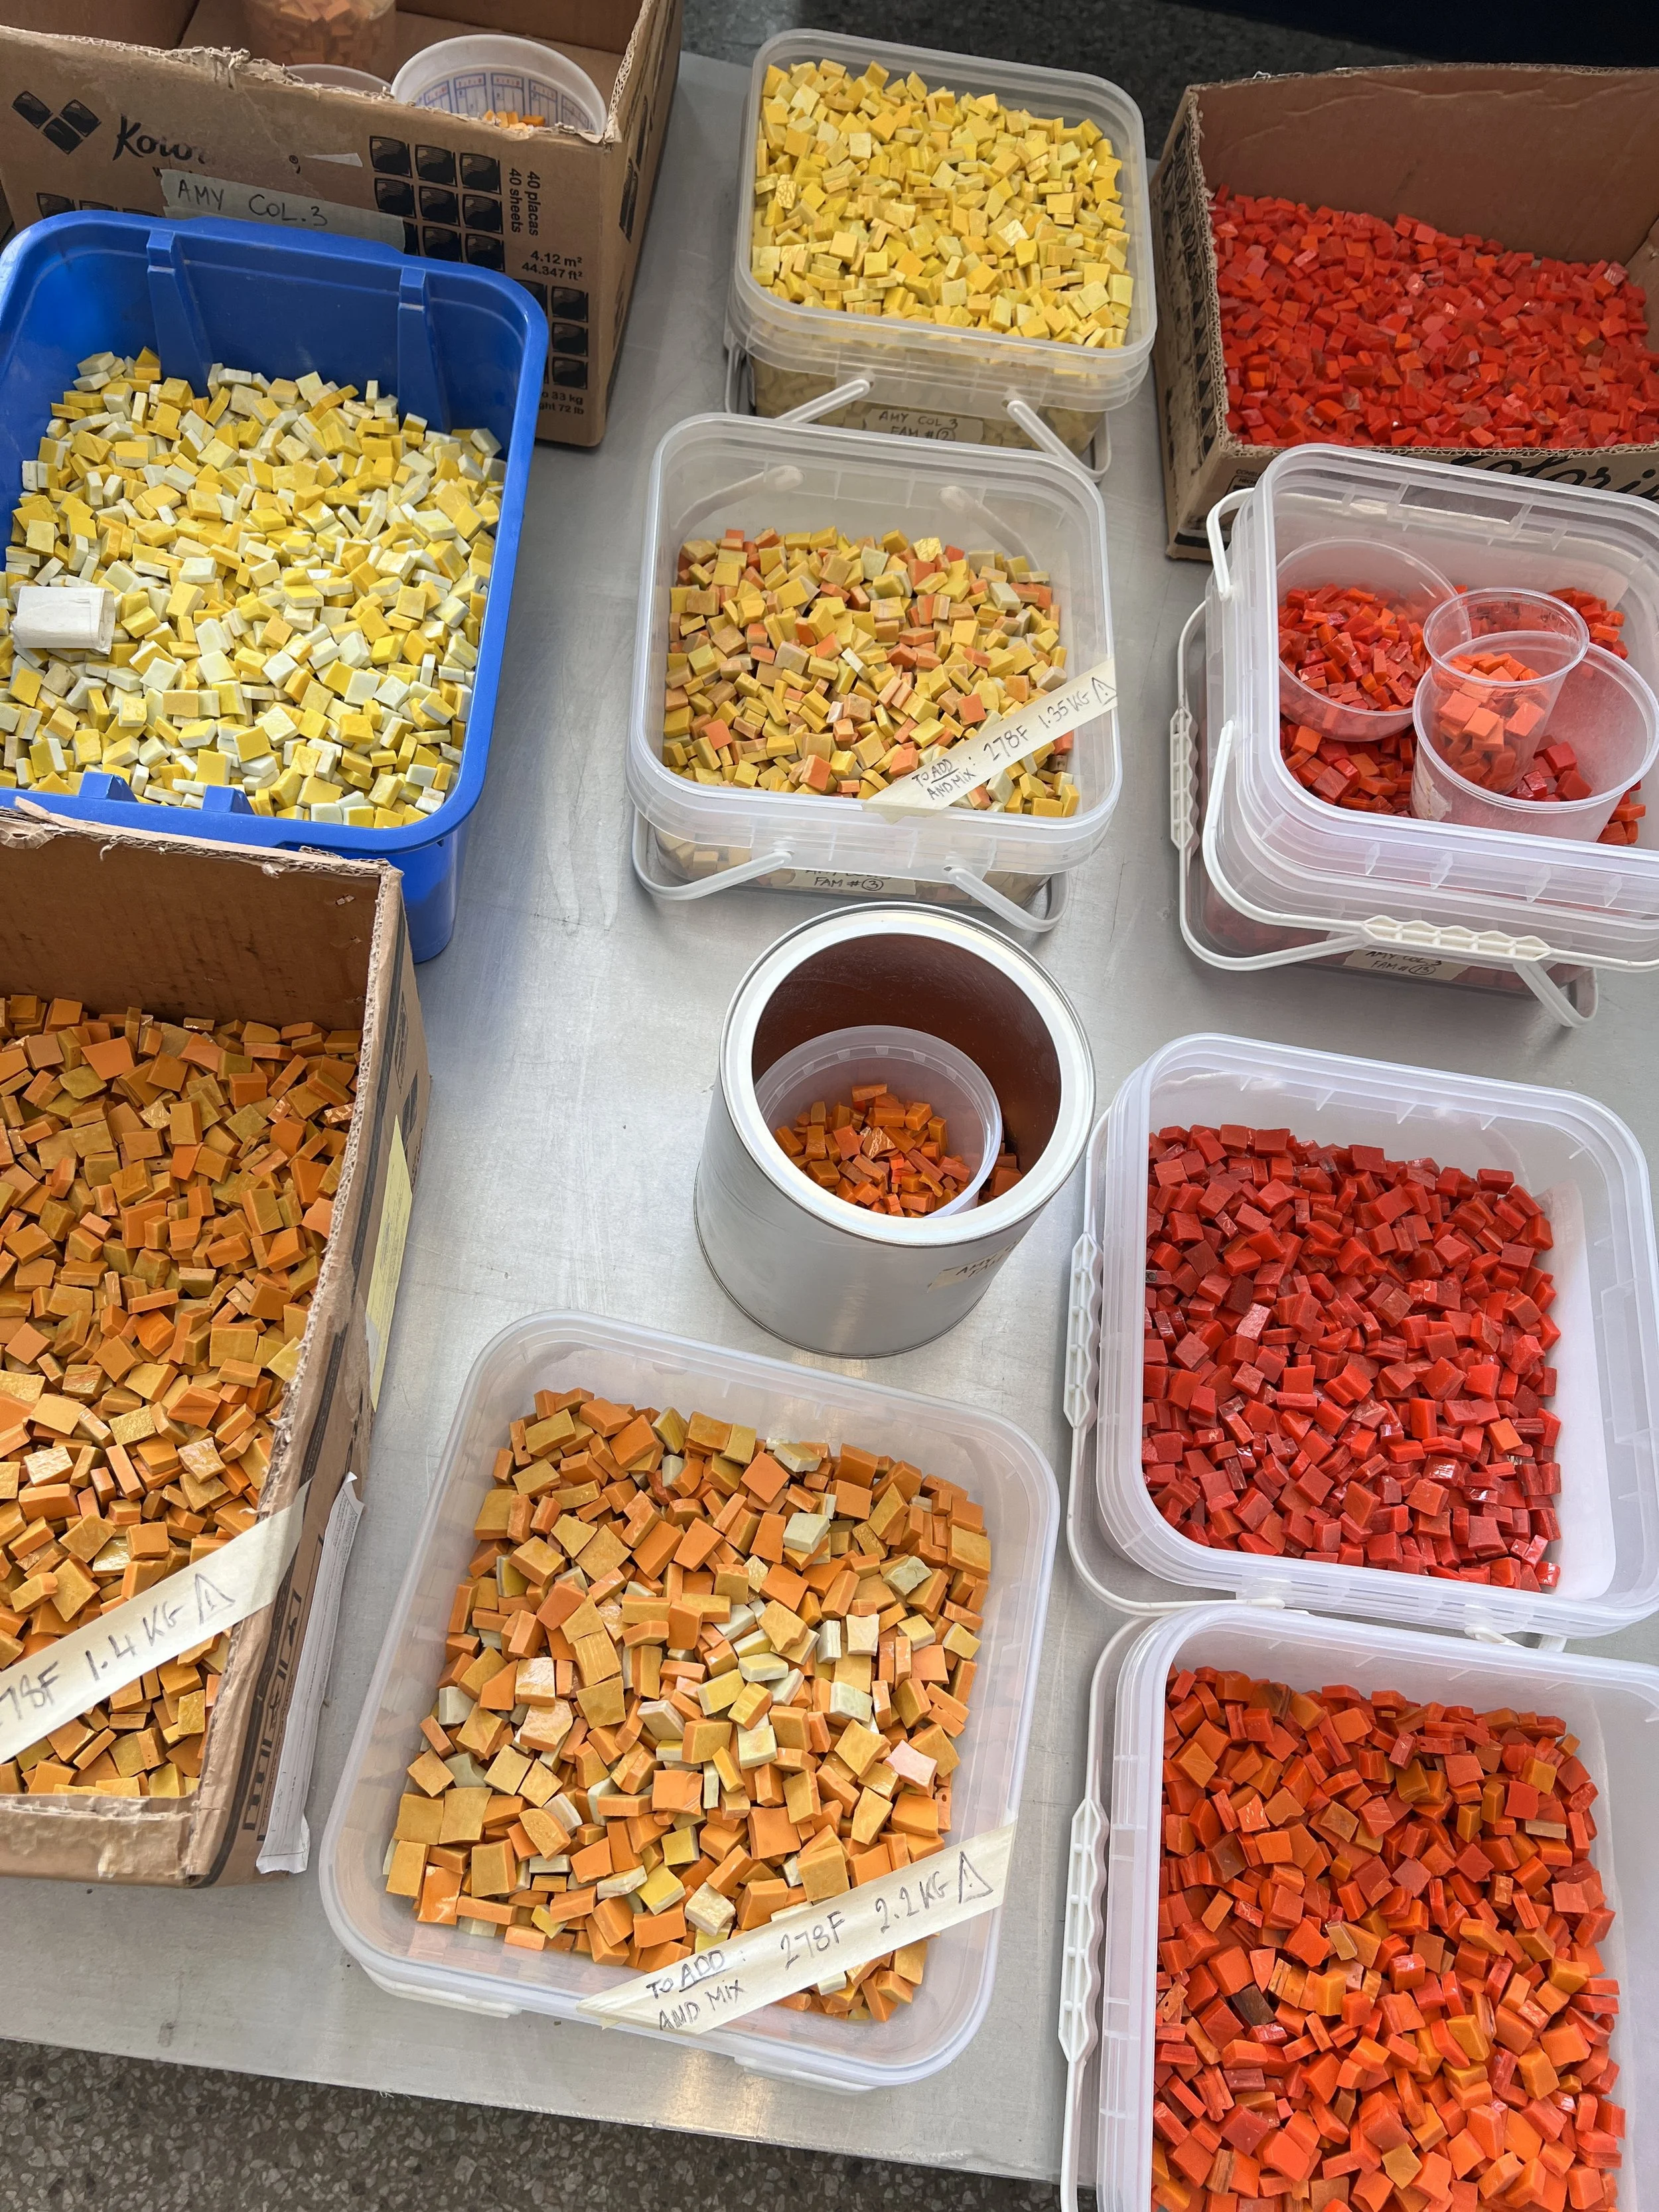
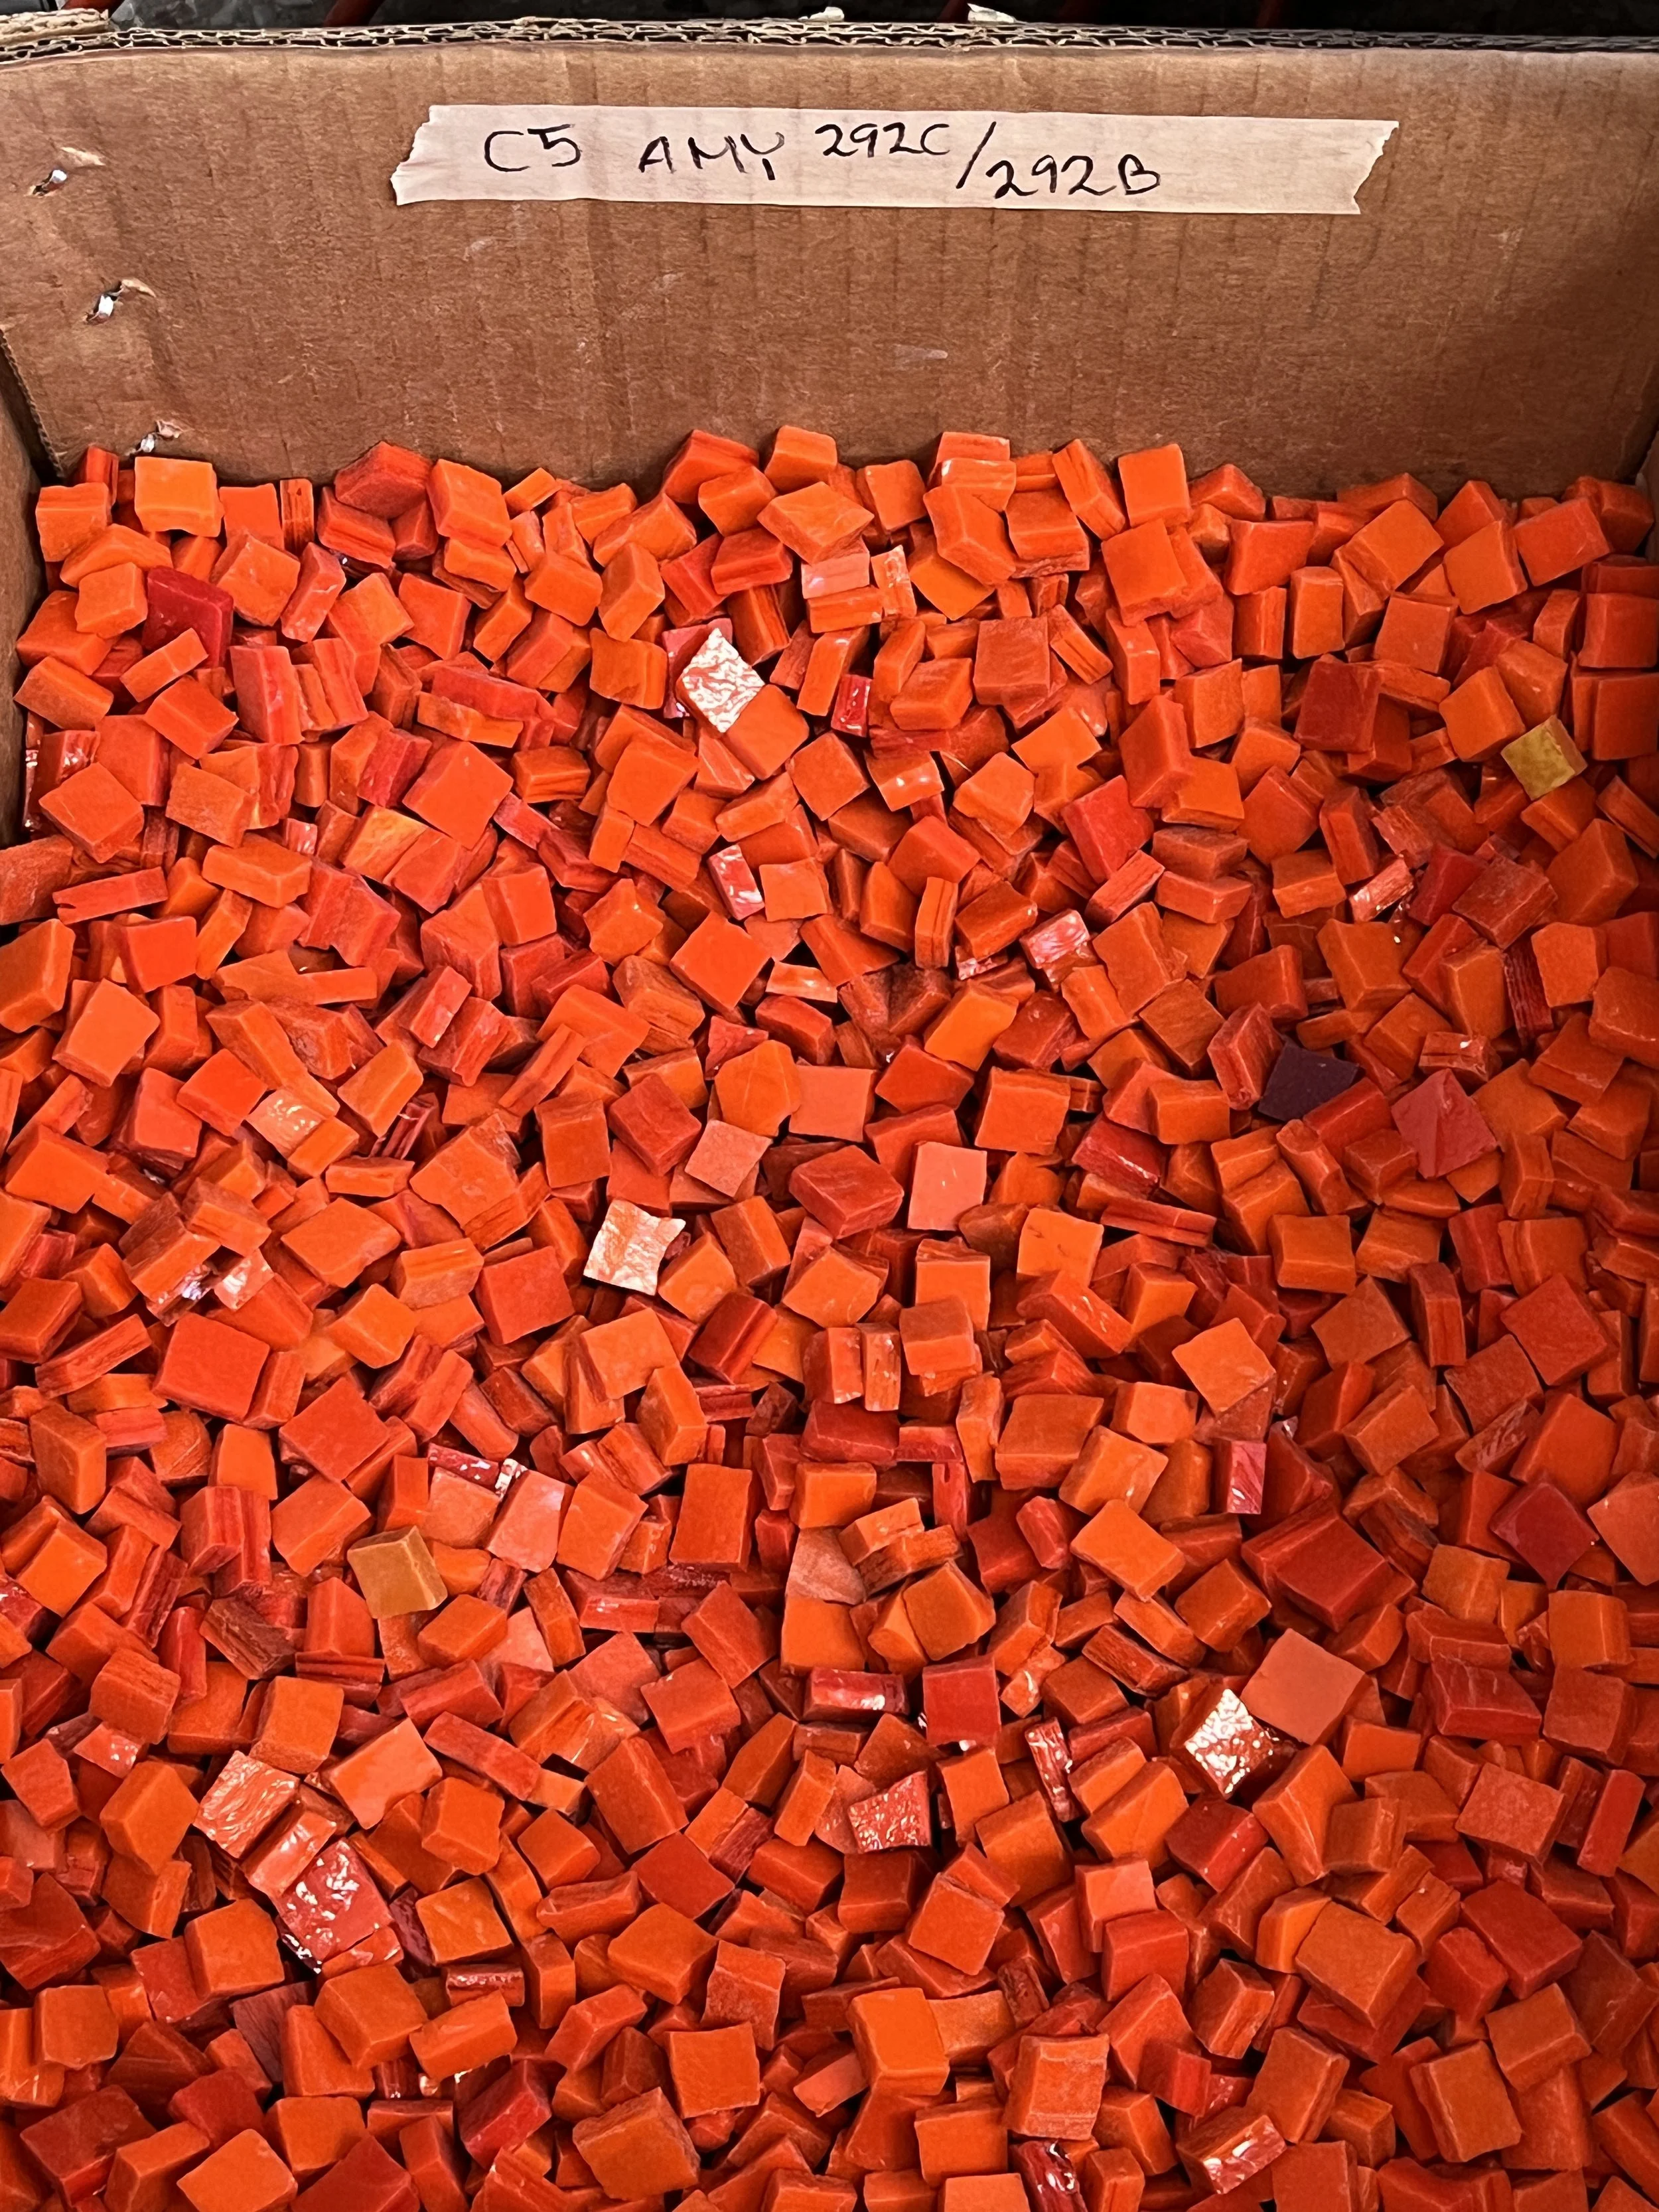
I gotta say, Mosaika nailed it on the first try. I think everyone breathed a sigh of relief. Once this sample was approved, I was cleared to make my first visit to Mosaika so that we could determine the palette for each piece. In advance, I had to do a bit of redesigning to make sure that there would be no visible seams in the mosaics; the designs had to wrap continuously. After doing the redesigns, I printed them out on my big Canon printer and taped them into cylinders, just to make sure they were indeed visually seamless. Then, the fun part: visiting my dear friends at Mosaika, and sorting through a dazzling array of smalti glass to set the palette for each column design.

We printed out each design, and pulled out each color so that we had a reference to match.
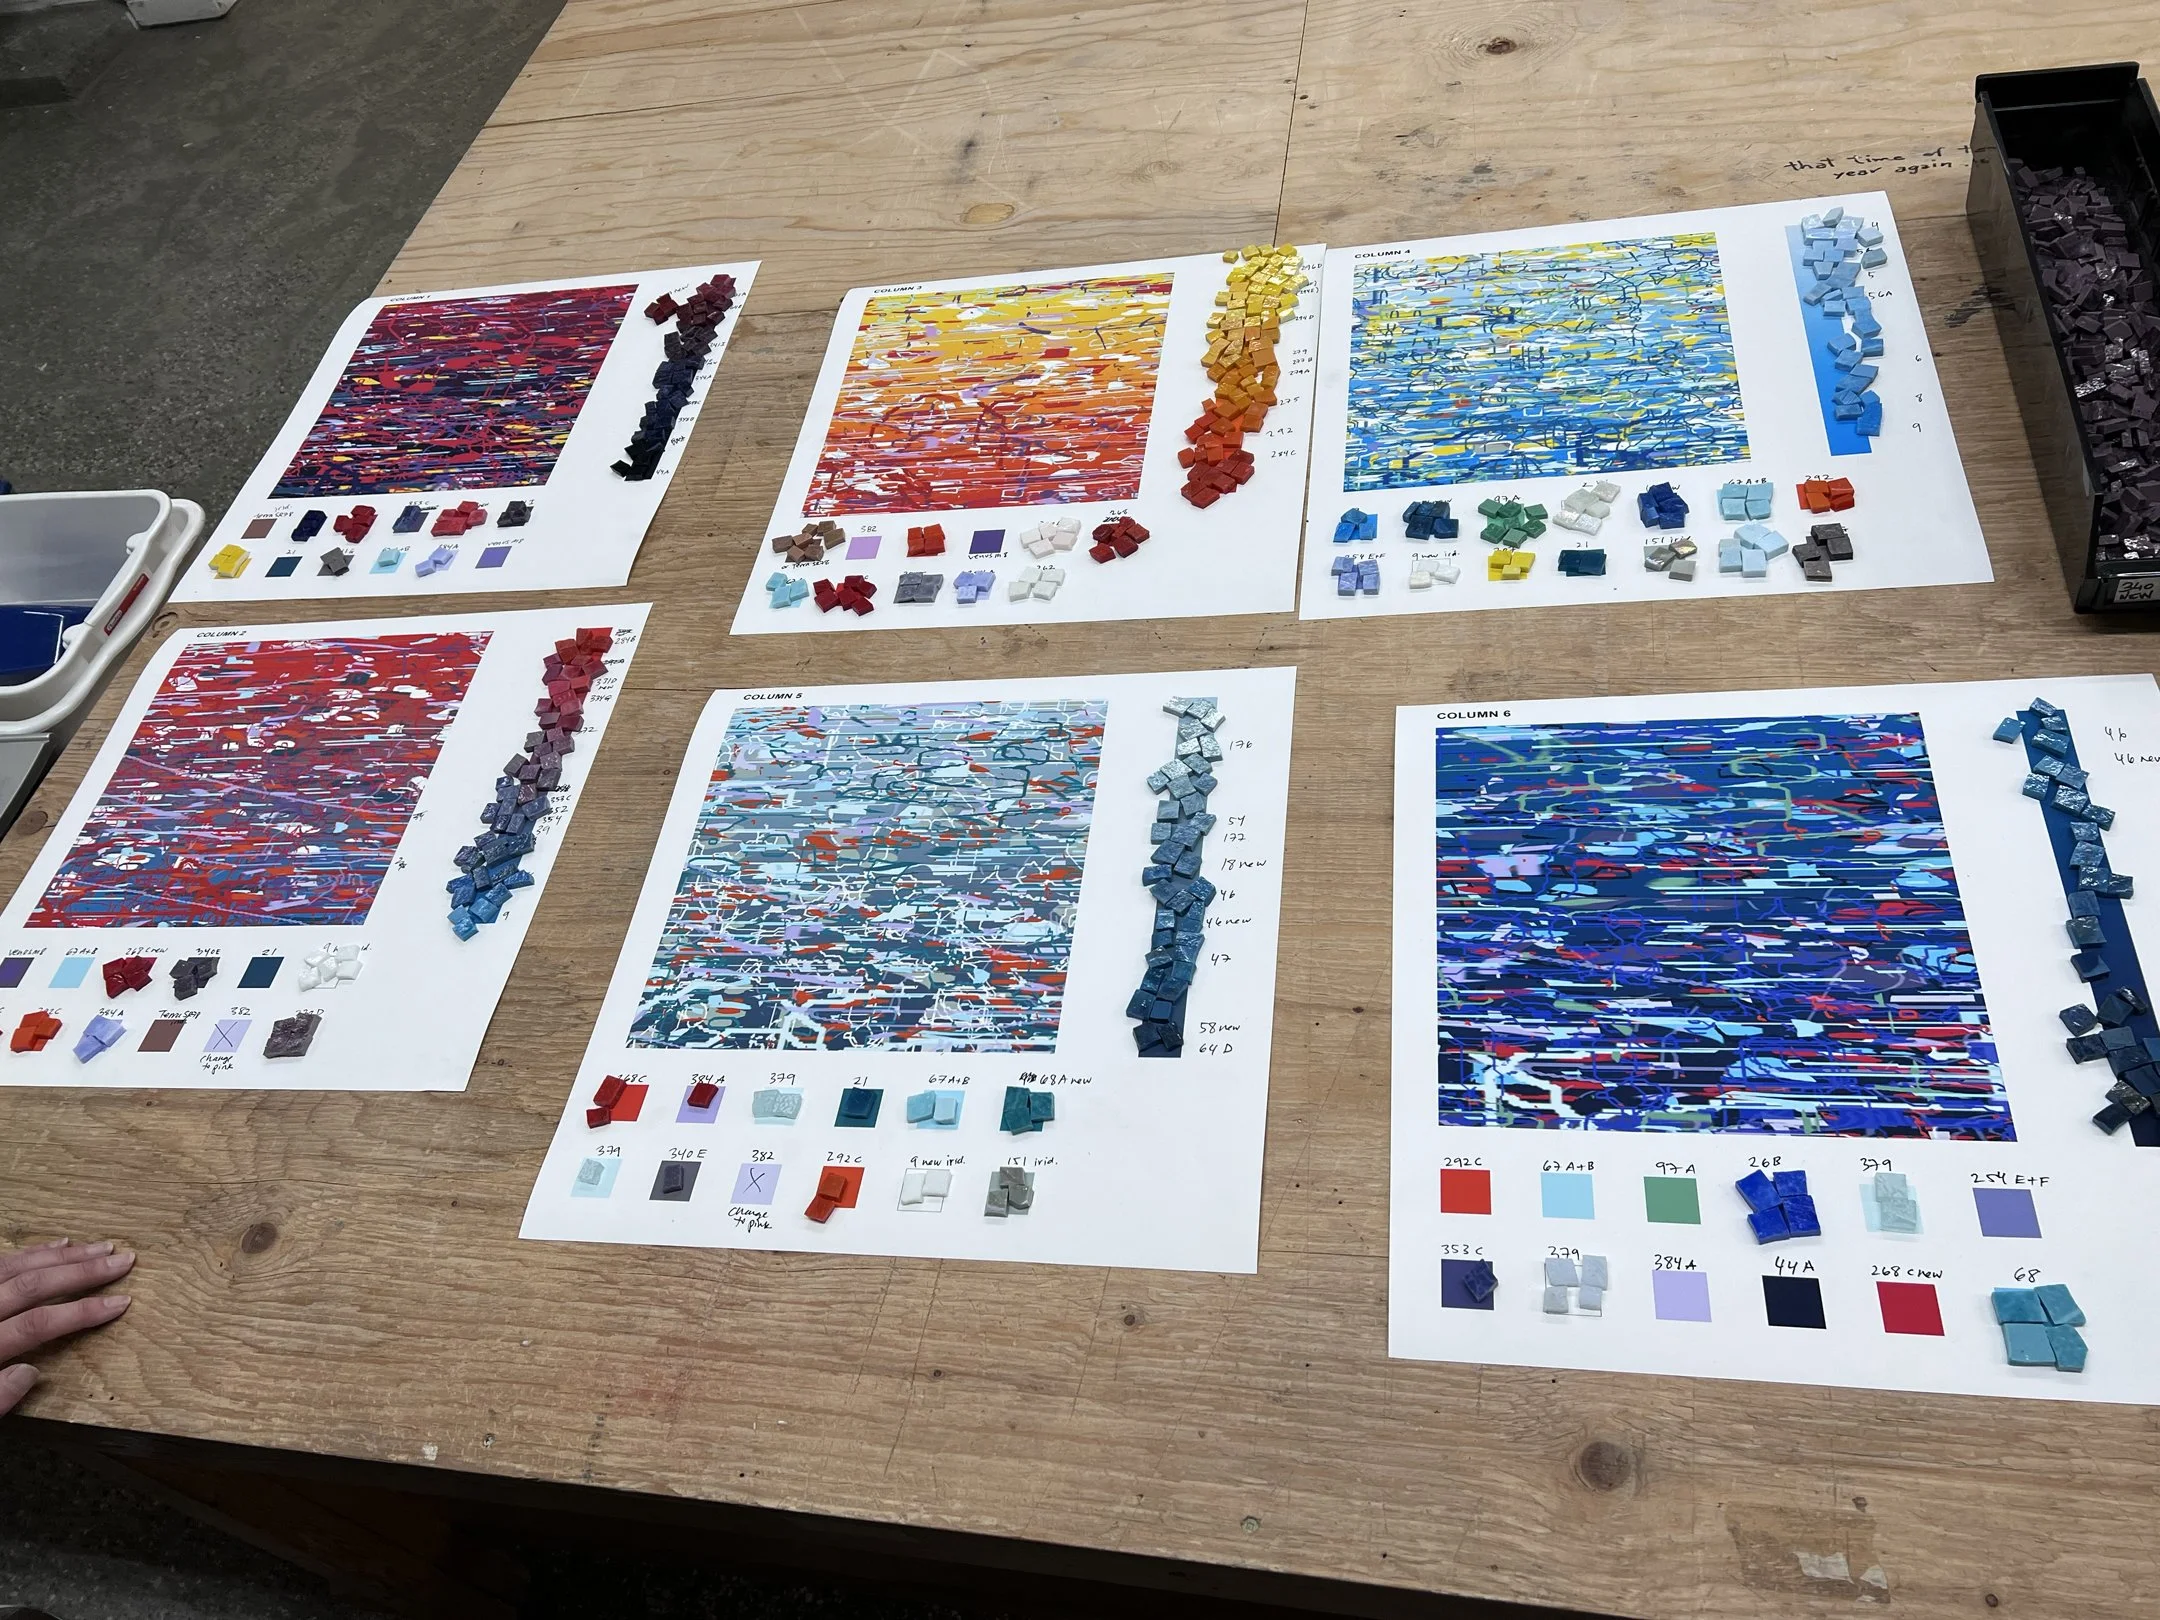
After two days in the studio, we had determined the palette for each column.
At this point, I could catch my breath a bit. Once fabrication begins, usually the artist doesn’t have too much to worry about, especially when you are working with such terrific fabricators. However, we still had to finalize the floor design. I had thought a lot about some kind of wave design, but we didn’t want it to be too heavy handed. There was a lot of back and forth.
I started with the idea of simple lines.
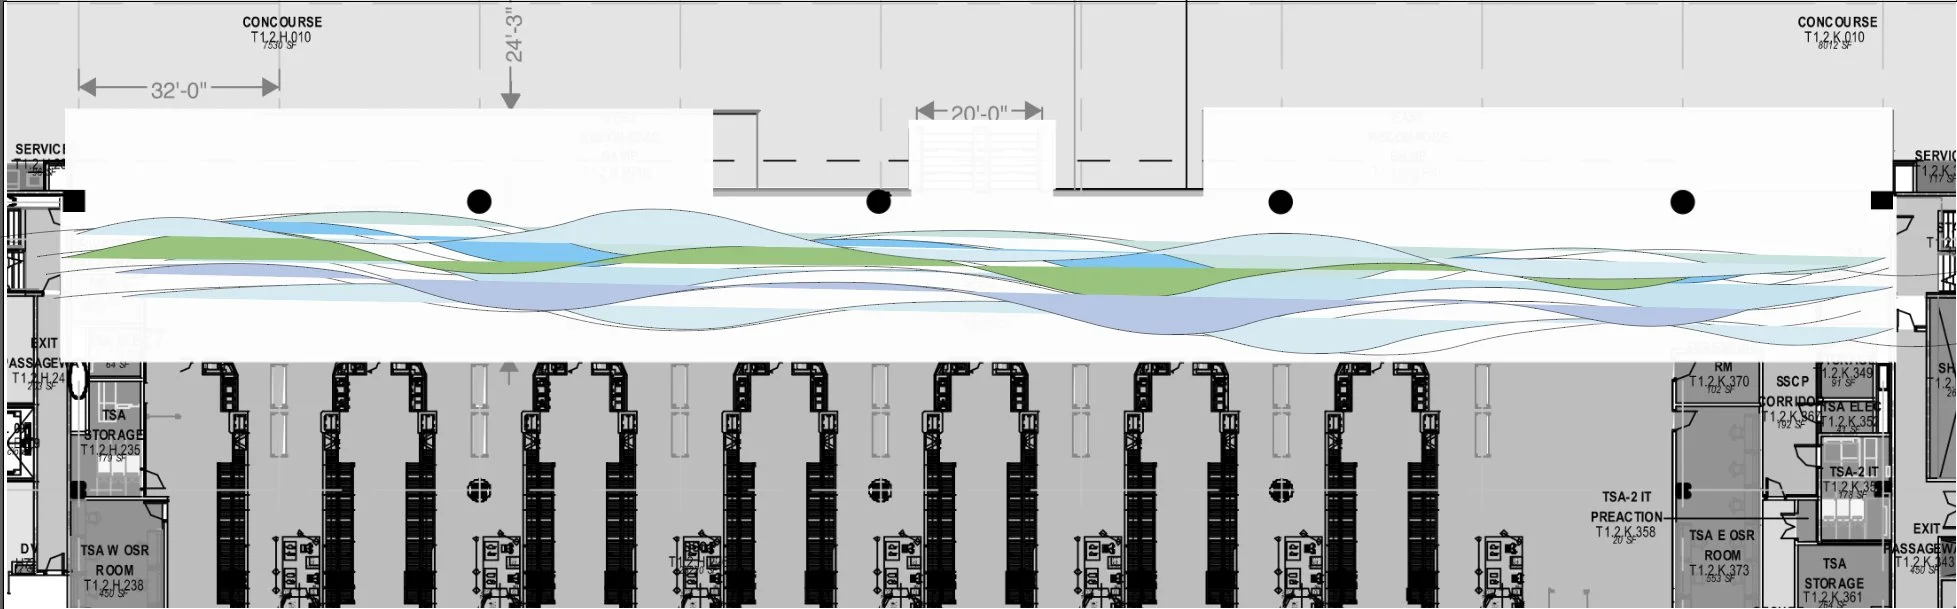
…and then did a few different variations…

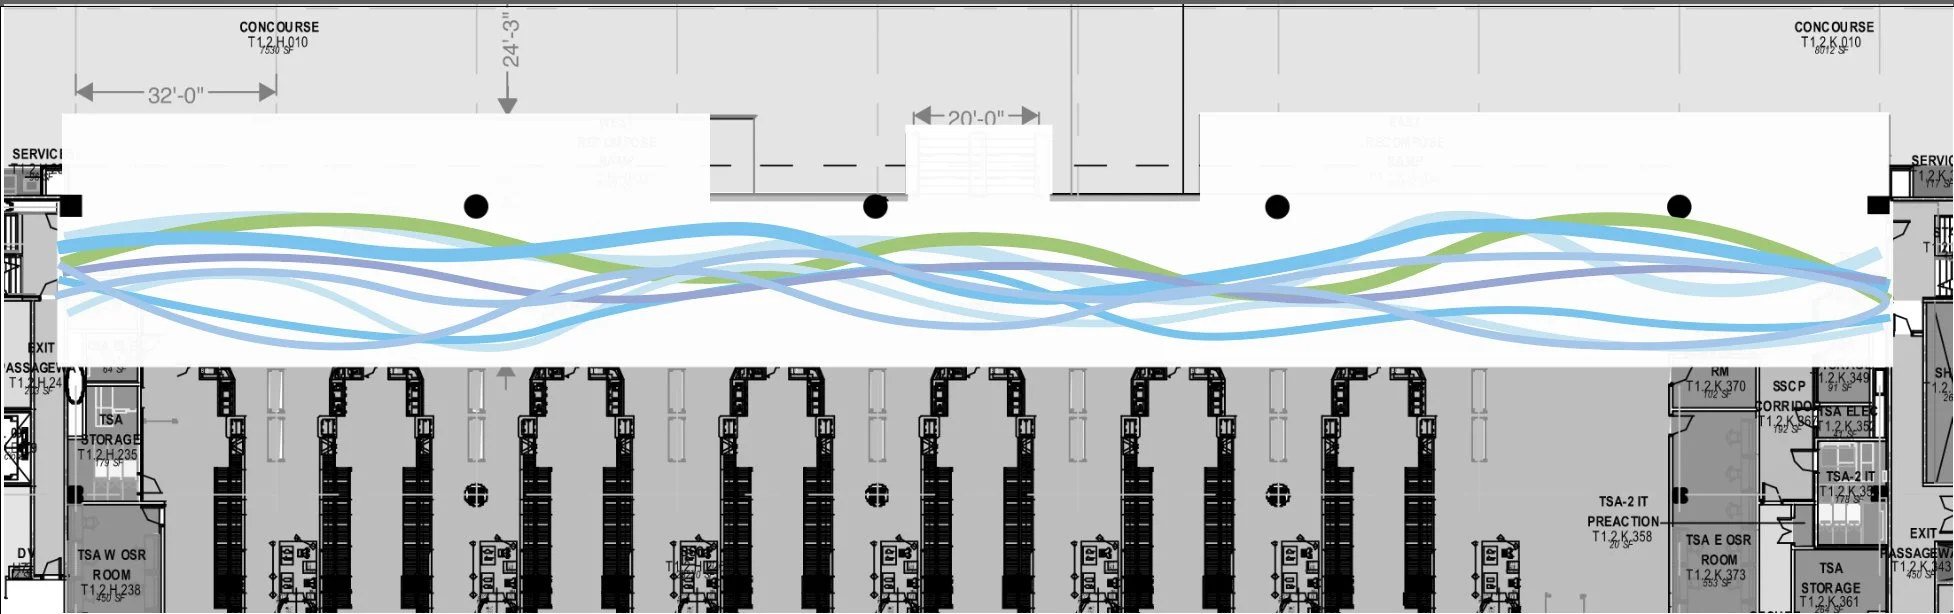
I went back to the drawing board a few times. The bad news is that sometimes you must rework an idea a many times to get a good result. The good news is that, if you have a good team, it becomes a real group effort to find at the right solution.
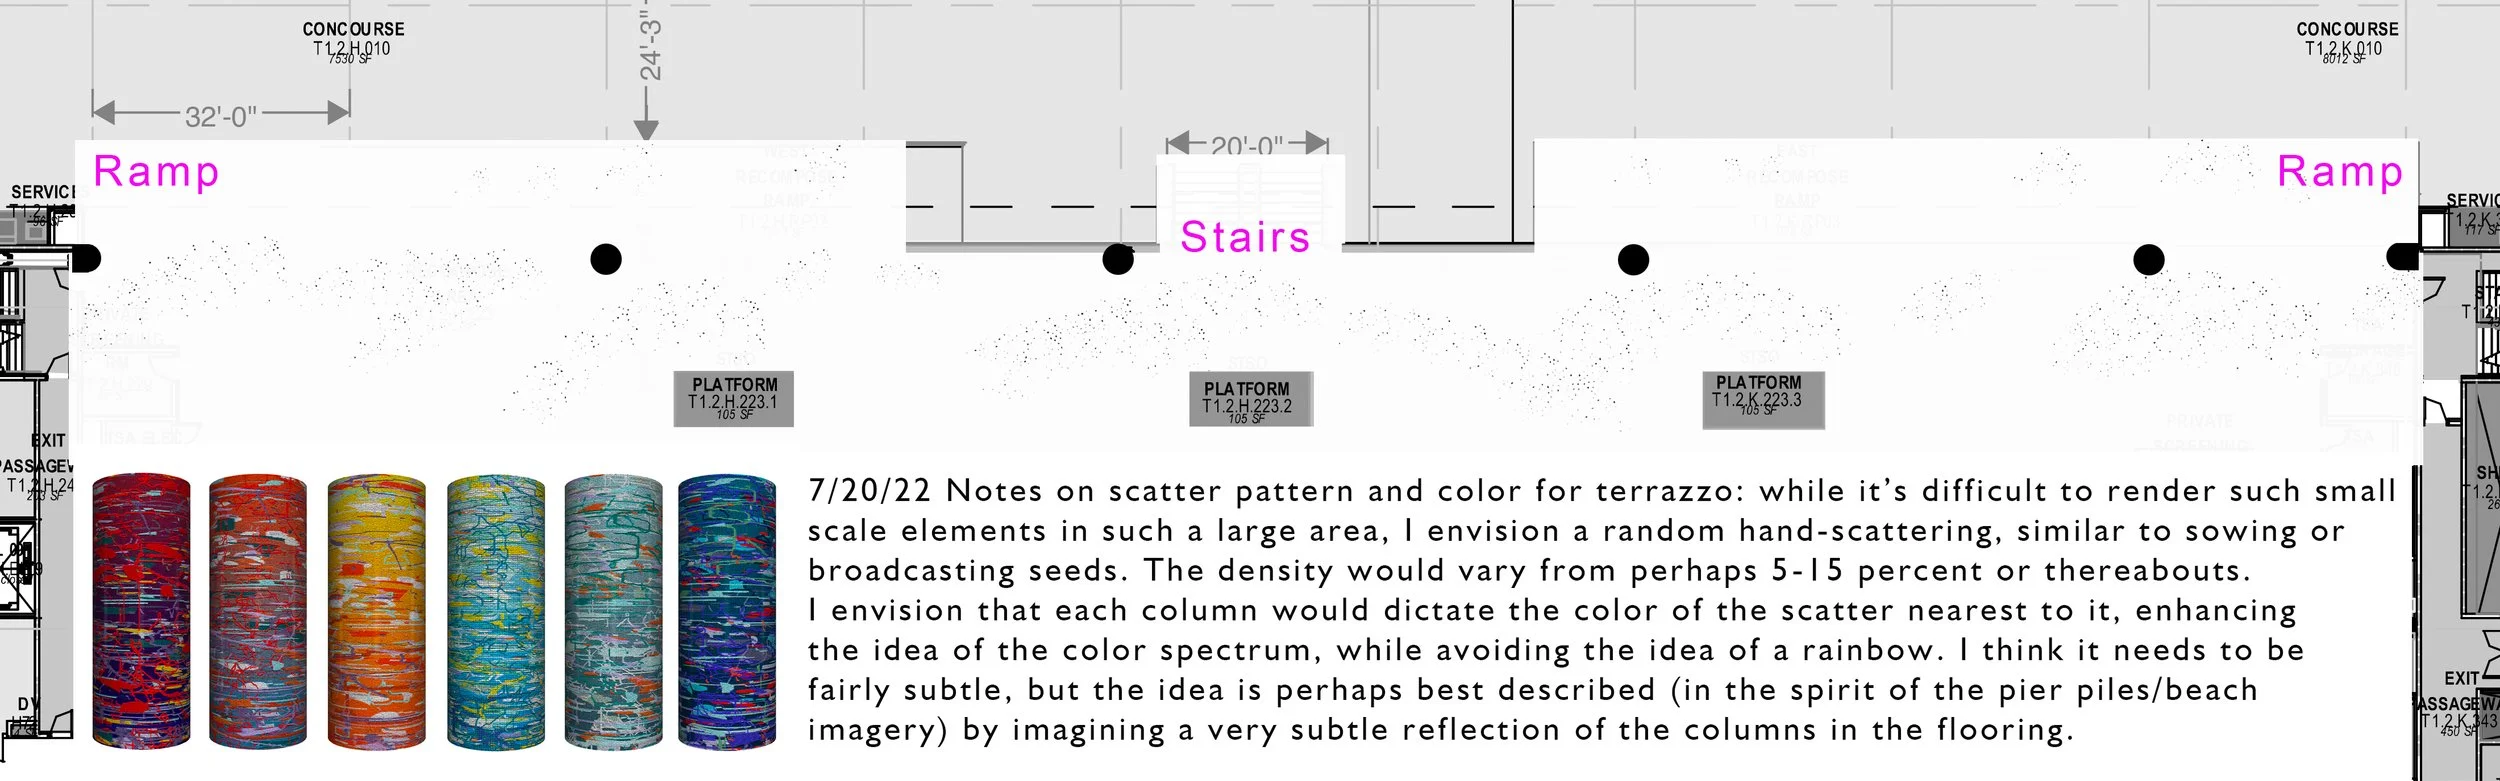
We arrived at the idea of a very subtle scattering of smalti glass (matching each column, and flowing in a light gradation) that give a sense of “shells on a beach.” I thought a lot about the tide, the waves on the shoreline, and the way the water interacts with, say, pier piles. This sounds like a pretty simple idea, but it was incredibly challenging to execute. Usually, terrazzo floor colors are set apart by zinc lines, or separators. But in this case, we wanted to create a very subtle gradation, going from 5% to 0% in the terrazzo mix. This involved a team gathering at Corradini Corp. in Costa Mesa, and two days of testing various methods of calculating, pouring, sprinkling, and blending the smalti into the matrix. It was utterly fascinating and, once again, I am incredibly lucky to work with such amazing fabricators.
My printed mockup of a 5% - 0% gradation of smalti within the terrazzo matrix. In the back ground, 4 x 4 foot samples of terrazzo matrix, waiting for the application of smalti.
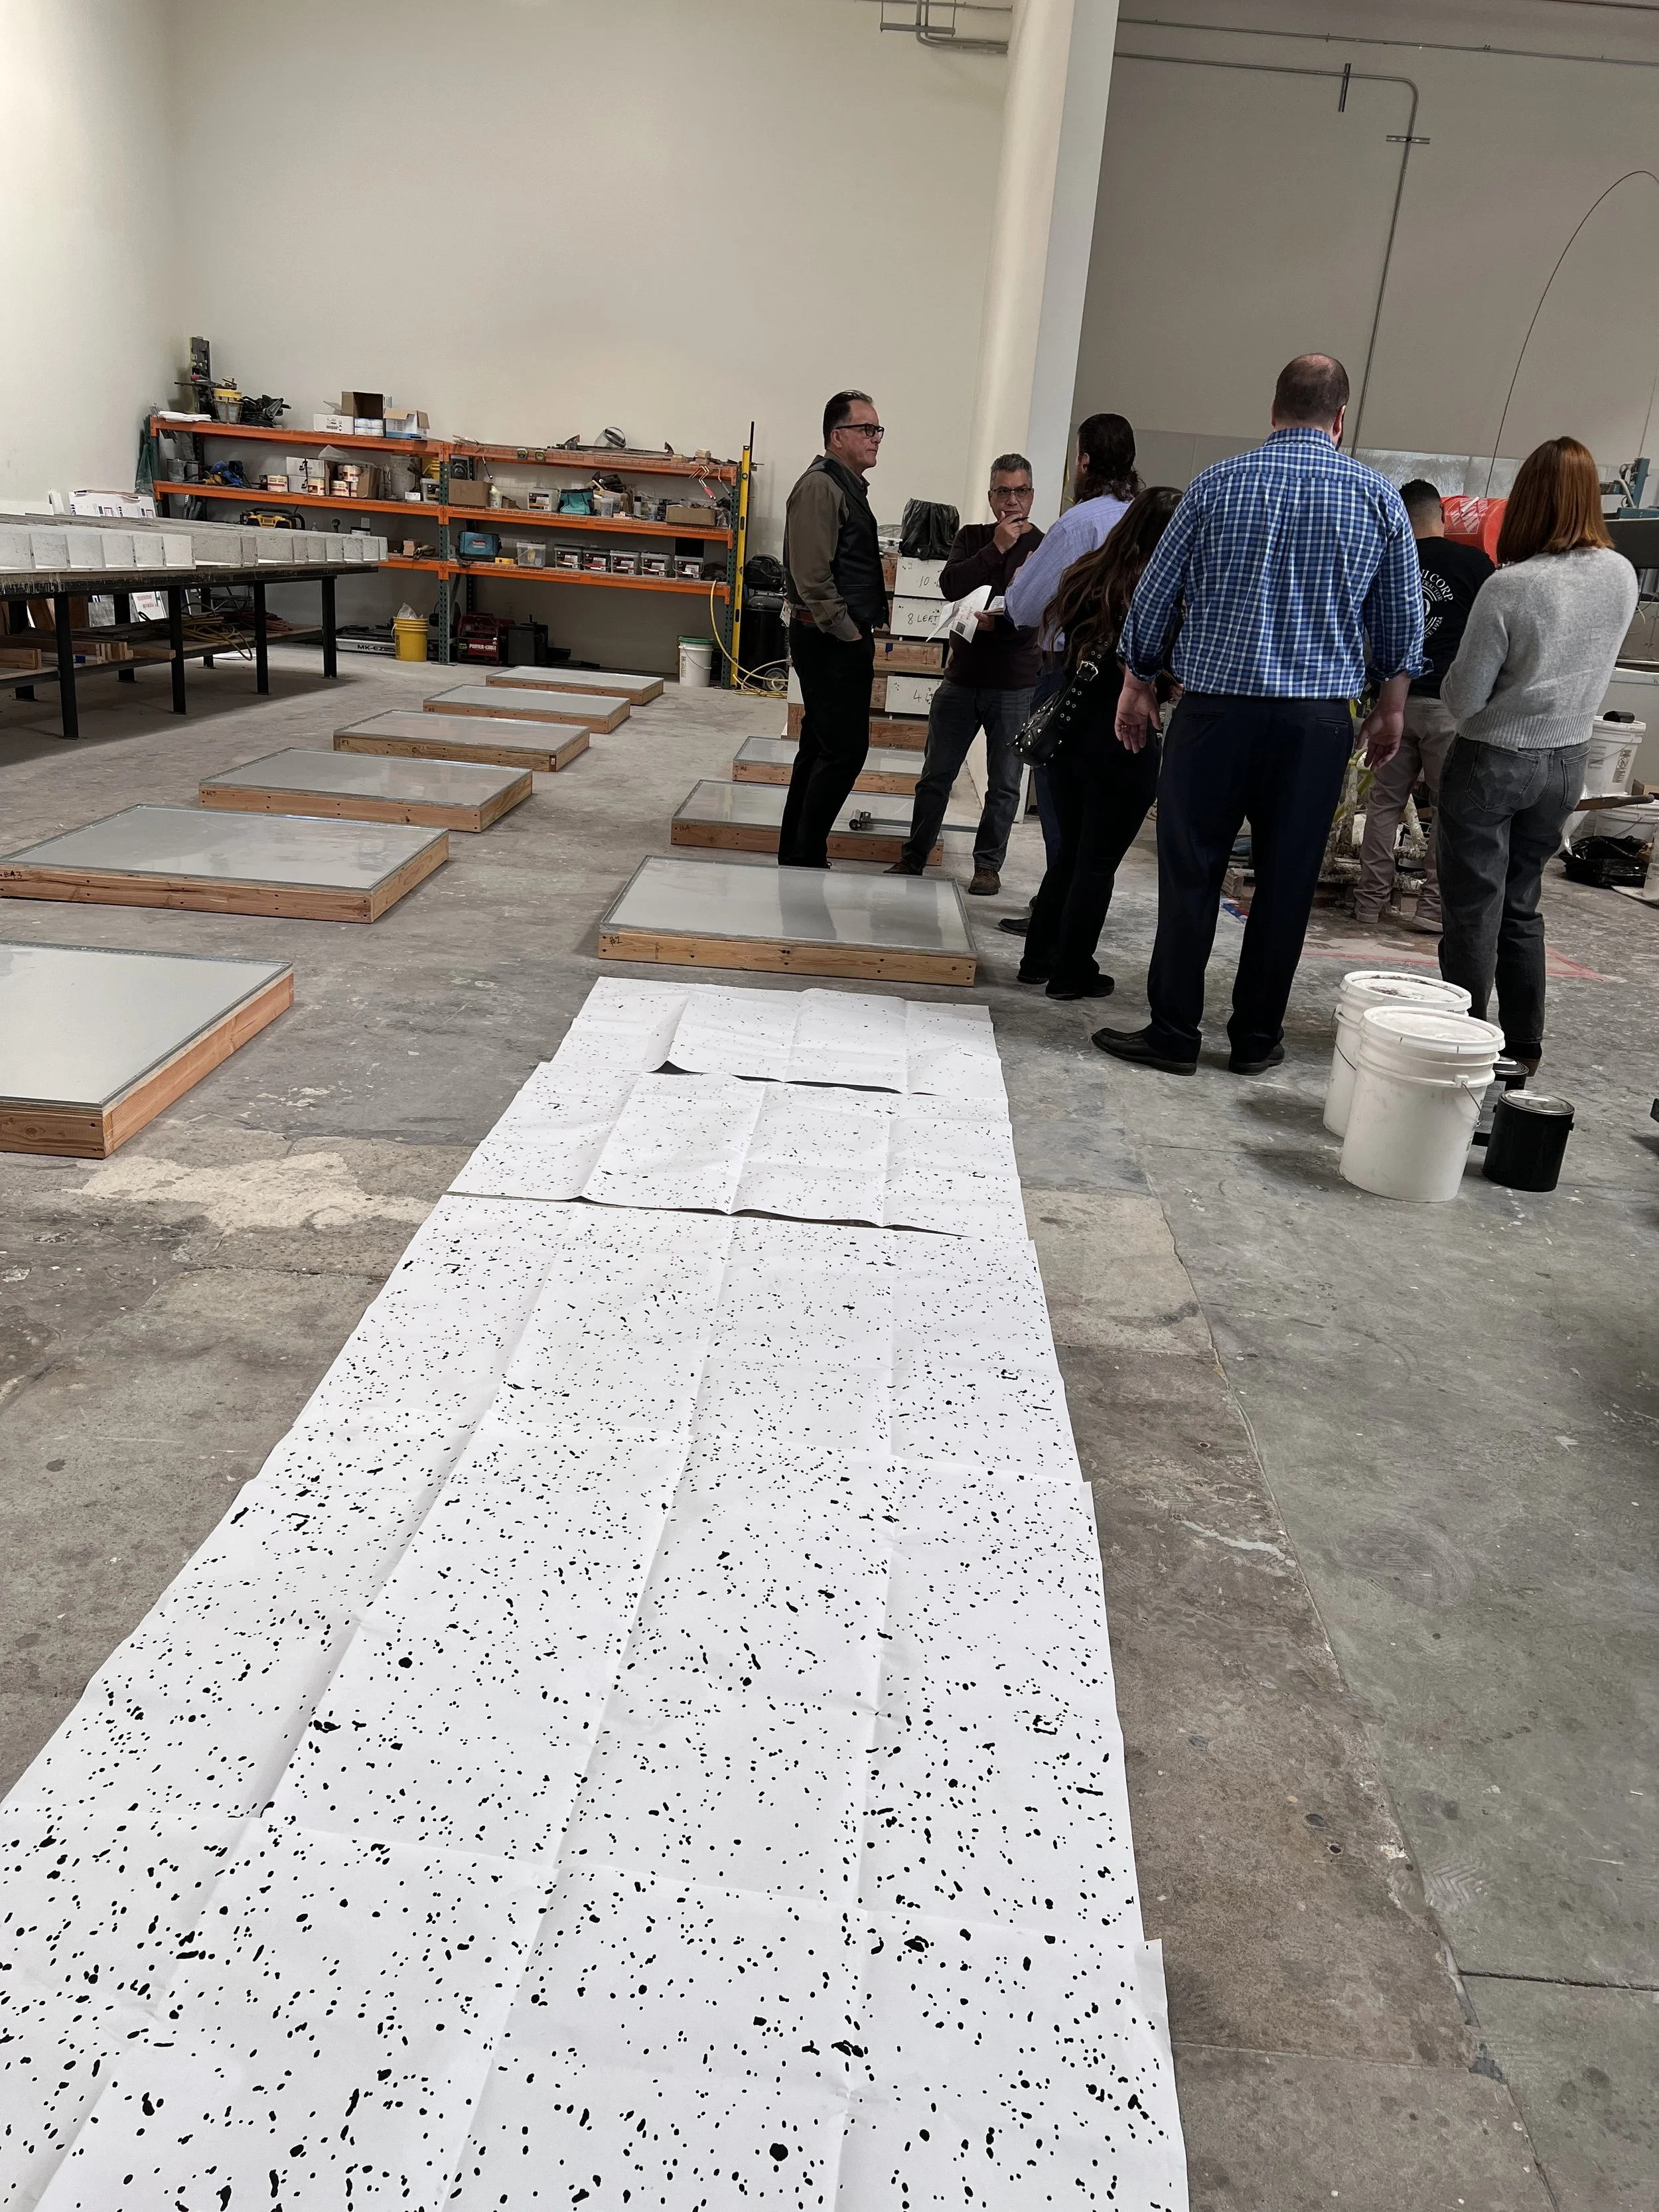
After two days of testing, we felt confident in our plan to execute the gradient without the use of zinc dividers. Corradini calculated how much material we would need, overall, and we consulted with Mosaika to get the correct blend and quantity of each color for each column. It required a lot of “art math.” In addition, we were adamant that the smalit not appear confetti-like… so each piece of smalti had to be broken up by hand in advance.
Terrazzo matrix with assorted smalti glass mixed in.
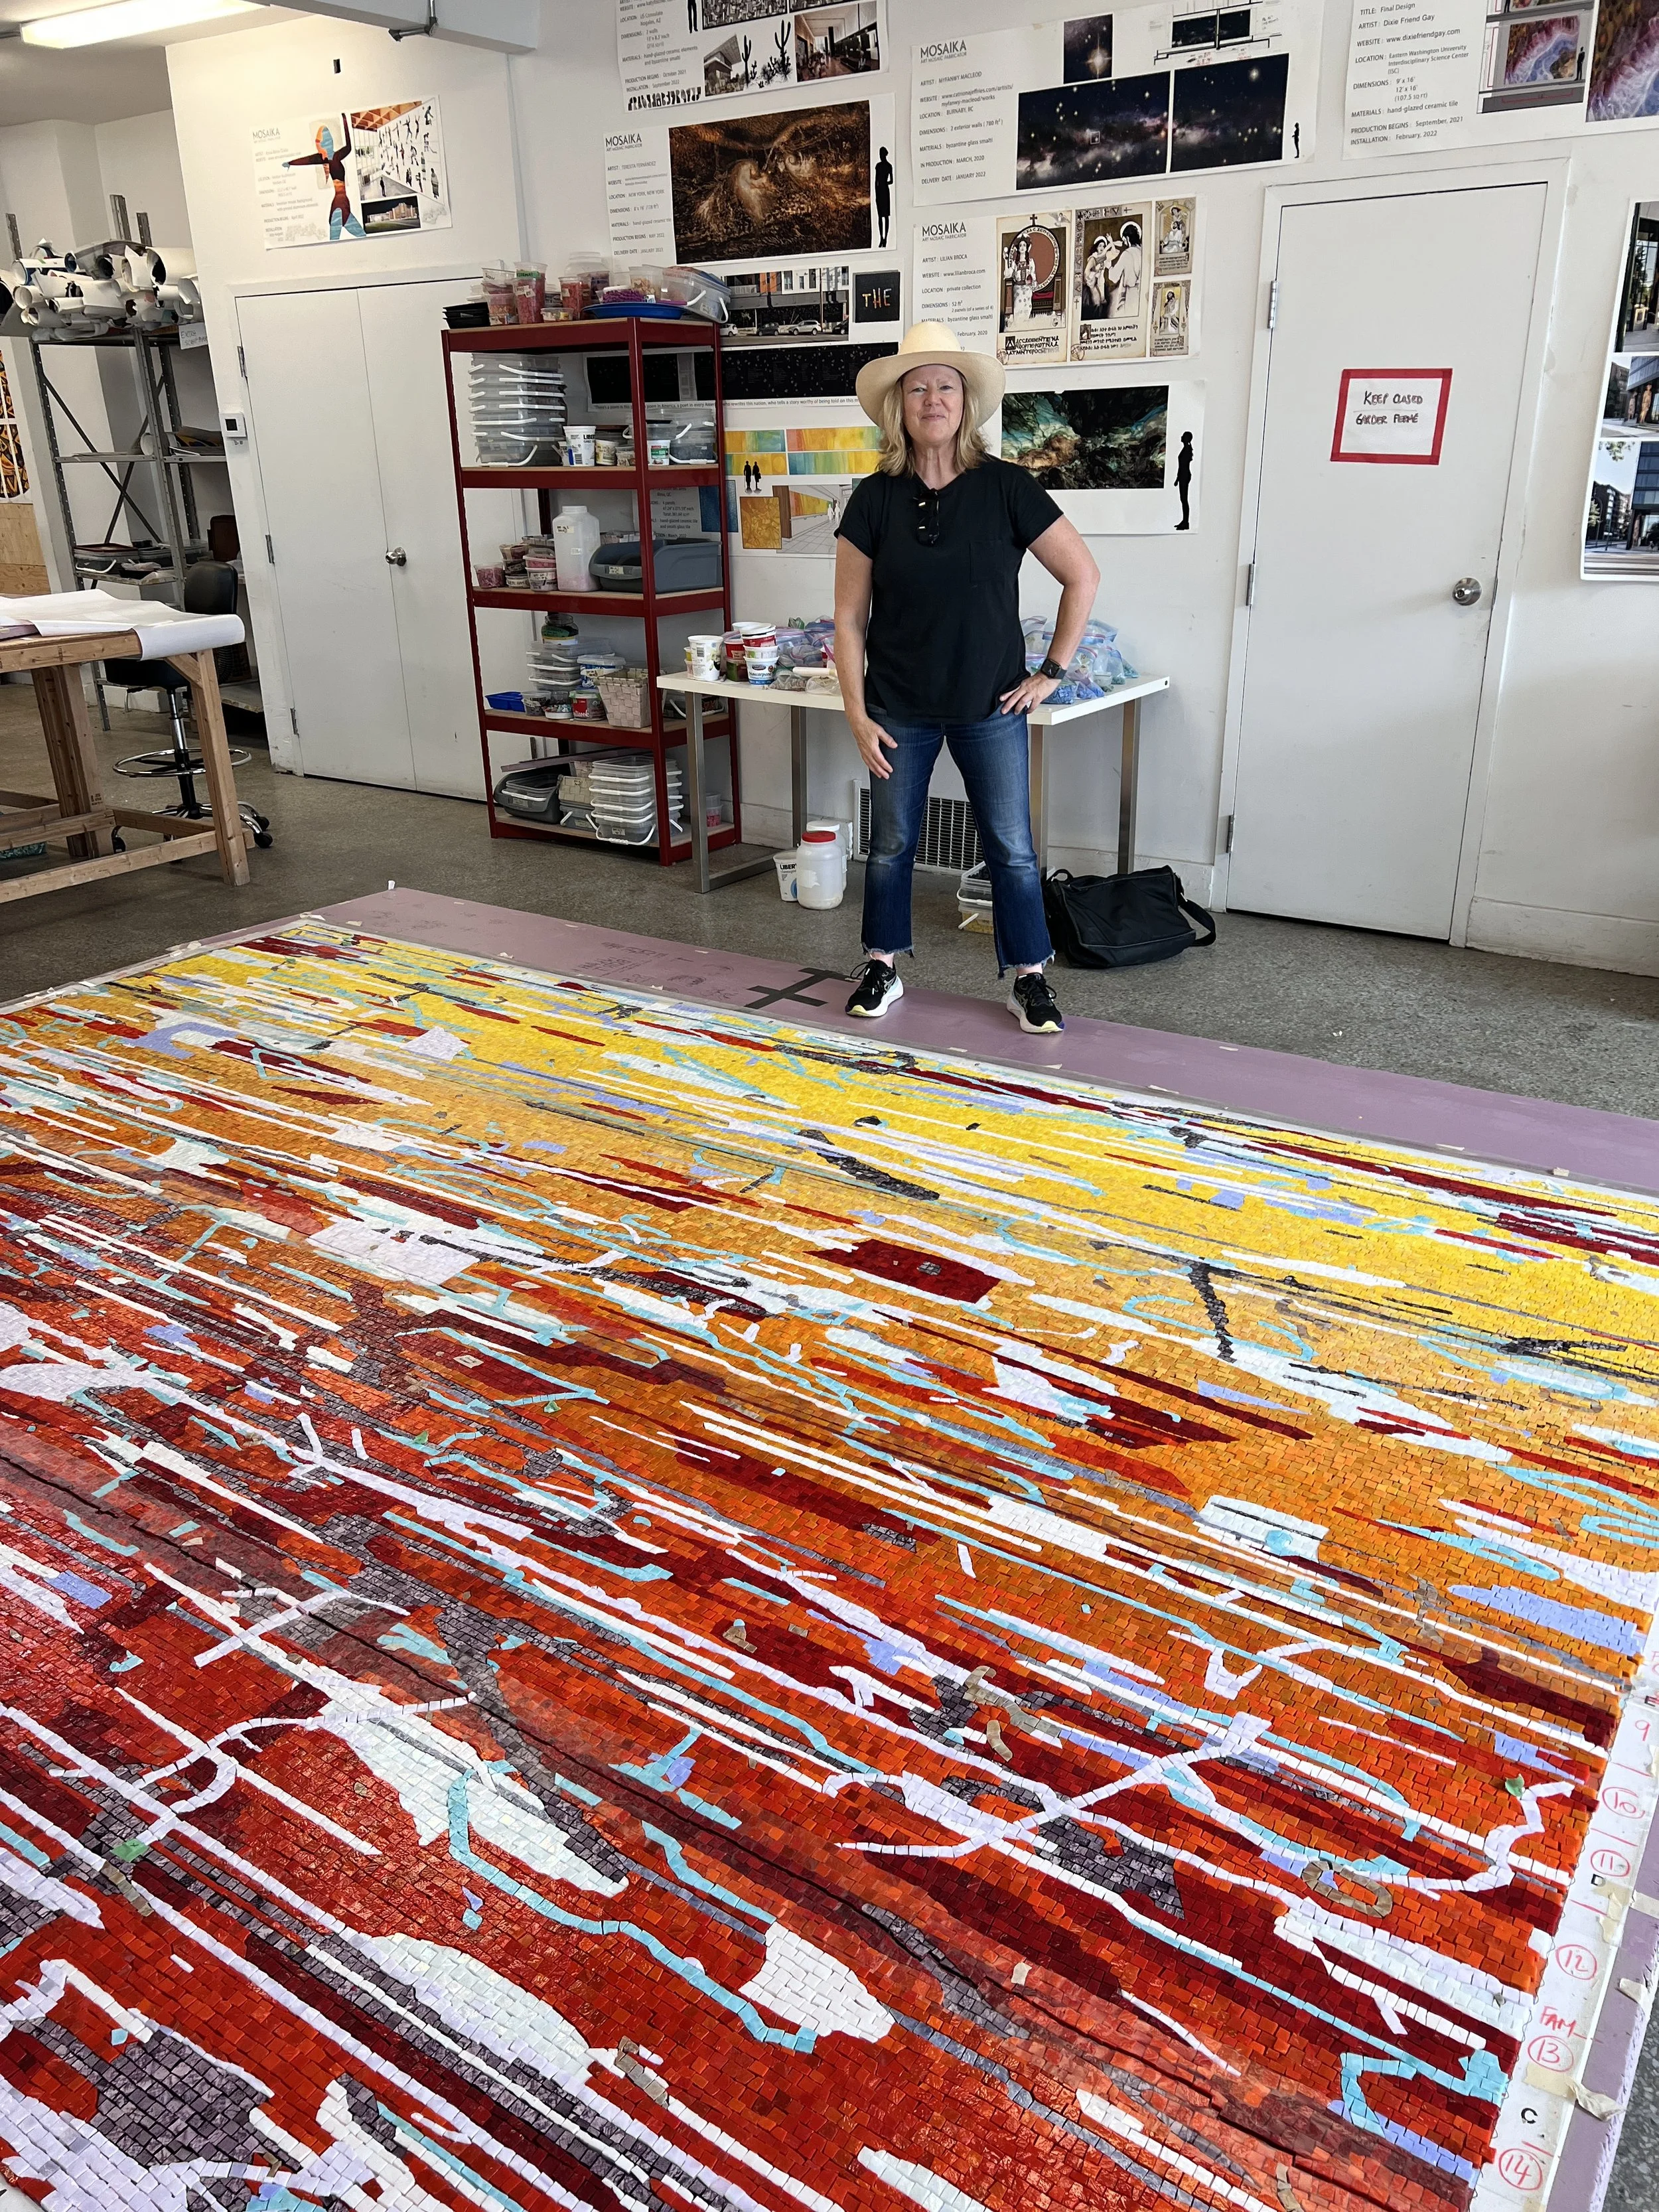
In July 2024 I went back to Montreal to do the final mosaic check at Mosaika. Typically, artists visit Mosaika’s studio twice during a project— at the beginning, to figure out the palette and esthetic approach, and at the end, to approve the work before it gets packed and shipped. Both visits are incredibly inspiring. It’s so exciting to see how Mosaika’s artists have interpreted the designs, realizing the project in this most beautiful and ancient medium. Sometimes, a few small corrections are made, which requires the artisans to walk on the mosaic in their stocking feet, picking out problematic sections and then rebuilding them. Finally, each mosaic is officially approved and set aside until it’s crated and shipped. As always, it’s fun to see what other projects they are working on, and ogle at all of the gorgeous materials in the studio.
Progress shot of a mosaic being pieced together
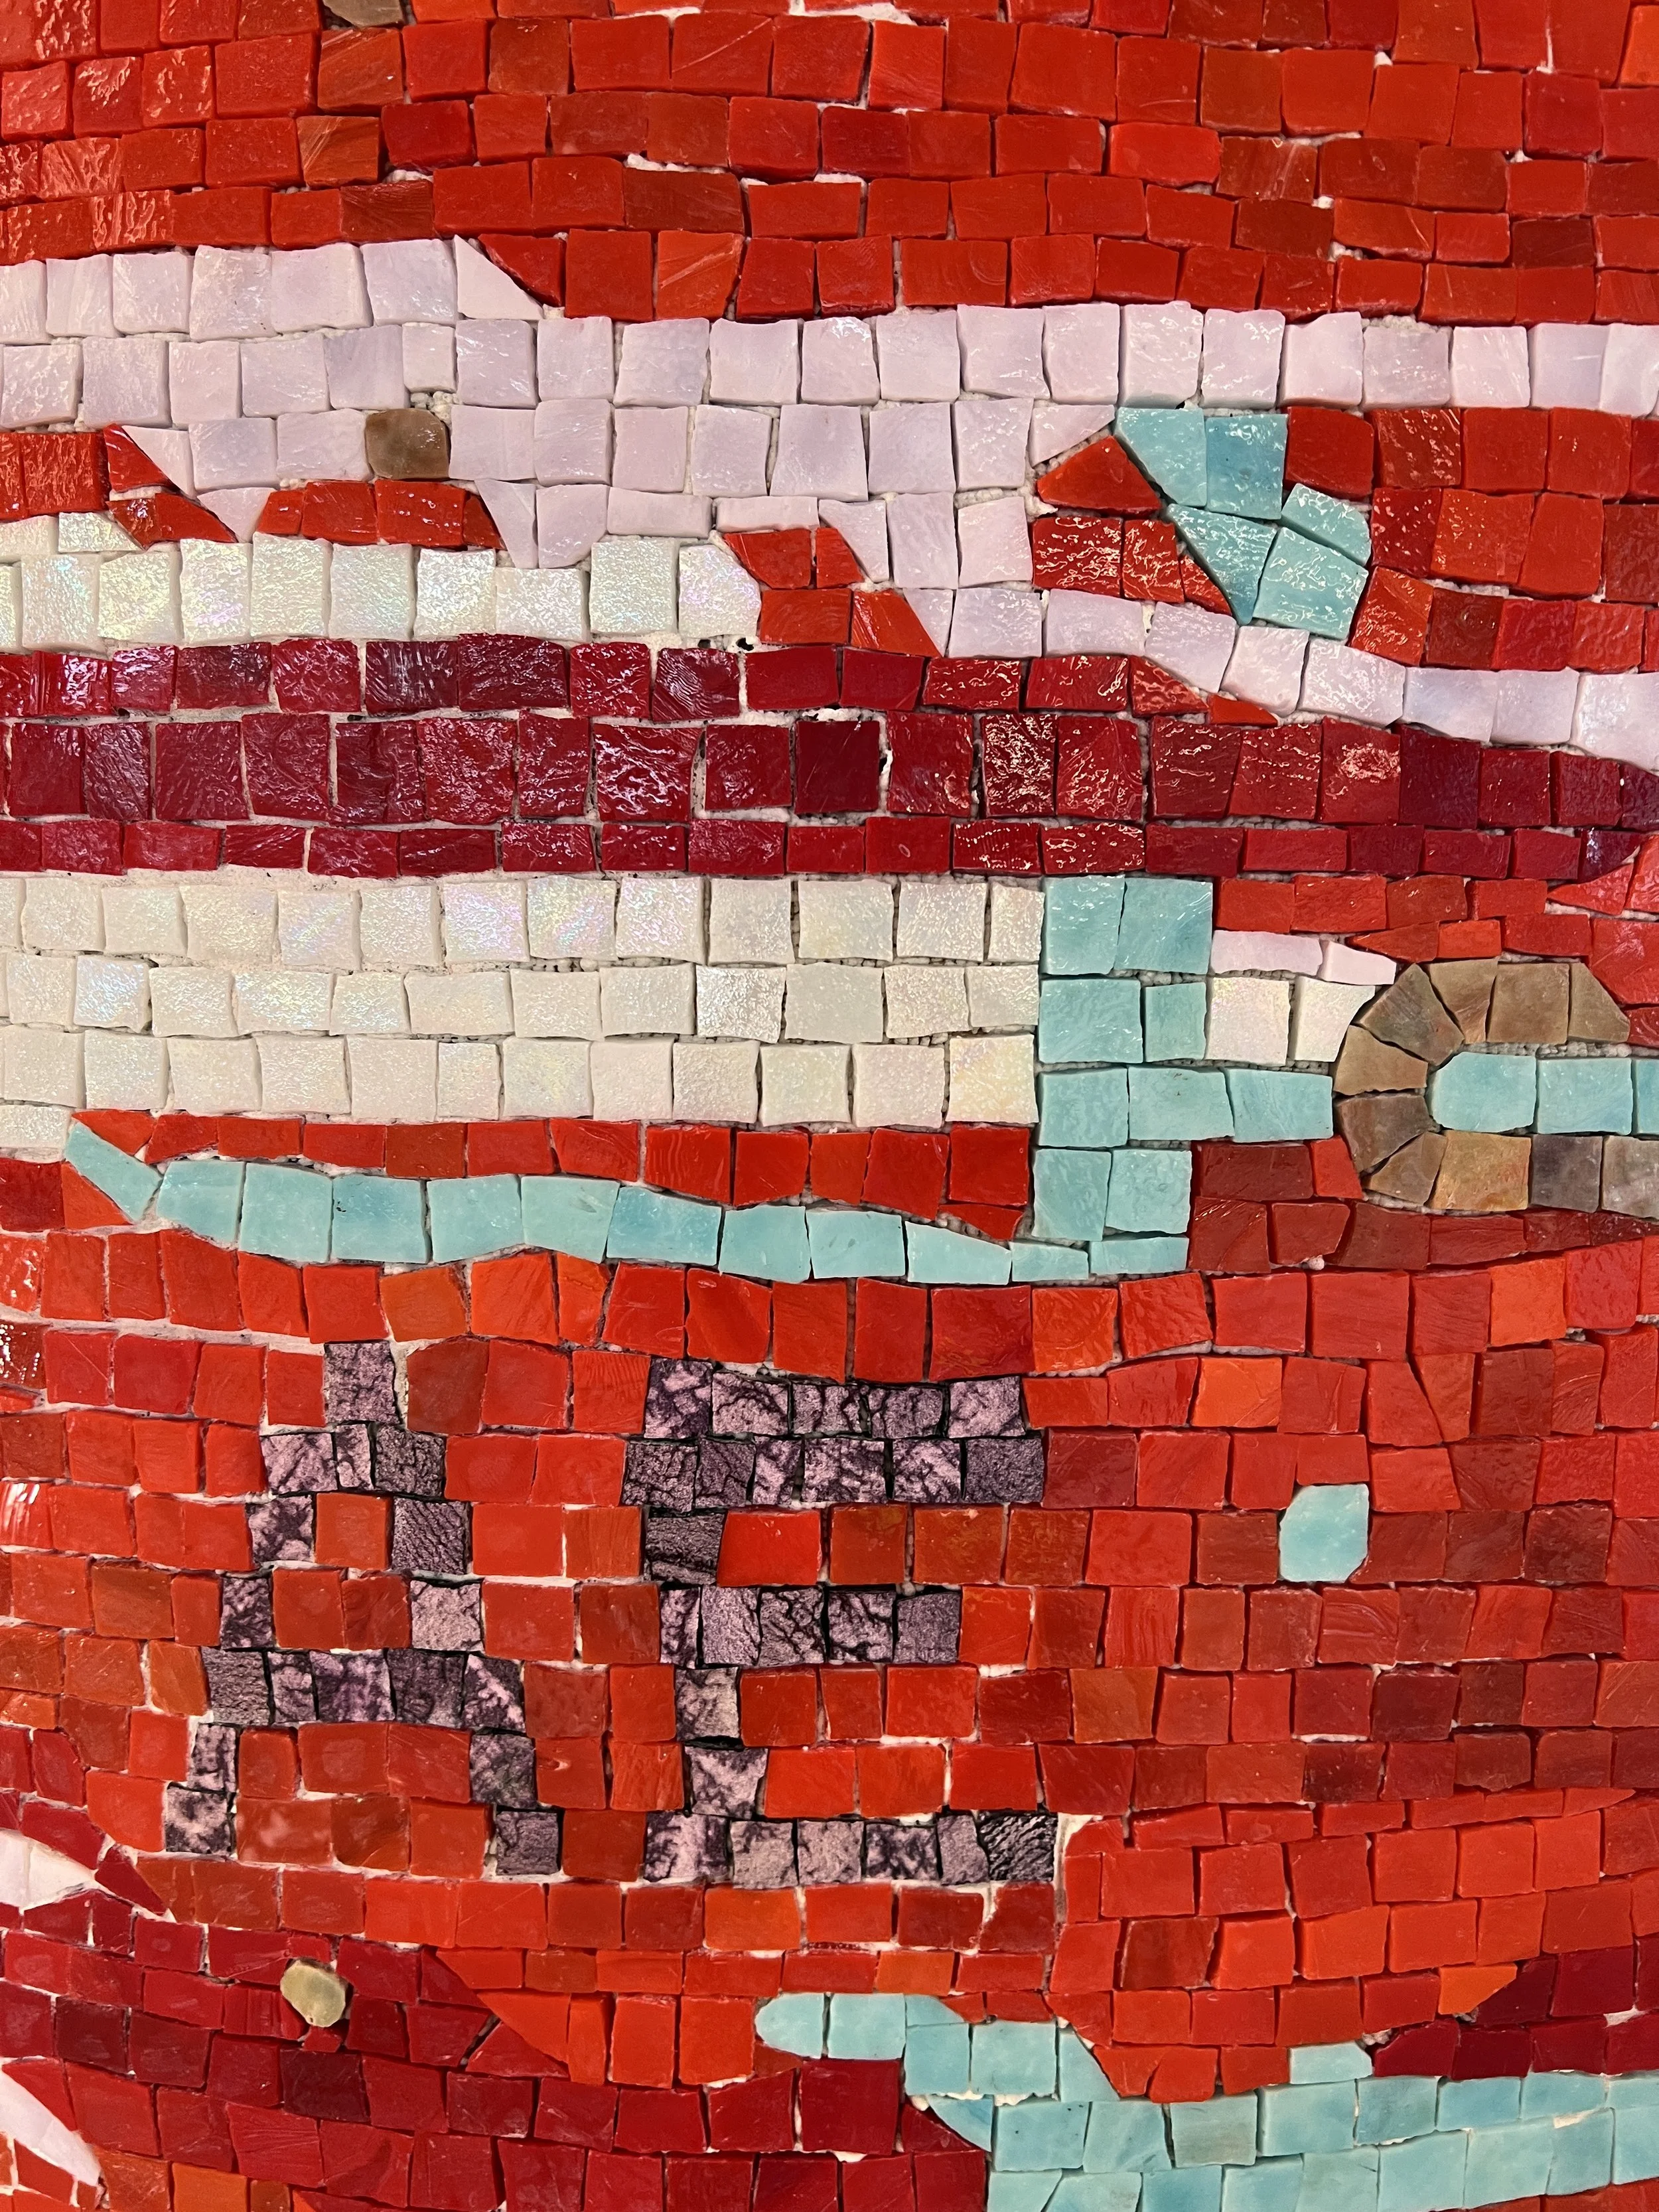
So much rich variation within each color!
This particular color appears in most of the mosaics. We tried to repeat a few colors throughout the group for continuity.
In Mosaika’s glass studio, thrilled with the results.
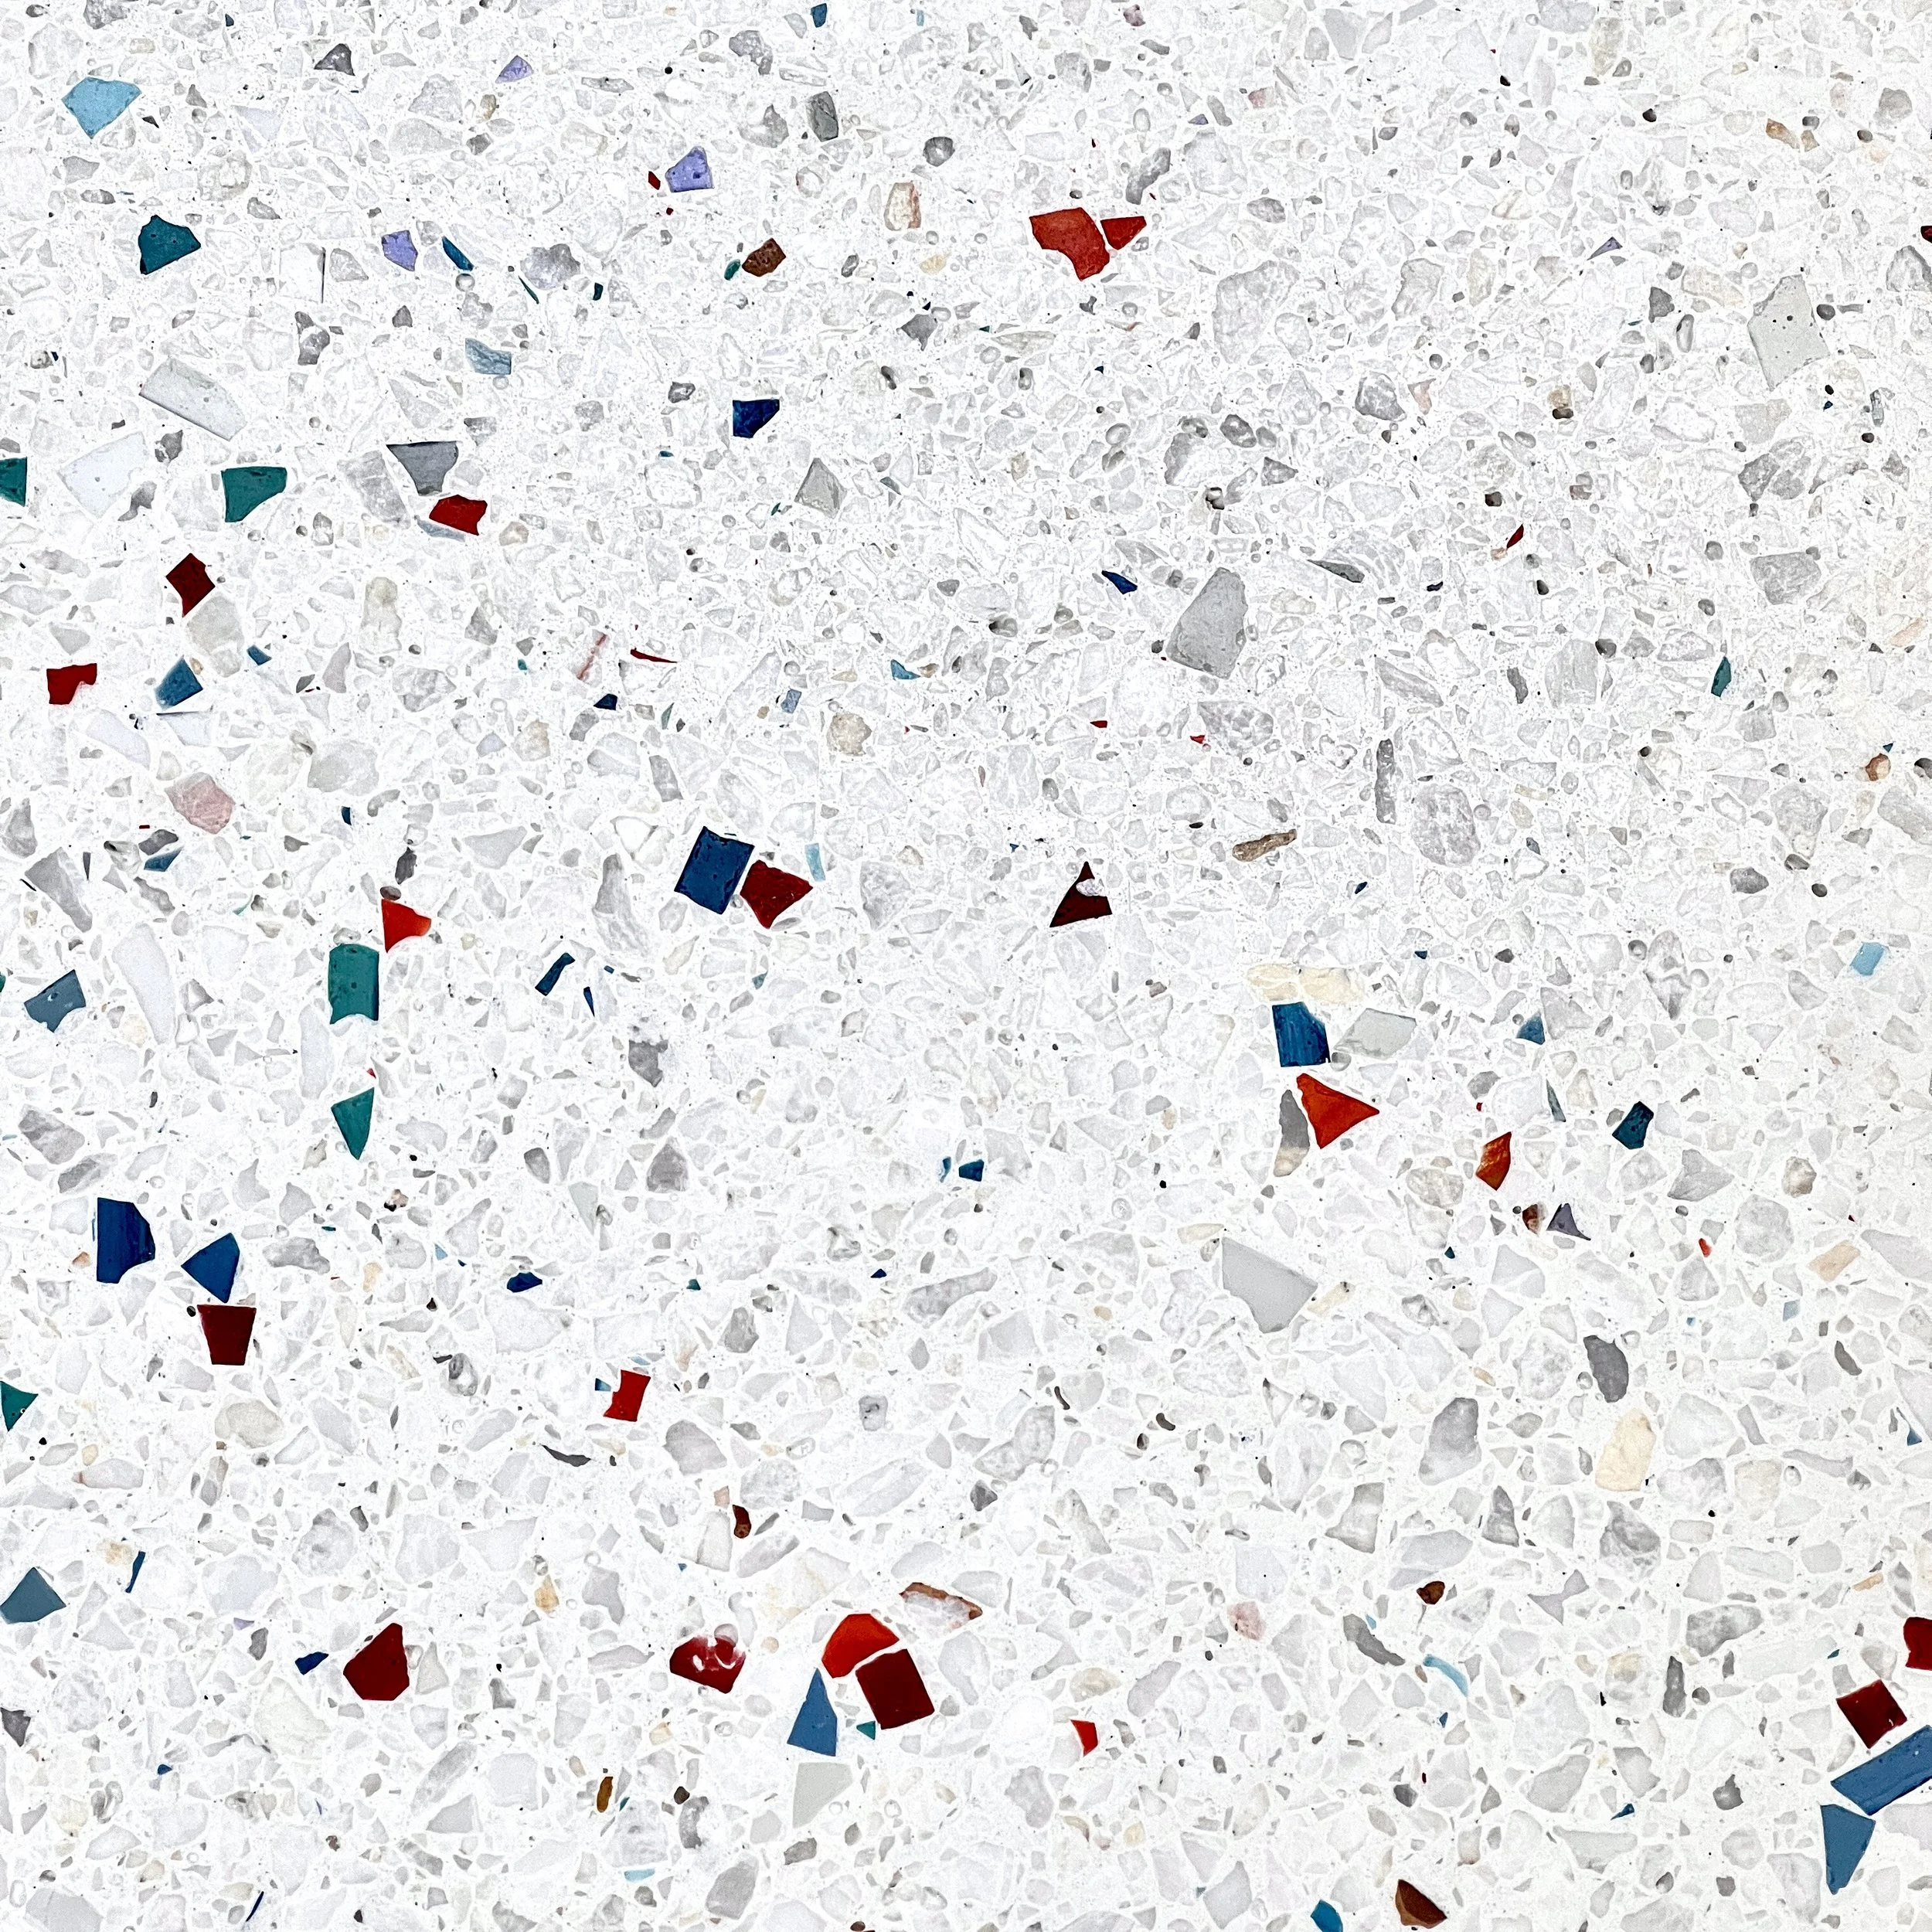
In late October, 2024, I went to San Diego to assist with the floor installation. Corradini’s team is incredibly skilled, and the work went fast, despite all of the complex mixing formulas, six different color palettes to match the columns, and the extra hand-casting of material that I would be doing myself. It had been decided that we’d add a bit more material directly around the column bases, bumping up the 5% to close to 10%— without overdoing it. In addition, I was to hand-cast smalti in the 1% - 0% gradation.
Hand-casting smalti glass into the terrazzo matrix
Once the floor was finished, the remaining step was to schedule the column installation. Whew! Almost there! Finally, in March 2025, installation began.

Moaaika’s expertly organized crating system,
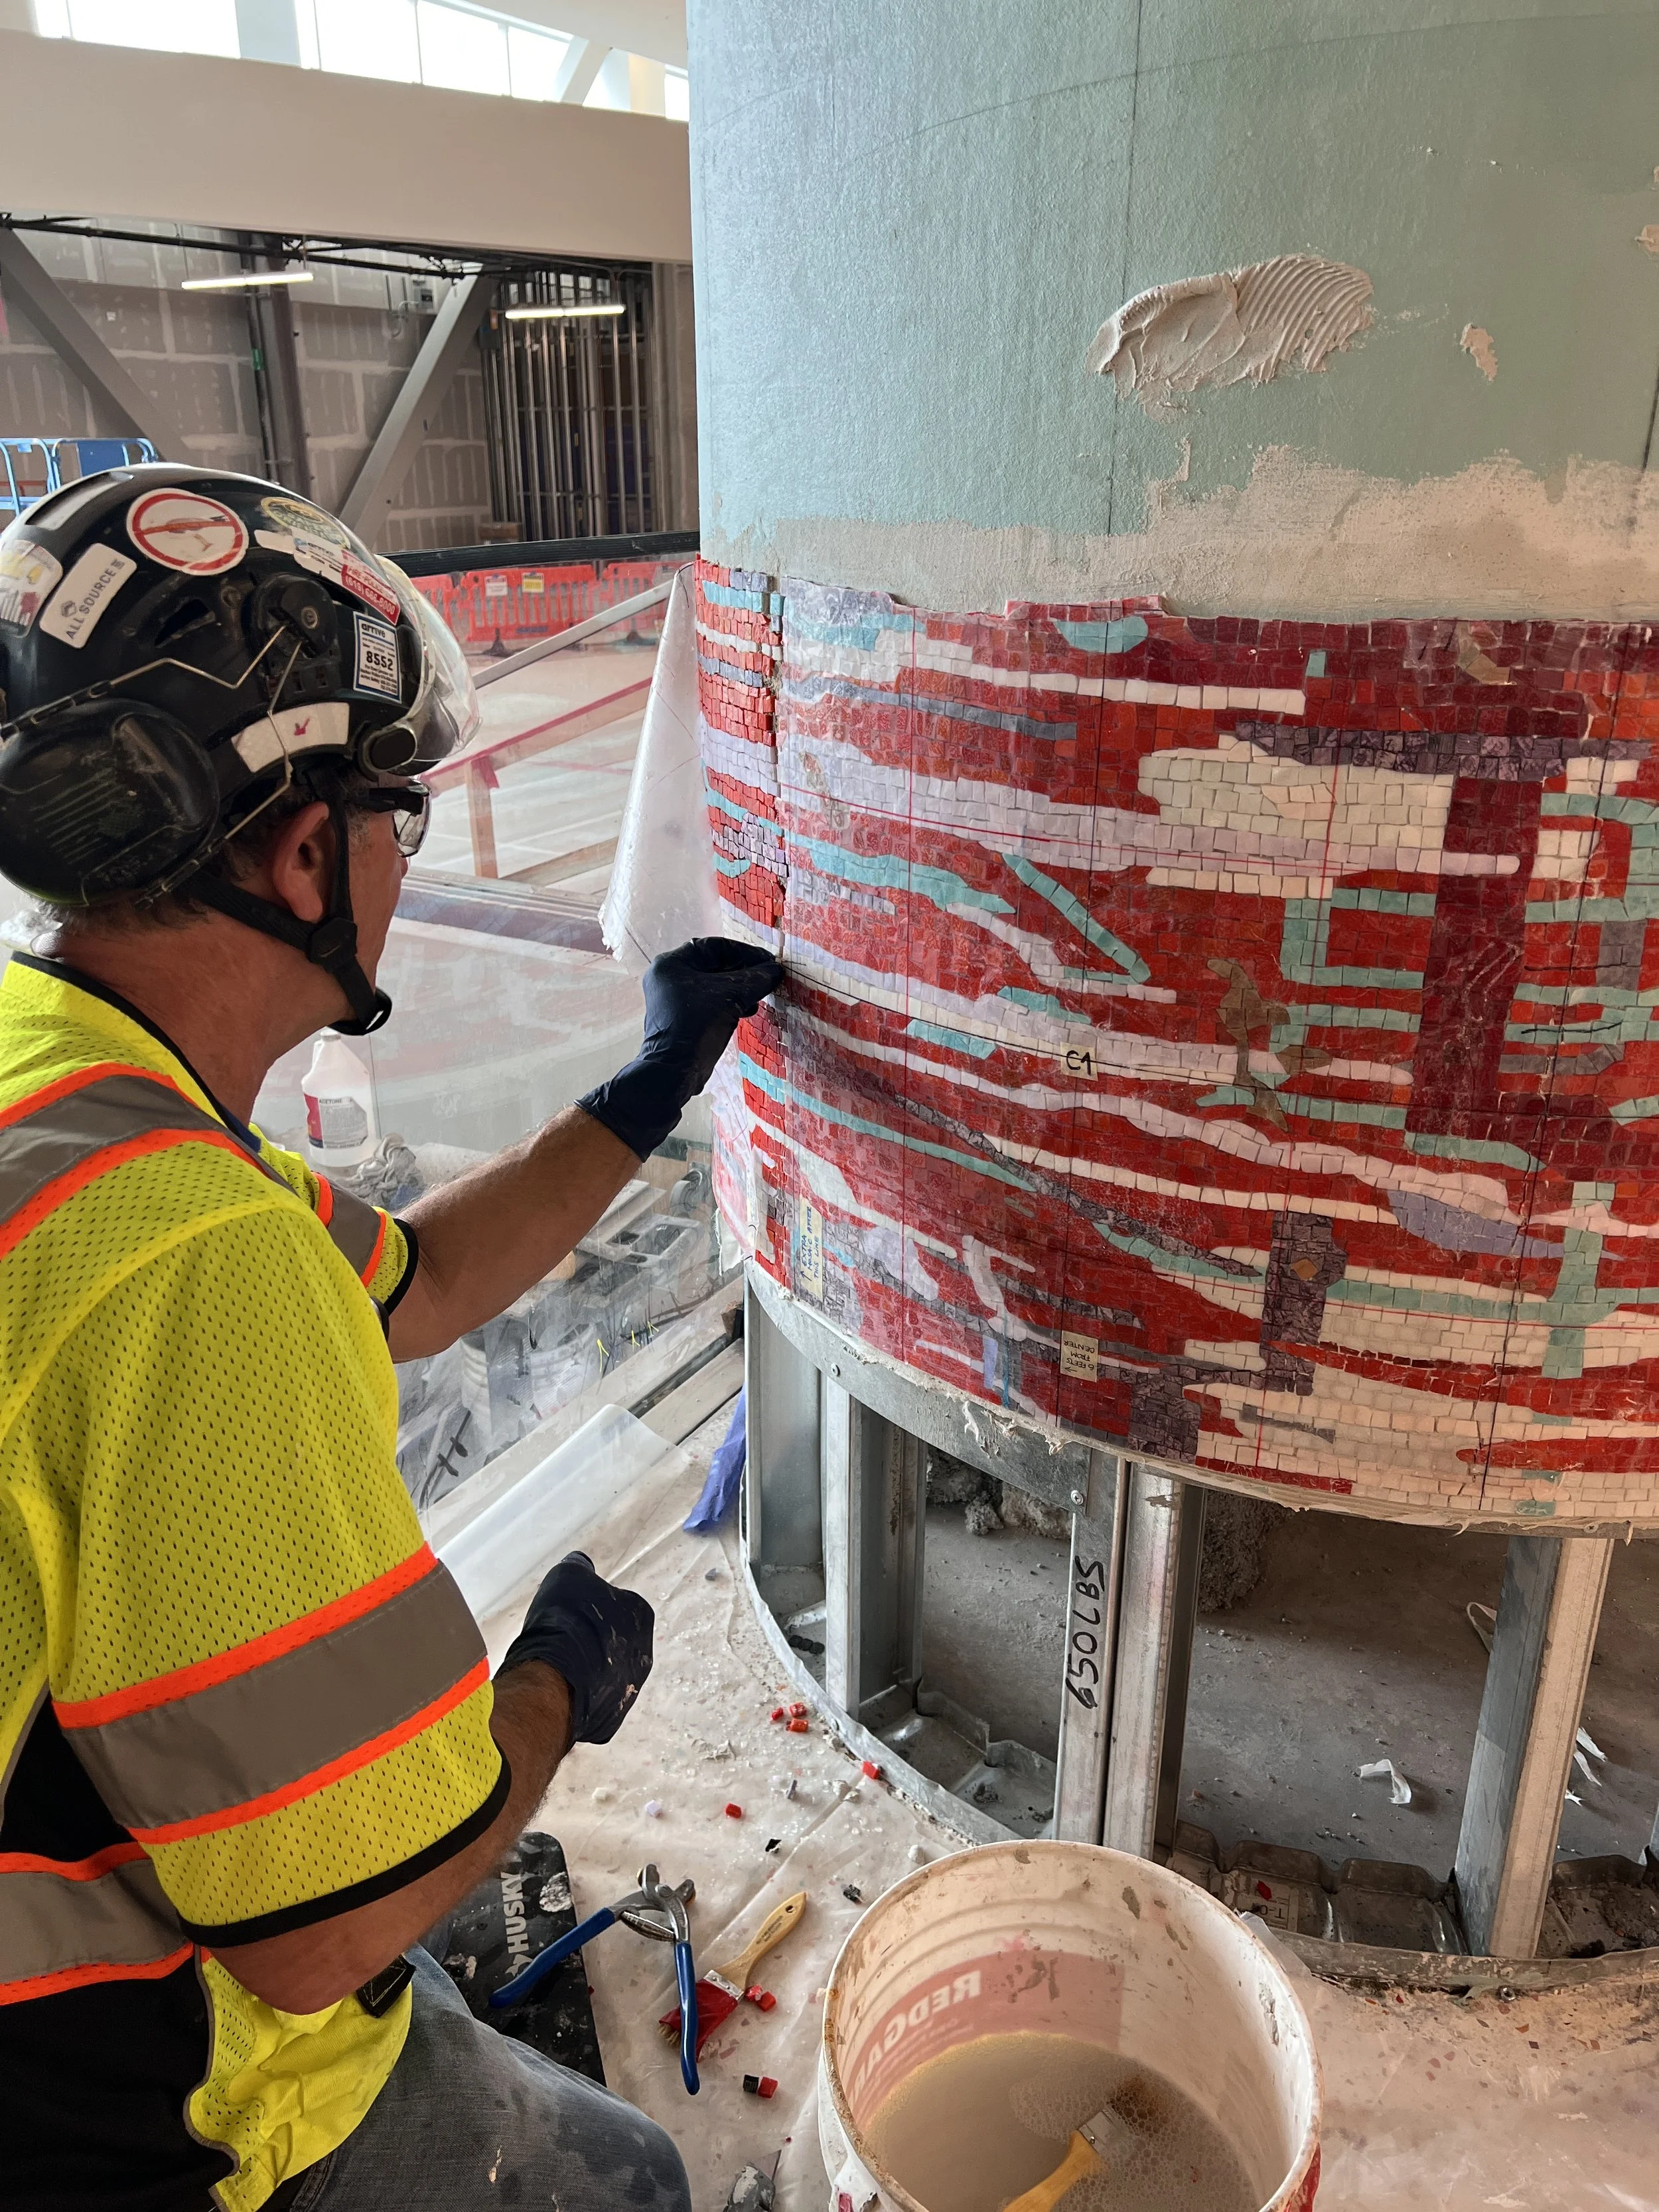
Applying small sections of mosaic to the mortar
Gotta get my initials in there, somewhere!
Applying grout to the surface of the mosaic
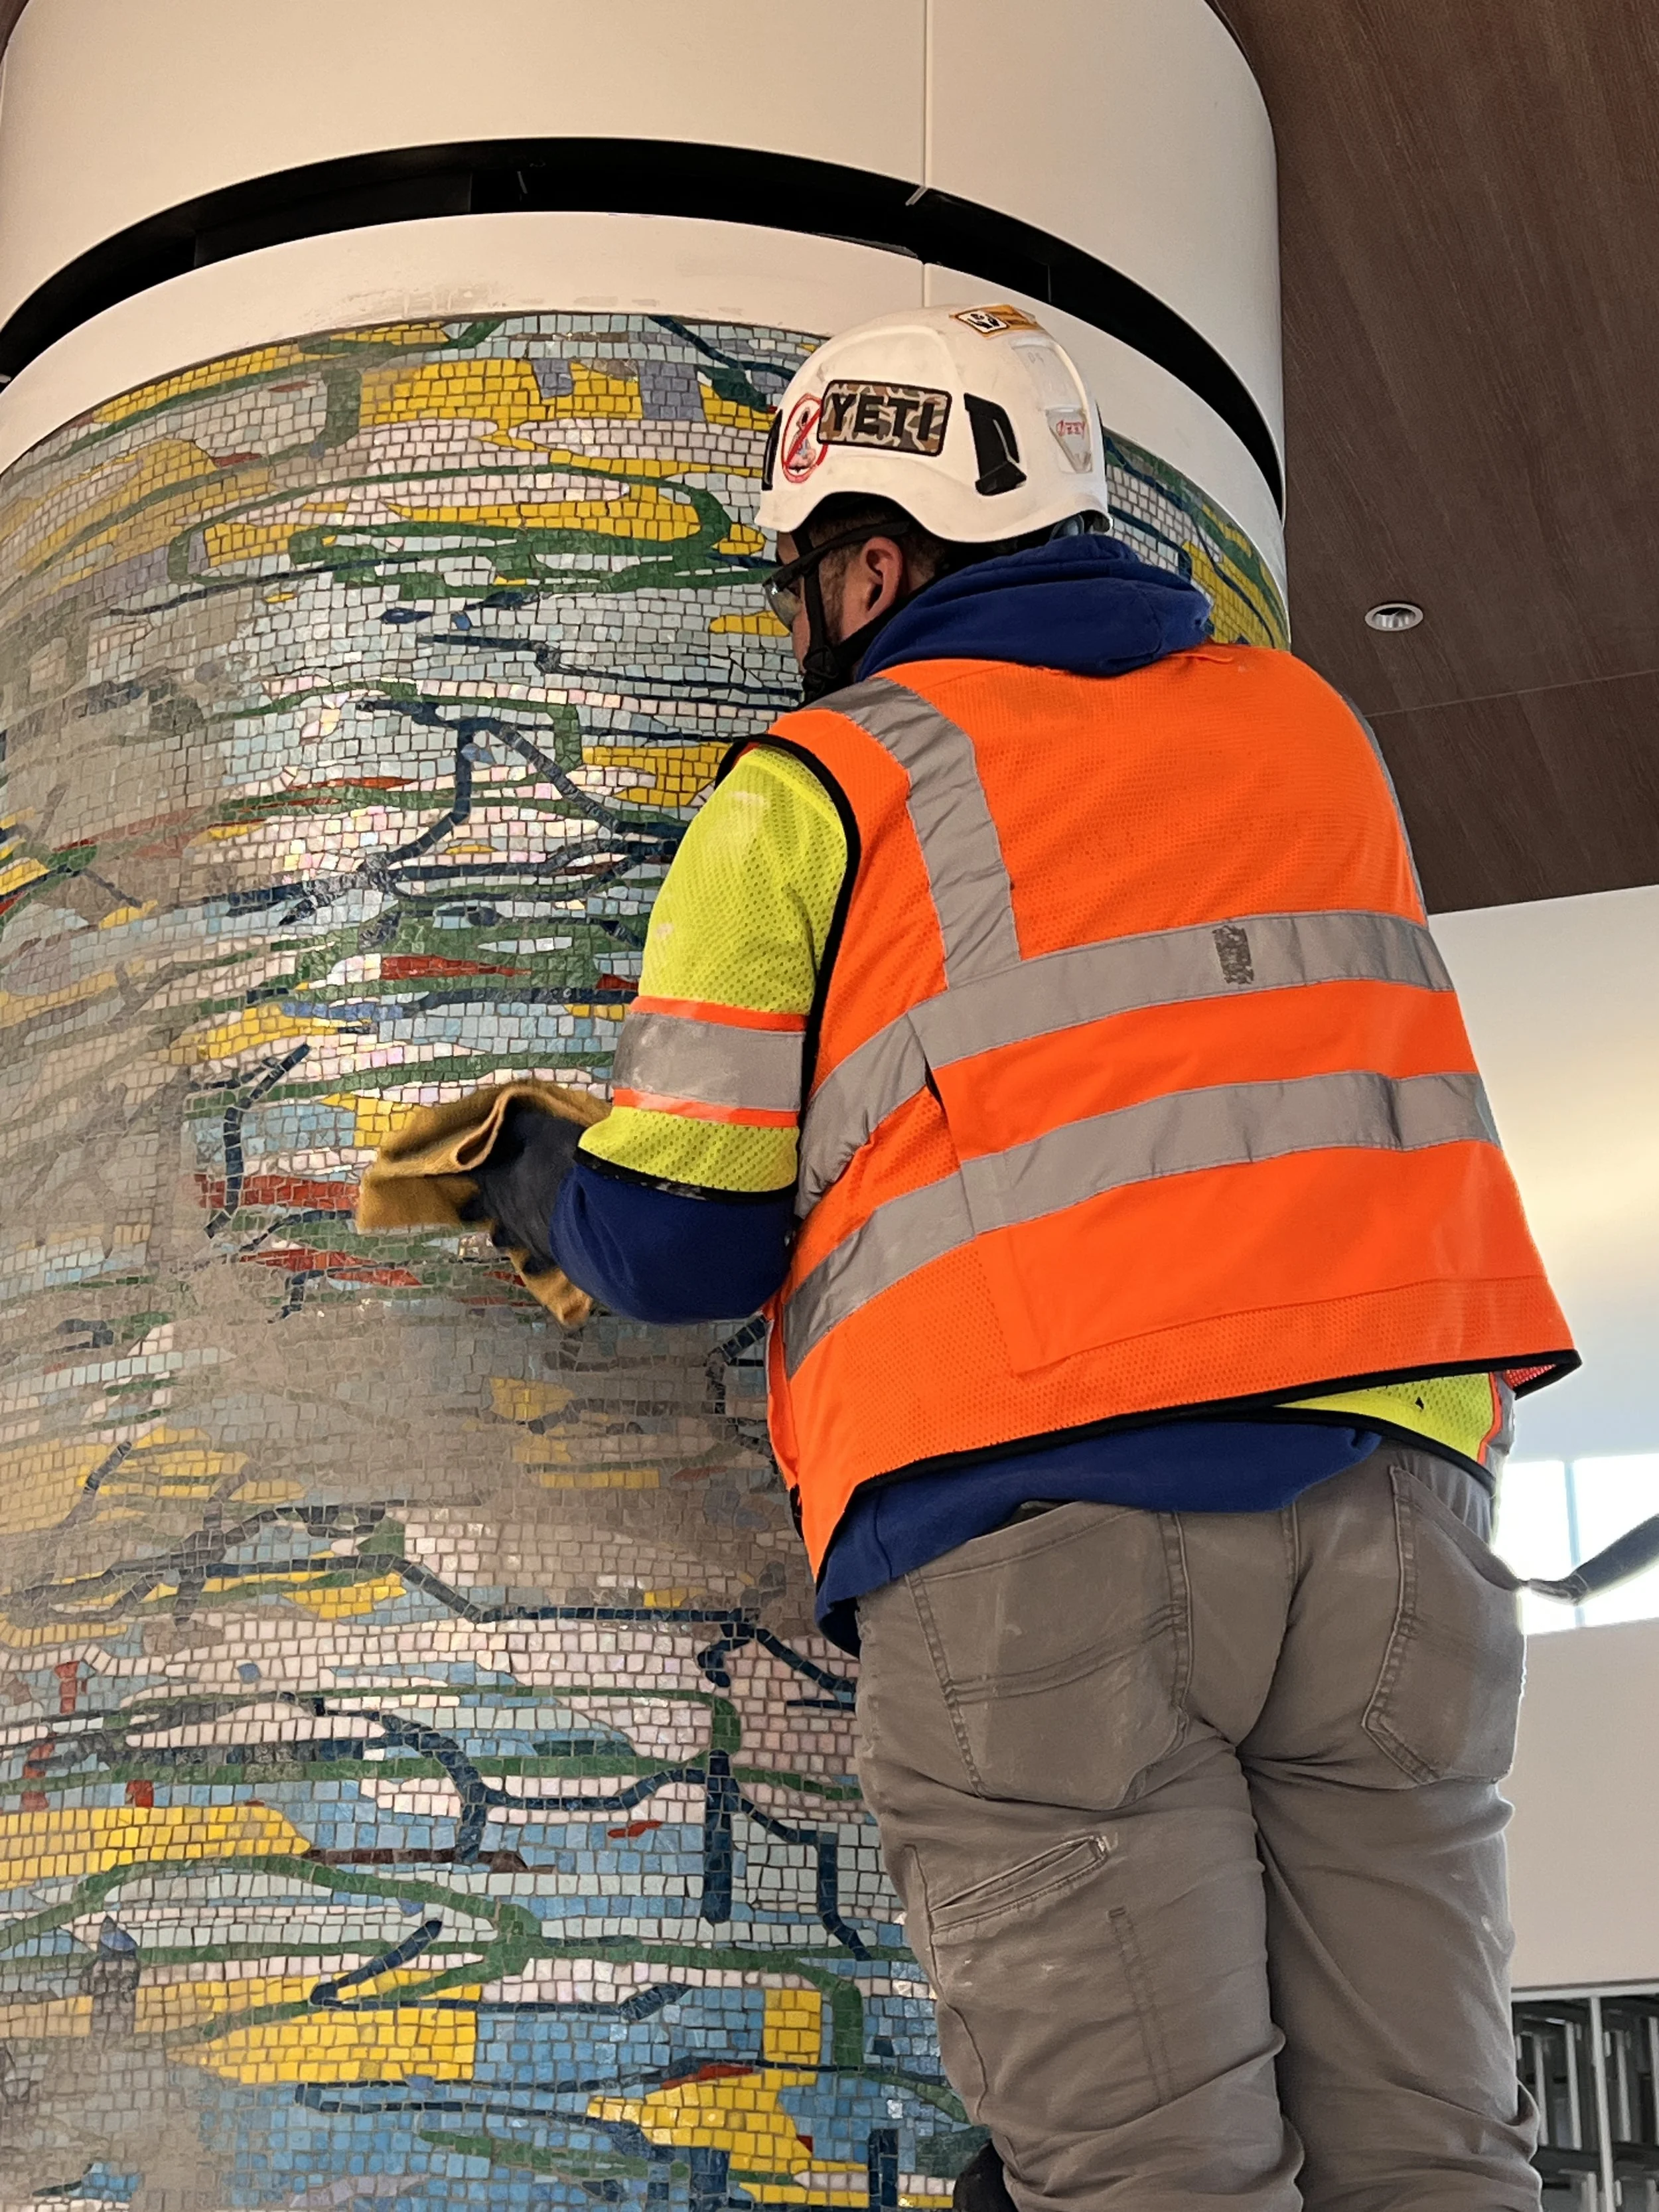
Installation lasted for about three weeks. I was on site at the beginning, and then made another trip in May for final approval, save for any punch list items that needed attention. The team carefully assessed every inch of the mosaics to make sure that everything was ship-shape.
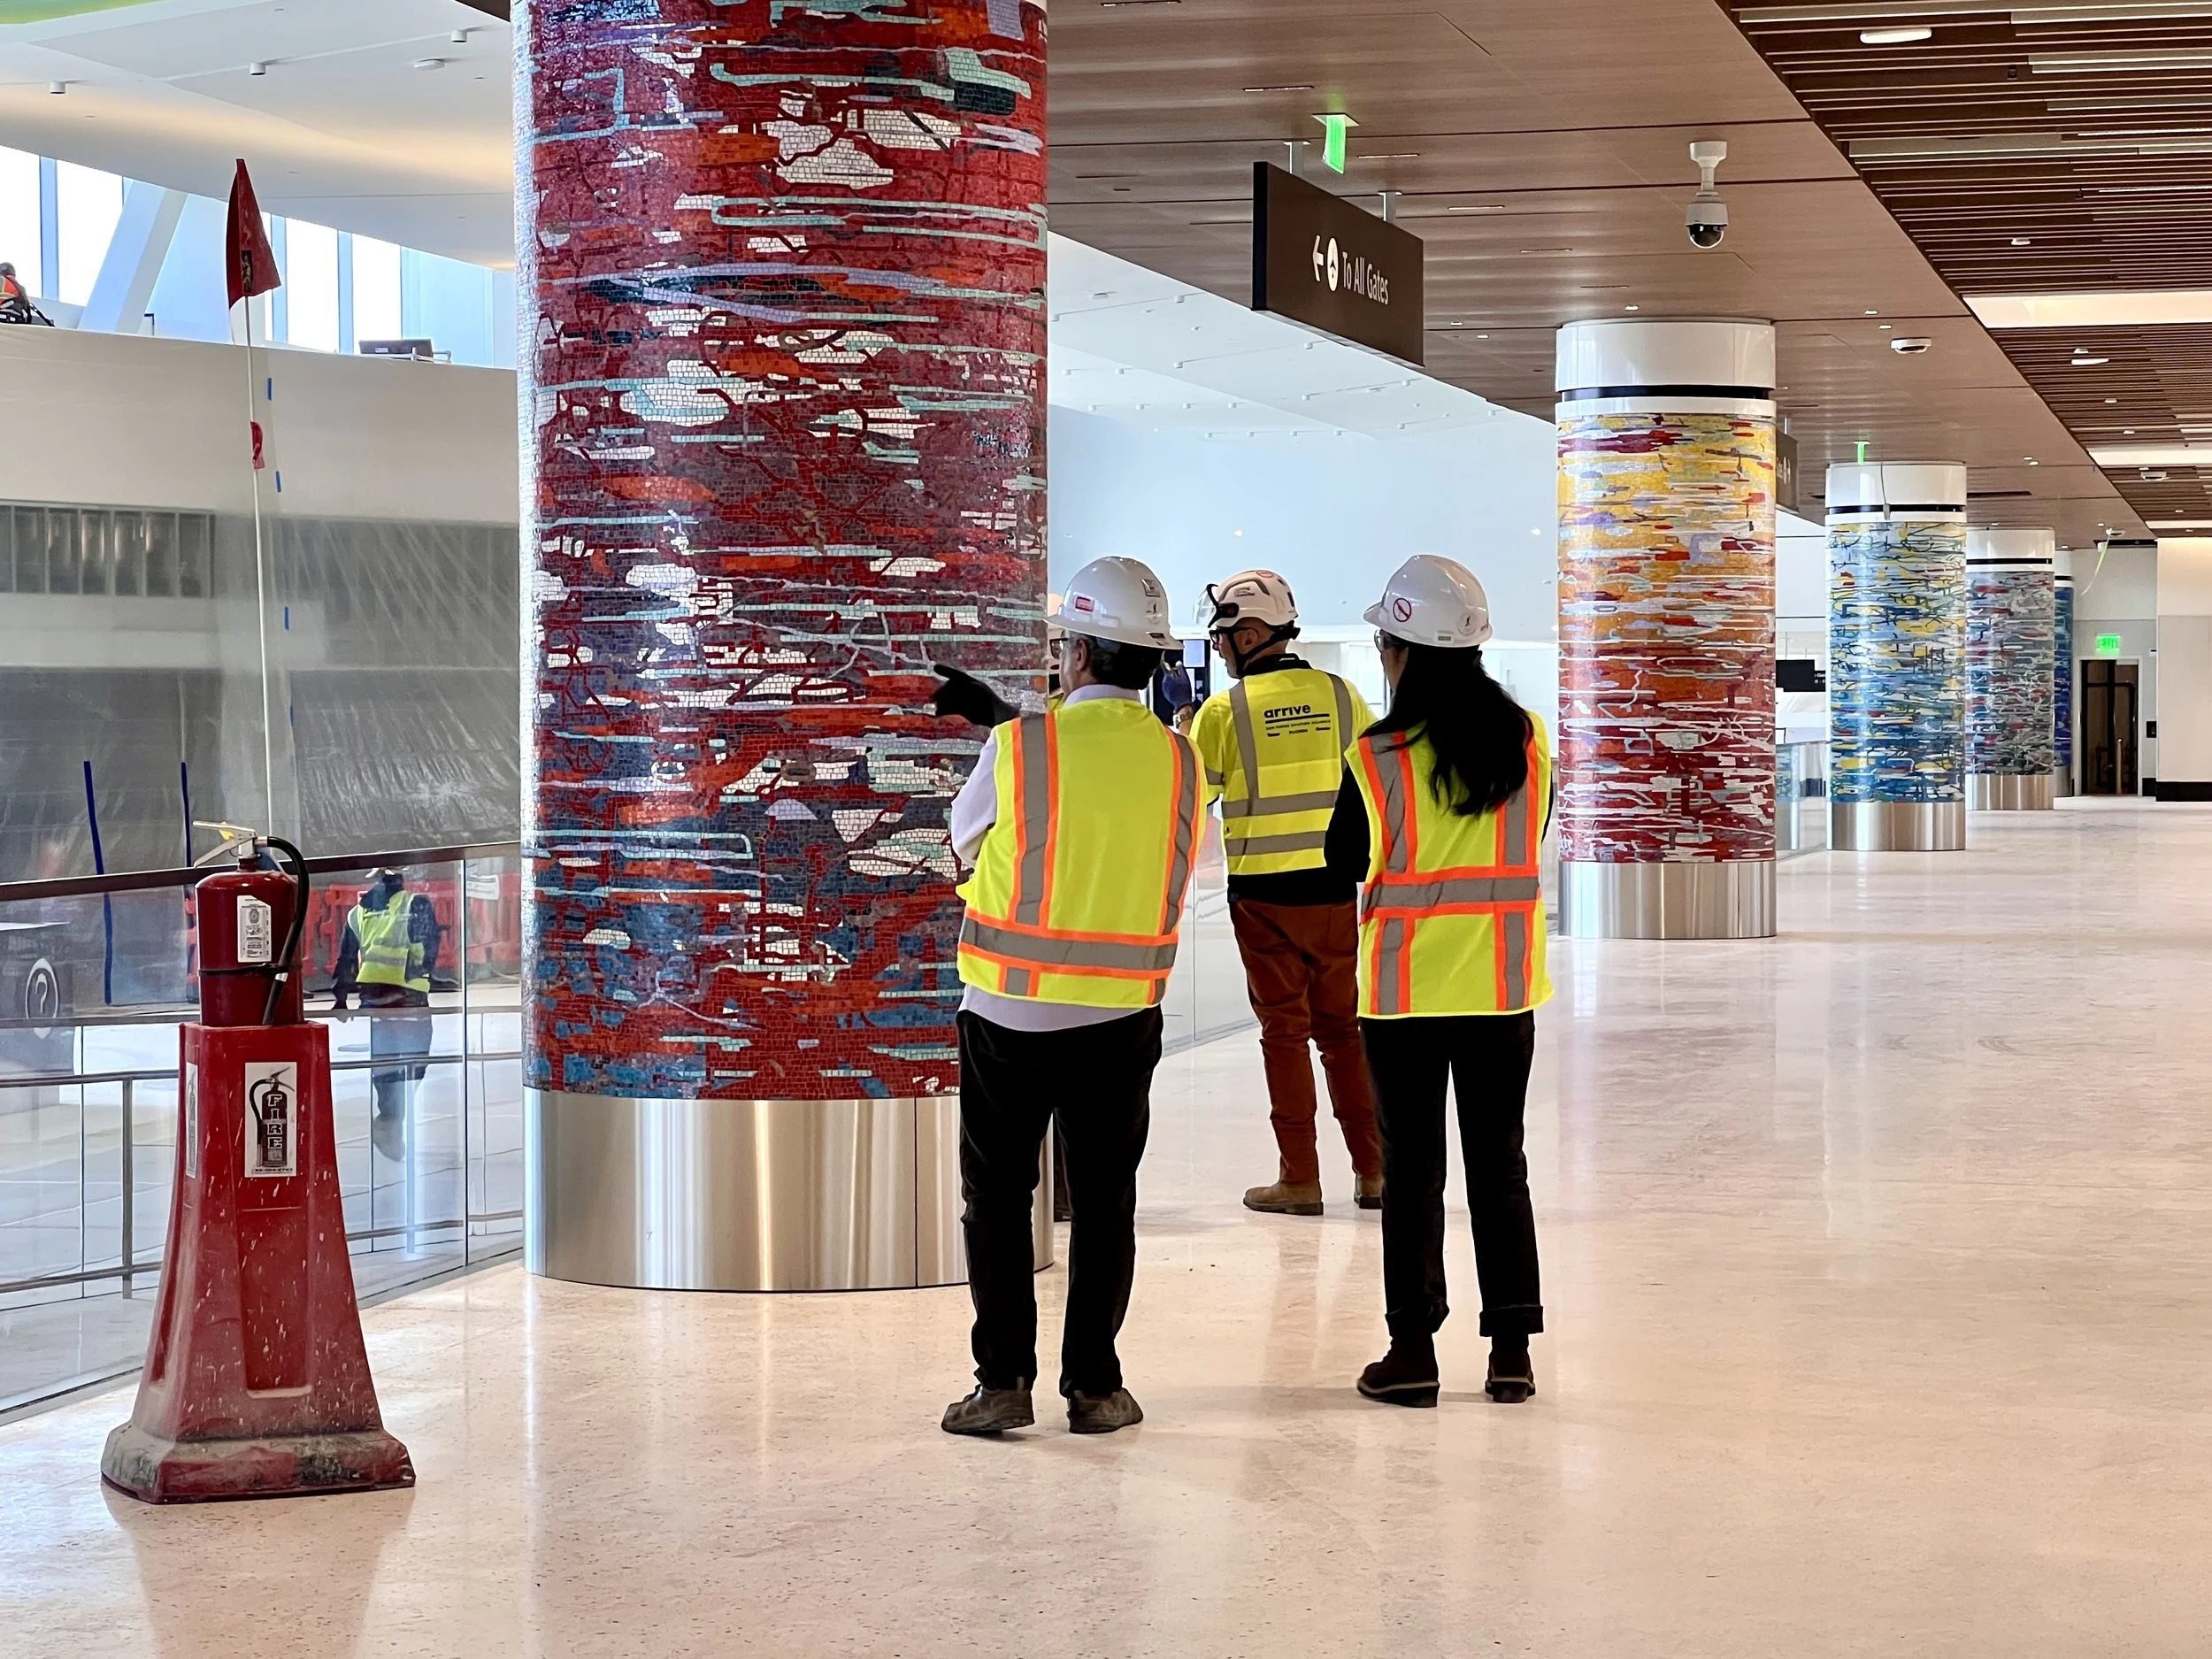
Inspecting the columns
Tine to celebrate! One last trip to San Diego (at least for the time being) for the Gala on September 12. So wonderful to share the sense of accomplishment with the entire team. In all, thousands of people worked on the New T1.

For more photos, click here